I N T R O D U C T I O N
The Rio Grande RF heater produces radiant heat like the sun, warming people and
objects rather than the air in between. It is mounted on an adjustable bracket that
allows the heat to be directed exactly where it is required. The heaters are designed
for indoor and outdoor use so are therefore weatherproof.
Please read the following instructions carefully before use. The safety of this
heater is guaranteed only by its correct usage in accordance with these
instructions, therefore it is recommended that they are retained for future
reference.
S P E C I F I C AT I O N
Ta b l e 1 . U K a n d E u r o p e a n H e a t e r s
Use MCB Type 3 or C.
4
I N S TAL L AT I O N
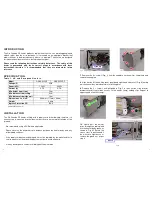
The Rio Grande RF heater is fitted with a supply cord for hard-wiring, therefore it is
unnecessary to open the terminal box in order to carry out normal installation of this
product.
We recommend using a RCD where applicable.
Please observe the minimum safe distance between the heater body and any
inflammable surfaces.
If the supply cord becomes damaged, it must be replaced by the manufacturer, its
service agent or a similar qualified person in order to avoid a hazard.
If in any doubt, please contact a suitably qualified electrician.
Model
GRAS-015RF
GRAS-020RF
Voltage (V)
230V
Power (kW)
1.5kW
2.0kW
Current (A)
6.5A
8.7A
Min. height from floor
2.0m
Min. distance from ceiling
0.3m
Min. distance from side wall
1.0m
Dimensions L x H x D
648mm × 111mm × 89mm
Weight
3.8kg
Ingress Protection (IP)
IPX4
9
Fig. J
Fig. K
7
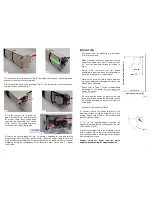
. Remove the 4 × screws (Fig. J) from the endplate on the emitter (lamp) end and
remove the endplate.
8
. Slide out the left hand side cover, guard and right hand side cover (Fig. K) noting
which channel they were located in for refitting later.
9
. Remove the 2 × screws as highlighted in Fig. L to take out the side reflector
bracket/reflectors that allows access to the emitter (lamp) holding clips. Repeat at
opposite end of emitter (lamp).
Fig. L
Fig. H
GLAND NUT
Fig. M
10
. Gently pull the emitter
wires through the cable gland
into the heater body space as
shown in Fig M. Ensure the
sleeve stays in position and if
the wires are tight loosen or
remove the gland nut as per
step 6.
SLEEVE


