19
Accessing DVR Over the Internet Using Client Software
1
2
3
4
5
6
7
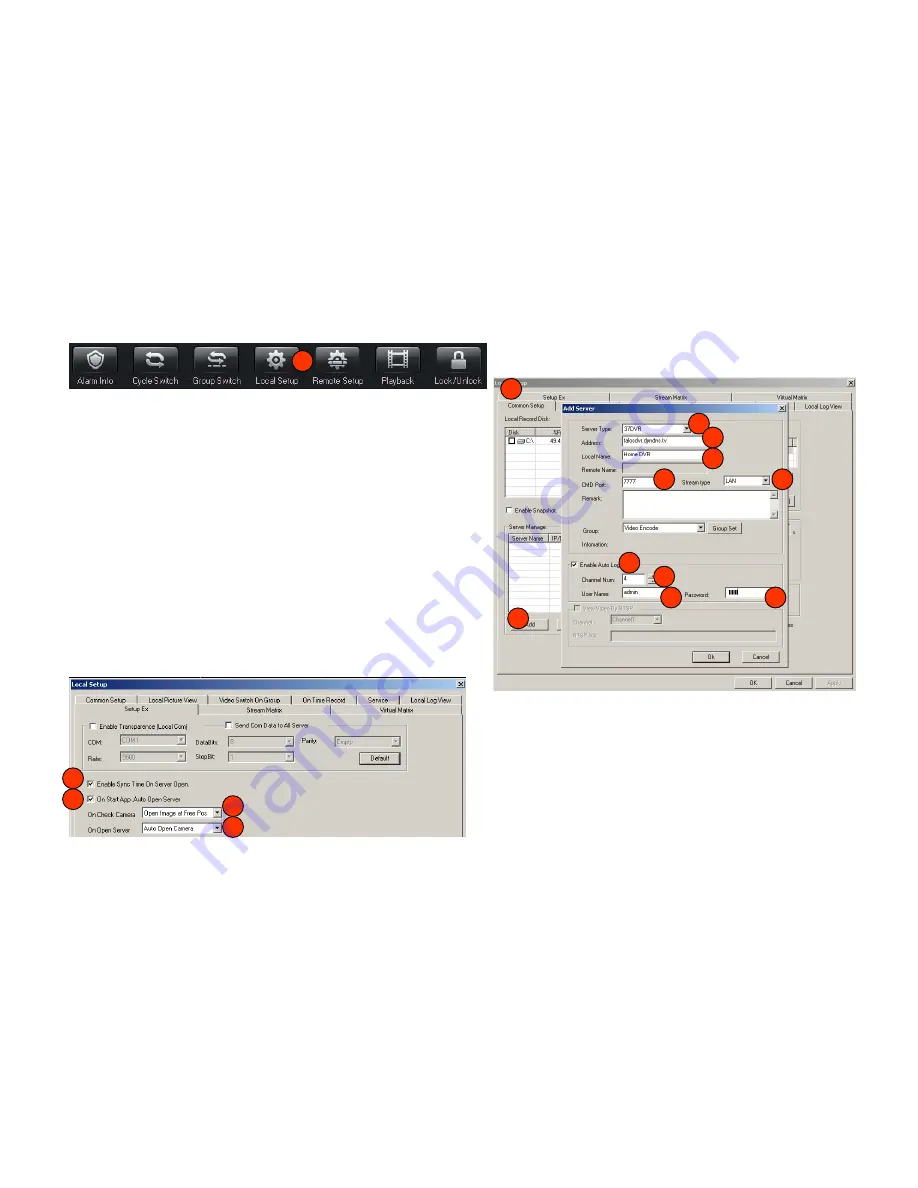
1. Click the “Local Setup” tab on the main viewing screen
2. Under “Server Manage” click “Add”
3. Select “37DVR” from “Server Type”
4. Enter your Dyn host name
5. Assign a name to your DVR
6. Enter “7777” into the “CMD Port” field
7. Select “LAN” from the “Stream Type” drop-down
8. Check the “Enable Auto Logon” radio button
9. Select the number of channels your DVR supports
10. Enter your DVR User Name
11. Enter your DVR Password
8
9
10
11
12. Under the “Setup Ex” tab
13. Click “Enable Sync Time On Server Open”
14. Click “On Start App Auto Open Server”
15. Select “Open Image at Free Pos” from the “On Check
Camera” drop-down
16. Select “Auto Open Camera” from the “On Open Server”
drop-down
12
13
14
15
16


