CHARGING TH E MUSE
0
0
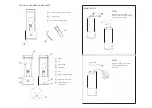
OPTION 1: WIRED CHARGING
Insert the provided USB Type-C charging cable
into the input at the back of the lamp base and
plug into a USB Type-A adapter.
For optimum charging, use the 0.Sm charging
cable provided and a 2-Amp USB Type-A
adapter.
OPTION 2: WIRELESS CHARGING
Place assembled product flat an a compatible
wireless charging pad and ensure it is placed
an the centre of the pad for effective
charging.
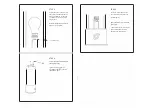
When charging corr�ctly, the battery charge level indicator lights @ will start blinking.
Total charging time is 8 hours wired or 10 hours wireless.
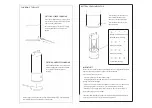
BAT TERY LEVEL INDICATOR
IMPORTANT
O<H----
c:>
Press the button an the back of the
lamp to display the battery level
indicators an the front of the lamp.
Press the button twice to turn the
indicator lights
off.
:'i(::
0
0
0
Blinking: < 10% Battery remaining
Solid: 25% Battery remaining
:'�':: :'�'::
0
0
50% Battery remaining
:.'�'::
:'�-�
-'6'-
"
1
\'
0
75% Battery remaining
:�: :�: :�: :�:
> 75% Battery remaining
The Muse uses
'
a Lithium-ion battery pack rated for 1000 full charge/discharge cycles.
After this, the battery capacity may begin to noticeably degr�de.
Tips to prolong the battery life are:
- Once fully charged, please remove.from charger
- Avoid letting The Muse reach 0% battery, when the low battery indicator starts
blinking, it should be recharged
- When not in use, store The Muse with between 25-50% battery (1-2 indicators on)
- During charging, make sure The Muse is uncovered to avoid over-heating
- Depending on your charger power output, The Muse may not always charge to
100% if the bulb is an at the same time
The battery, bulb, and glass can all be easily replaced. For replacement parts, please
visit our website or contact us at [email protected]
.
'
/


