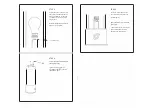
STEP 3
Ensure the bulb is screwed in fully
and contact is made between the
base of the bulb and the housing.
The bulb and housing are both
safe to touch.
Be careful to align the bulb properly
and do not over-tighten.
� Contact point
0
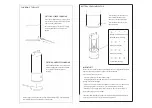
STEP 4
Return the lid and handle back into
@
the original position.
Tighten the screws with the
provided Hex Key
@
to secure
the handle in place
li
j
l
�
[
©'
STEP 5
To turn on, rotate the dial on the
front of the lamp clockwise until
the bulb lights up.
Adjust the dimmer for your desired
light output.
Dial the dimmer up for a cool white
light, and dial down for a warm,
ambient colour temperature.


