CARE AND CLEANING
We recommend cleaning with a soft dry cloth. If required, further cleaning can be achieved with
warm, soapy water. Do not use abrasive materials as these will damage the finish of the product.
Do not use alcohol or other solvents.
Extended use in wet or humid locations can cause condensation to form inside the glass tube.
Please follow ‘Initial Set-Up’ steps to open the lid and allow condensation to evaporate. To
avoid condensation, it is recommended that the lamp is not exposed to wet weather for long
periods, such as left out in the rain overnight
WARRANTY AND AFTER-CARE
This product has a two-year warranty. If there appears to be a functional defect with the product
during this time, please contact our team at [email protected].
Join the Community
Instagram: @tala | Facebook: talaHQ | Pinterest: TalaLED | Tag: lighttoliveby
Tala Energy Ltd, 25B Vyner Street, London, UK, E2 9DG | [email protected]
Tala Europe B.V, Bertus Aafjeshove 40, Nieuwegein 3437JN, Netherlands
Tala North America, Inc. 2 Research Place, Suite 300, Rockville, MD 20850, USA
NOTE: This equipment has been tested and found to comply with the limits for a Class B digital
device, pursuant to part 15 of the FCC Rules. These limits are designed to provide reasonable protec-
tion against harmful interference in a residential installation. This equipment generates, uses and
can radiate radio frequency energy and, if not installed and used in accordance with the instruc-
tions, may cause harmful interference to radio communications. However, there is no guarantee
that interference will not occur in a particular installation. If this equipment does cause harmful
interference to radio or television reception, which can be determined by turning the equipment
off and on, the user is encouraged to try to correct the interference by one or more of the following
measures: —Reorient or relocate the receiving antenna. —Increase the separation between the
equipment and receiver. —Connect the equipment into an outlet on a circuit different from that to
which the receiver is connected. —Consult the dealer or an experienced radio/TV technician for
help. Caution; changes or modifications not expressly approved by the party responsible for com-
pliance could void the user’s authority to operate the equipment.
This symbol indicates that electrical and
electronic equipment (WEEE) should not be
mixed with general household waste.
For recovery and recycling, please take
this product to a designated collection
point where it will be accepted free of
charge. Many retailers offer this instore.
Disposing of this product correctly will help
save valuable resources and prevent any
potential negative effects on human health
and the environment.
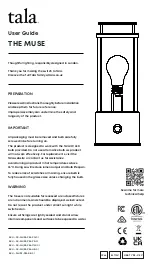
THE MUSE
Ø12.5x33.8cm / Ø5x13.3in
IP44 | Suitable for Wet locations
5V/2A USB Type-C | 5W wireless
Battery: Li-ion 13.2Ah 3.7V 48.8Wh
Ta max. 35ºC
Only use with Tala The Muse 12V bulbs
BULB
12V | 6W | 400lm | E27
35W replacement | 0.5A
CRI 97, R9 95 | 2000-2800K
Ø6 x 11cm | Flicker <1%


