3
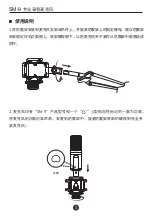
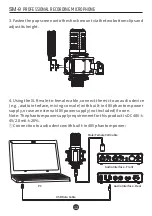
. Fasten the pop screen onto the shock mount via the two bottom clips and
adjust its
height
.
4
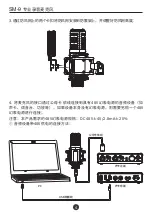
. Using the XLR male-to-female cable, connect the mic to an audio device
(e.g., audio interface, mixing console) with built-in 48V phantom power
supply, or use an external 48V power supply (not included) if none.
Note: The phantom power supply requirement for this product is DC 48V±
4V/2.8mA±20%.
① Connection to audio device with built-in 48V phantom power:
12
PC
Male/Female XLR Cable
Audio Interface - Front
Audio Interface - Rear
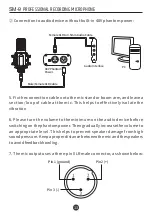
USB Data Cable
SM-9
PROFESSIONAL RECORDING MICROPHONE
Summary of Contents for SM-9
Page 1: ...Professional Recording Microphone SM 9...
Page 2: ...SM 9 4006828333 34mm 1 SM 9 1 1 2 1 1 1...
Page 4: ...1 2 SM 9 3 SM 9...
Page 5: ...3 4 48V 48V 48V DC 48V 4V 2 8mA 20 48V 4 PC USB SM 9...
Page 6: ...48V 5 6 7 XLR 5 3 1 2 48V 3 5mm PC SM 9...
Page 7: ...1 2 3 4 5 6 7 6 2000 2000m SM 9...
Page 9: ...8 SM 9...
Page 18: ...17 SM 9 PROFESSIONAL RECORDING MICROPHONE...
Page 19: ......
Page 20: ......


