background image


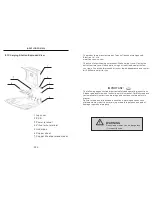
1.2Symbols on 2000series

These symbols can be found in the mower. Study them carefully so you 
understand their significance.

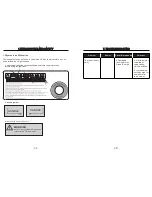
    1. The symbol is pasted on the top of mower, please  read it carefully 
     before using the appliance. 


    2. Handle symbol.


     Always lift the mower by Handle.


  1.INTRODUCTION AND SAFETY

WARNING

severe injury or death may cause
if incorrectly lift the mower. 

HANDLE

HANDLE

1 2

0

5

4

6

7 8 9

5.WARNING-Operatethe


disabling


device


before


working


on


or


lifting


the


machine

-

P2

-

4.Damaged 
running motor
Grass too high

4. Get the motor 
repaired or 
replaced by 
service station
.
5. Increase the 
cutting height or 
use a normal 
lawn mower. 

The robot is very 
noisy

7. TROUBLE SHOOTING

Problem

Display

Solutions

Possible reasons

-

P51

-

Summary of Contents for Robot Mower L2X00 IPX4

Page 1: ...Please read this manual carefully before use Please keep this manual for future reference ROHS ROBOT MOWER USER MANUAL ...

Page 2: ...rectly used WARNING The following pages contain important safety and operating instructions Please read and follow and instructions in this manual Carefully read and review all safety instructions warnings and cautions contained in this manual Failure to read and follow these instructions warnings and cautions statements may result in severe injury or death to persons and pets or damage to persona...

Page 3: ...ng schedule setting P35 5 11 Delete working schedule P36 5 12 OTHER setting P37 5 13 Recharging P40 6 1 Robot cleaning P41 6 2 Robot Storage P43 6 3 Blade replacement P43 6 4 Fuse replacement P43 6 5 Battery P44 5 2 Starting the mower P29 8 1 Mower Exploded View P52 8 2 Charging station Exploded View P54 4 2Remote control P27 1 40 41 42 43 44 45 2 3 4 5 6 7 8 9 10 11 12 13 14 15 16 17 18 19 20 21 ...

Page 4: ...rating instructions Please read and follow all instructions in this manual Carefully read and review all safety instructions warnings and cautions contained in this manual Failure to read and follow these instructions warnings and cautionary statements may result in severe injury or death to persons and pets or damage to personal property WARNING Robot lawn mower can be dangerous if incorrectly us...

Page 5: ... Handle 1 INTRODUCTION AND SAFETY WARNING severe injury or death may cause if incorrectly lift the mower HANDLE HANDLE 1 2 0 5 4 6 7 8 9 5 WARNING Operatethe disabling device before working on or lifting the machine P2 4 Damaged running motor Grass too high 4 Get the motor repaired or replaced by service station 5 Increase the cutting height or use a normal lawn mower The robot is very noisy 7 TRO...

Page 6: ...el L2X00 IPX4 Input XXX V 2A 85W Made in China ROHS S N XXXXXXXXXXX Address XX Taizhou Tianchen Intelligence Electrics Co Ltd Product name Robot lawn mower Model L2X00 IPX4 Input XXX V 2A Ouput XXX 2A V Made in China ROHS Confirm the ground before the charging station is leveled with the charging station if necessary fill area with dirt and level off Relocate the virtual wire 1 Replace the blade w...

Page 7: ...ation is not flat Short run time operates less time than normal Mower does not detect the charging station contacts Recharge the mower fully Reset the charging station in a flat place Terrain needs landscaping repairs Obstacle along the path Mower does not complete the edge Mower drives but blade will not mow 1 On manual pattern Mow on remote control has be turned off 2 The cutting motor is broken...

Page 8: ...manual mode maintain a safe distance from behind or around the mower and wear proper foot apparel Do not operate the mower on slopes greater than 20 degrees or use it in manual operation on slopes where a firm footing is not possible Do not operate the mower if any safety feature or device is damaged or inoperable Do not attempt to disable or defeat any safety feature or device P5 Mower stop worki...

Page 9: ...o not wash the robot with water jets at a high pressure and do not plunge it partially or thoroughly in water as it is not watertight It is absolutely forbidden to use the robot in explosive and flammable environments 1 INTRODUCTION AND SAFETY The operator or user is responsible for accidents or hazards occurring to other people or their property P6 Mower stop working and beeping Mower stop workin...

Page 10: ...ouch the handle Restart the mower 1 No power to plug receptacle or main power is shut off Bad communication between charging station and mower 1 Check the power and check the plug Connect charging station with power supplier 1 The virtual wire fails to send signals 2 The virtual is broken 1 Check the virtual wire light colorless Be sure the virtual wire is connected to the charging station that is...

Page 11: ... has a limited life span of 1 3years Battery life is dependent on the length of the using season and how many hours per week the robot is used A long season or many hours of use per week means that the battery must be replaced more regularly Attentions for lead acid batteries Charge the batteries at least once every six months of they are at 25 The interval of this charge should be reduced to 50 b...

Page 12: ...will stop movement in that direction and reverse itself away from the obstacle Rain sensors There are two rain sensors on top cover of mower The mower will go back to the charging station automatically when it s raining Rain sensors can be selected from control panel or remote control Turn on it the mower will go back to home if it is raining Turn off it the mower will go on mowing when it is rain...

Page 13: ...an choose the cutting mode from remote control On auto pattern mower selects cutting mode intelligently It goes straight if the grass has be cut and it goes circle if the grass is long P10 6 MAINTENANCE AND STORAGE 7 To remove the deposits and or other residues from the blade use a suitable brush 8 Clean the outside of the charging station from any accumulated residues 9 Keep all nuts bolts and sc...

Page 14: ... driving motors are monitored continuously during operation for any situation that may cause these motors to over heat In the event this is detected the mower will stop operation Fuse protect There is a fuse hold under clamshell top cover next to charging jack it contains a one time use fuse in the event of a short circuit or power malfunction Waterproof Waterproof design there is an inner cover u...

Page 15: ...rden is also significant If the garden mainly consists of open lawns mower can mow more per hour than if the garden consists of several small lawns separated by trees flower beds and passages 300m 300m 300m 100m 100m 100m Virtual wire maximum length Standard virtu al wire length 45 38 5 23 5cm LWH Charging station size Charging station and virtual wire 45 38 5 23 5cm LWH 45 38 5 23 5cm LWH P12 5 U...

Page 16: ...hium battery 7 2Ah 7 2Ah 3 4hours 3 4hours Average working time Type of battery battery Charging time 4 5hours 5 6hours Battery 10Ah Lithium battery Mower can t be started when Mower can t be started when charging station is powerless P13 6 EXIT Exit OTHER setting and it goes back to menu TUE 12 14 13 54 OTHER 16 C 16 C 16 C 16 C WAVE EXIT Select TOUCH and press to enter it Press or to select ON o...

Page 17: ...s to enter it Select CODE and press to enter it Press or to select ON or OFF and press to confirm it TUE 12 14 13 51 AUTO OTHER 16 C 16 C 16 C 16 C TUE 12 14 13 53 AUTO OTHER 16 C 16 C 16 C 16 C TUE 12 14 13 53 OTHER 16 C 16 C 16 C 16 C TOUCH TUE 12 14 13 53 CODE ON OTHER OFF 16 C 16 C 16 C 16 C CODE P39 5 TOUCH It s about human sensor setting TOUCH ON the mower stops working if something touch th...

Page 18: ... obtain the best possible result Even the mower can mow in rain however wet grass easily collects on the mower and the risk of slipping on steep slopes is greater The blades must be in good condition to obtain the best mowing result In order to keep the blade sharp for as long as possible it is important to keep the lawn free from branches small stones and other objects especially the objects less...

Page 19: ...INE ON RAIN ON CODE ON 1 WAVE WAVE ON ultrasonic sensors functioned WAVE OFF ultrasonic senors default Setting steps Select OTHER and press to enter it Select WAVE and press to enter it Press or to select ON or OFF and press to confirm it 2 LINE It s about virtual wire setting LINE ON ever time the mower started it has to find virtual wire and follow it back to charging station LINE OFF the mower ...

Page 20: ... to Menu 8 The mower goes back for recharge after it finishes cutting 5 USE 5 11 Delete working schedule 1 Select TIME from menu and press to enter it 2 Select TUE by press or and enter it by press Take TUE for example 3 Select Del and press to confirm it 4 Select Esc to exit working schedule deleting FRI 12 14 13 38 TUE WED 08 10 10 __ 16 C 16 C 16 C 16 C FRI 12 14 13 38 TUE WED 08 10 10 10 16 C ...

Page 21: ...ect Set and press to enter working schedule setting 5 To set Start time Start Start Time To set Hour and Minute Take 8 10 for example Press or to scroll 08 and press to confirm it The arrow moves to Minute Press or to scroll 10 and confirm it 5 USE 5 10 Working schedule setting There are 7 options MON TUE WED THU FIR SAT SUN 1 Select TIME from menu and press to enter working schedule setting TUE 1...

Page 22: ...ow the grass tips OK P19 IMPORTANT INFORMATION Hard or dry ground may cause pegs to break when driving them in In extreme cases watering the lawn where the pegs will be driven 5 9 Address setting the mower cold communicate with charging station there is an ADDRESS between mower and charging station User has to set the address before using the mower Otherwise the mower can not start working in Auto...

Page 23: ...croll the correct Minute and press to confirm it 5 Return back to menu automatically arrow 5 8 Password setting 1 Select CODE from menu and enter it 2 Enter Initial password 0000 the following message appears on the display Press one of the keys or to set the first figure Press the key to confirm it the arrow moves on to the next position Repeat the procedure to set all the numbers of Initial pass...

Page 24: ...an 50cm Greater than 50cm Virtual wire Root Max 1cm Max 1cm Max 1cm Virtual wire Max 20cm P21 50cm 5 USE 5 6 Operation pattern There are two operation patterns Auto pattern Manual pattern On Auto pattern WAVE LINE RAIN shows as picture Manual pattern WAVE LINE RAIN shows as picture 16 C TUE 12 14 13 31 AUTO MANUAL 5 7 System time setting 1 Select CLOCK and press button to enter system time setting...

Page 25: ...e distance between charging station and virtual loop should at least 2 5 meters Greater than 2 5 m Tree with hole or flowers around require placing a wire around it 1cm 1cm P22 Robot mower main menu Clock Code Time Auto Manual Other input password set password MON TUE WED THU FRI SAT SUN WAVE LINE RAIN WAVE LINE RAIN CODE EXIT ON OFF ON OFF ON OFF ON OFF month date week hour date WAVE LINE RAIN in...

Page 26: ...ttern or Auto pattern from control panel or remote control and confirm it mower start cutting 5 3 Stopping mower Turn off mower 1 Press power button from remote control Mower stops the blade motor stops mower goes into taskstate 2 The appliance also can be turned off by press emergency witch directly 3 Press power button from control panel to turn off the appliance 5 4 Restart mower 1 Press power ...

Page 27: ...rner like follow picture shows P24 Proper setup in sharp corners Incorrect corner setup On multi spindle appliances take care as rotating one blade can cause other blades to rotate Connect two terminals of virtual wire to charging station and ensure virtual wire is in good connecting Light on charging station is in colorless Insert charger to charging station and screw it And then connect charger ...

Page 28: ... appliance when barefoot or wearing open sandals Always wear substantial footwear and long trousers Always be sure of your footing on slopes Use extreme caution when reversing the appliance towards you Always switch on the mower according to instructions with feet well away from the blade 5 1 Preparation Ensure the correct installation of the virtual wire delineation system as instructed Periodica...

Page 29: ...ft Select figure means 5 Confirm button To confirm your choose or enter 6 Down select menu go down select menu go right Select figure means P27 4 2 Remote control MOW 1 9 2 3 4 5 6 7 8 4 CONTROL PANEL AND REMOTE CONTROL 10 To stop the mower Press it the mower enters taskstate Indicator light Go right Effected while mower in taskstate User has to stop the mower first then press it the mower enters ...

Reviews: