background image

12  For your safety

Note:  

Failure to install the product correctly may void 

the vehicle’s type-approval. The owner could be held 
responsible for any damage resulting from vehicle 
failure that can be attributed to RF energy interfering 
with the vehicle systems.

Unapproved modifications or changes 
to radio

The radio is designed to satisfy the applicable 
compliance regulations. Do not make modifications or 
changes to the radio that are not expressly approved by 
Tait Electronics Limited. Failure to do so could invalidate 
compliance requirements and void the user’s authority 
to operate the radio.

High radio surface temperatures

Warning: 

The bottom surface of the radio and the 

heatsink fins can become hot during prolonged opera-
tion. Do not touch these parts of the radio.

EN 60950 requirements (25 watt mobiles)

This radio complies with the European Union standard 
EN 60950 when operated up to the rated 33% duty 
cycle of two minutes transmit and four minutes receive, 
and with ambient temperatures of 30 °C or lower.

Warning:  

Operation outside these limits may cause the 

external temperature of the radio to rise higher than this 
standard permits.

110 watt mobiles

Do not place objects on the radio. The heatsink needs a 
clearance of at least one inch (2.5 cm) and a free flow 
of air.

Summary of Contents for TM9100

Page 1: ......

Page 2: ......

Page 3: ... taitradio com fi Suomi Tait Electronics Limited vakuuttaa täten että TMAB1E TMAH5E tyyppinen laite on direk tiivin 1999 5 EY oleellisten vaatimusten ja sitä koskevien direktiivin muiden ehtojen mukai nen Katso http eudocs taitradio com fr Français Par la présente Tait Electronics Limited déclare que les appareils TMAB1E TMAH5E sont conformes aux exigences essentielles et aux autres dispositions p...

Page 4: ...at use of such information equipment and software complies with the laws rules and regulations of the applicable jurisdictions Enquiries and comments If you have any enquiries regarding this document or any comments suggestions and notifications of errors please contact your regional Tait office Updates of manual and equipment In the interests of improving the performance reliability or servicing ...

Page 5: ...Object Code into a human readable form Protected by U S Patents 5 870 405 5 826 222 5 754 974 5 701 390 5 715 365 5 649 050 5 630 011 5 581 656 5 517 511 5 491 772 5 247 579 5 226 084 and 5 195 166 Environmental responsibilities Tait Electronics Limited is an environmentally responsible company which supports waste minimization material recovery and restrictions in the use of hazardous materials T...

Page 6: ... the amount and duration of RF that you and other people are exposed to It is also important that you Do not remove the RF Exposure label from the radio Ensure this RF exposure information accompanies the radio when it is transferred to other users Do not use the radio if you do not adhere to the guidelines on controlling your exposure to RF Controlling your exposure to RF energy This radio emits ...

Page 7: ...ons For more information on what RF energy is and how to control your exposure to it visit the FCC website at www fcc gov oet rfsafety rf faqs html Compliance with RF energy exposure standards This two way radio complies with these RF energy exposure standards and guidelines United States Federal Communications Commis sion Code of Federal Regulations 47 CFR 1 1307 1 1310 and 2 1091 American Nation...

Page 8: ...s CFR Title 47 Subpart R deals with the use of frequencies in the 764 to 776MHz and 794 to 806MHz bands Low power channels This radio complies with 90 531 b 3 and 90 531 b 4 of 47 CFR These sections state that only low power transmission is permitted on the following channels Regional Planning channels as defined in 90 531 b 3 Itinerant channels as defined in 90 531 b 4 Frequency band reserved for...

Page 9: ...n Union EU and states within the European Economic Area EEA Restrictions This product can be programmed to transmit on frequencies that are not harmonized throughout the EU EEA and will require a licence to operate in each member state This product can be programmed for frequencies or emissions that may make its use illegal Where applicable a license must be obtained before this product is used Al...

Page 10: ...ile in the air is not permitted Consult the manufacturer or its representative of any such electronic devices to determine whether electronic circuits in those devices will perform normally when the radio is transmitting If you have a pacemaker immediately turn off the radio if you suspect it is interfering with the pacemaker If there is interference between your hearing aid and the radio please d...

Page 11: ...icle may violate the laws and legislation that apply in your country or state Please check the vehicle regulations in your area Radio protection when charging the vehicle battery Always remove the fuses from the radio power cable before charging the vehicle battery connecting a second battery or using power from another vehicle e g when jump starting the vehicle Electromagnetic compatibility in Eu...

Page 12: ...rements and void the user s authority to operate the radio High radio surface temperatures Warning The bottom surface of the radio and the heatsink fins can become hot during prolonged opera tion Do not touch these parts of the radio EN 60950 requirements 25 watt mobiles This radio complies with the European Union standard EN 60950 when operated up to the rated 33 duty cycle of two minutes transmi...

Page 13: ...Menu map 13 Menu map Note The menus shown below may not be available for your radio ...

Page 14: ...trols see About the radio controls on page 21 Zone 11 Channel 12 Talkgr Menu scroll keys on off key volume control microphone socket PTT key press to talk red display speaker green amber microphone radio status LEDs function keys 1 to 4 left selection key right selection key ...

Page 15: ...nderstanding the radio indicators 25 Status indicators 25 Audible tones 26 3 Basic operation 27 Turning the radio on and off 28 Turning the radio on and off using a hand held control head 28 Adjusting the speaker volume 29 Adjusting the volume using a hand held control head 29 Locking and unlocking the keypad 29 Navigating the radio s menus 30 Using the Main menu 30 Accessing frequently used menus...

Page 16: ...49 Activating in zone scanning 50 Making a call while scanning 50 Suspending a channel from a scan group 51 Editing a scan group 52 Selecting a group to edit 52 Viewing group membership 53 Adding a channel to a group 54 Deleting a channel from a group 54 Changing a group s transmit channel 55 Changing a group s first or second priority channel 55 Hearing faint and noisy signals 56 Turning squelch ...

Page 17: ...ntarily 79 Adjusting the backlighting level 79 Adjusting the display contrast 79 Reducing power consumption 80 Turning low power transmit on or off 80 Customizing the audible alert settings 81 Changing the volume of all audible tones 81 Changing the keypress volume 82 Turning off radio controls and keypress tones 82 Hearing only channel traffic 83 8 Troubleshooting 84 Troubleshooting 85 System err...

Page 18: ...otential risk of death or serious injury Caution There is the risk of minor or moderate injury to people Caution There is a risk of equipment damage or malfunction Related documentation The following documentation is also available for your Tait radio which you can access from the Tait Technical Support website http support taitradio com Safety and Compliance Information supplied with each radio T...

Page 19: ...19 2 Getting started This section describes your radio s controls and indicators This section covers About your digital radio About the radio controls Understanding the radio display Understanding the radio indicators ...

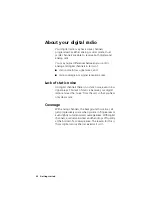
Page 20: ...ion areas Lack of static noise On digital channels there is no static noise even in low signal areas This lack of static is because your digital radio removes the noise from the call so that you hear only clear voice Coverage With analog channels the background noise in a call gets progressively worse when you are in fringe areas or even slightly outside normal coverage areas With digital channels...

Page 21: ...rol microphone socket PTT key press to talk red display speaker green amber microphone radio status LEDs function keys 1 to 4 left selection key right selection key Symbol Name Function PTT key Press and hold to transmit and release to listen Volume control Rotate to change the speaker volume On off key Turn the radio on or off with a long press Left and right selection keys Action determined by t...

Page 22: ...y as well as alphanumeric keys two scroll keys and left and right selection keys The PTT key the scroll keys and the selection keys all work in the same way as those on the radio control head see About the radio controls on page 21 PTT key press to talk microphone left selection key scroll keys alphanumeric keys right selection key ...

Page 23: ...way as those on the standard control head with the exception of the PTT and volume up and down keys The hand held control head also has two additional function keys Zone 11 Channel 12 Talkgr Menu scroll keys function key 3 volume up PTT key press to talk microphone status LEDs alphanumeric keys right selection key volume down function key 2 on off key function key 1 display function keys 4 to 6 le...

Page 24: ...r transmit your radio is transmitting on low power Repeater talkaround your radio is operating in repeater talkaround mode Zone this letter represents the zone in which your radio is operating where A is zone 1 Z is zone 26 and AD is zone 30 in the example shown K represents zone 11 Scanning your radio is monitoring a group of channels or talkgroups for activity Scanning your radio is monitoring a...

Page 25: ...s behave may be affected by the way your radio is programmed Status indicators Zone 11 Channel 12 Talkgr Menu red green amber status LEDs Color Meaning Red transmit Glowing your radio is transmitting Flashing your transmit timer is about to expire Green receive Glowing the current channel is busy Flashing you have received a call or monitor is active amber scanning Glowing your radio is scanning a...

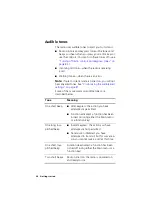
Page 26: ...ng the audible alert settings on page 81 Some of the more common audible tones are described below Tone Meaning One short beep Valid keypress the action you have attempted is permitted Function activated a function has been turned on using either the Main menu or a function key One long low pitched beep Invalid keypress the action you have attempted is not permitted Transmission inhibited you have...

Page 27: ... This section covers Turning the radio on and off Adjusting the speaker volume Locking and unlocking the keypad Navigating the radio s menus Using function keys to access frequently used features Selecting a zone Selecting a channel Limiting call time Checking recent calls About GPS information ...

Page 28: ...r on or off When the radio is first turned on the red green and amber LEDs flash briefly and the radio gives two short beeps A brief message may appear on the display Turning the radio on and off using a hand held control head When a hand held control head is installed there are two controls you can use to turn the radio on the on off key or the PTT key Press the on off or PTT key to turn the radi...

Page 29: ...aker volume and to decrease the volume Locking and unlocking the keypad The keypad lock feature prevents you from pressing a key accidentally The number of keys that are locked depends on the way your radio is programmed If you receive a call while the keypad is locked press any key to answer To lock the keypad Press and hold for about one second The message Keypad locked briefly appears in the di...

Page 30: ... list When the menu you want is highlighted press Select to open the menu you have chosen Tip To quickly exit the menu system press and hold when the word Cancel or Back appears above it Accessing frequently used menus Depending on how your radio is programmed you may have two different Quick Access menus One Quick Access menu is displayed when you press a scroll key and the other when you press t...

Page 31: ...ck Access menu Press or to go directly to the Individual Call menu The Individual Call menu with a list of your available individual calls is now displayed Using the left selection key Quick Access menu The text above the left selection key corresponds to the Quick Access menu for example Talkgroups To use this Quick Access menu Press and the associated menu appears Channel 12 Zone 11 Menu Individ...

Page 32: ...ion key settings Use the Main menu to check the features assigned to your radio s function keys 1 Press Menu and select Radio settings Radio info Key settings 2 In the Key Settings menu scroll through the list of function keys 3 Press Select to view details of the function associated with a particular function key The example shown is for a function key programmed to turn backlighting on and off 4...

Page 33: ... which it is currently operating in the following ways the name of the zone appears below the channel name in the default radio display or the zone symbol appears as a letter in the top right corner of the display Other ways of selecting a zone You may also be able to use the following controls to select a zone left selection key see Using the left selection key Quick Access menu on page 31 or scr...

Page 34: ...lection key see Using the left selection key Quick Access menu on page 31 scroll keys see Using the scroll key Quick Access menu on page 31 Limiting call time Your radio may limit the amount of time you can talk transmit continuously This is known as the transmit timer or time out timer and allows other radio users to make calls on that channel The radio warns you before the transmit timer expires...

Page 35: ...grammed you may be able to press a function key or use your Quick Access menu to select recent calls The most recent call is displayed at the top of the list If you have not participated in any calls since your radio was switched on the message No items in list appears in the display 2 Scroll through the list of recent calls until the call you want appears and then press Call The message Call brie...

Page 36: ... top right of the display The following GPS status information may appear in the display Status information shown on a hand held control head is shown in brackets tracking trk the GPS receiver is displaying up to date satellite information lost cnx no cnx the radio has lost serial commu nications with the GPS receiver stored no fix the GPS receiver is having trouble connecting to satellites and th...

Page 37: ... Press the function key programmed for GPS display GPS information is now shown in the display 2 Use the scroll keys and to view more GPS information 3 Press Exit to exit the GPS display Note In certain situations your radio may automatically exit the GPS display Main menu GPS info Talkgroups Select Back Zone 50 trk Easting 765773 Northing 7179810 Exit GPS info trk Lat S 25 28 30 Long E 119 38 36 ...

Page 38: ...make and receive calls use your radio in different repeater areas and scan a group of channels for activity This section covers Making calls Receiving calls Communicating directly with other radios Checking that the channel is clear Using the radio in different repeater areas Scanning a group of channels Editing a scan group Hearing faint and noisy signals ...

Page 39: ...phone and release the PTT key when you have finished talking While you are transmitting the red LED glows and or appears in the display 6 Finish your conversation as soon as possible and release the PTT key For a short time your radio may prevent you from making a call Making an individual call Note This feature is available for digital channels only To make a call to one person rather than a grou...

Page 40: ...uld have the following talkgroups Local talkgroups used by a specific agency to com municate within their own local agency It may even be made up of a county of public safety officers Regional talkgroups used by large state agencies that have regional divisions Statewide talkgroups used by an agency to com municate with a public safety member in another region Statewide talkgroups as their name su...

Page 41: ... menu to go to the Talkgroup menu 2 Scroll through the list of talkgroups to the one you want and press Select 3 Press the PTT key to make a call to the currently selected talkgroup Making an emergency call For information about making and ending emergency calls together with a explanation of how your radio behaves in emergency mode see About emergency calls on page 73 and Understanding emergency ...

Page 42: ...dio is programmed talkgroup call the name of the talkgroup is displayed individual call the name of the radio name from your call list is displayed if there is no associated name only the radio unit ID is shown Turning talking party ID off and on 1 Press Menu and select Radio settings Display settings Talk party ID 2 Scroll to either On or Off and press Select The current setting is highlighted Th...

Page 43: ...ll has been received Two medium beeps a two tone group call has been received Three short beeps a two tone super group call has been received A super group call is addressed to all radios in the fleet To accept the call press the PTT key and begin speaking Overriding two tone signaling You can override two tone signaling using a function key if your radio is programmed in this way Press the functi...

Page 44: ...ater is busy While repeater talkaround is active all calls are made on your current channel s receive frequency Turning repeater talkaround on and off You can turn repeater talkaround on and off using a function key if your radio is programmed in this way Press the function key to turn repeater talkaround on The message Talkaround activated or deactivated appears and appears in the display Repeate...

Page 45: ...re you make a call Turning monitor on and off Using the microphone hookswitch Your radio may be programmed to turn monitor on whenever the microphone is removed from the microphone clip Monitor is turned off when the microphone is replaced Using the Main menu 1 Press Menu and select Radio settings Functions Monitor Depending on how your radio is programmed you may be able to press a function key t...

Page 46: ...selected for you to use This channel is known as the home channel and may be the channel you make and receive calls on While voting is active the amber LED glows and appears in the display Selecting a voting group Using a function key To use a function key to select a voting group Press the function key to select and activate a preset voting or scan group Using the Main menu To select a voting gro...

Page 47: ... from the voting group 2 Press the function key programmed for nuisance delete If the channel has been removed successfully the message Channel nuisance deleted briefly appears in the display The channel remains removed from the voting group until you either select another voting group or the radio is turned off and then on again Note The function key programmed to activate a voting group may be p...

Page 48: ...Scanning resumes when the channel is no longer busy Some channels known as priority channels are scanned more often that other channels in the group While the radio is scanning for activity the amber LED glows and appears in the display When the radio stops on a channel where there is activity the amber LED and symbol flash The three types of scanning that may be available on your radio are standa...

Page 49: ...ogrammed function key When the function key activates background scan the currently selected channel automatically becomes a member of the background scan group To turn background scan on Press the function key Background scan remains on until either you press the function key again or select a standard or in zone scan group Changing the background scan group assigned to the function key 1 Press M...

Page 50: ... group Making a call while scanning If you want to make a call while your radio is scanning 1 Lift the microphone off the microphone clip 2 Press the PTT key to transmit If the amber LED is flashing your radio calls the currently selected channel If there has been no recent activity on the channel the amber LED is glowing rather than flashing then the channel that is called depends on the way your...

Page 51: ...an group To remove a channel from a scan group 1 Wait until the radio has stopped on the channel that you want to remove from the scan group 2 Press the function key programmed for nuisance delete If the channel has been removed successfully the message Channel nuisance deleted appears in the display The channel remains removed from the scan group until you either select another scan group or the ...

Page 52: ... Edit Groups menu lists all the scan groups programmed for your radio regardless of whether the groups are standard background or in zone scan groups 2 Scroll to the group that you want to view or edit press Select and the Edit Group menu opens 3 In the Edit Group menu select from the following options Group members shows the current members of a group and may also show the designated transmit cha...

Page 53: ... channel is used to transmit on when there has been no recent activity You cannot delete this channel it will not appear under Delete channel This channel is the group s first priority channel You cannot delete this channel it will not appear under Delete channel This channel is the group s second priority channel You cannot delete this channel it will not appear under Delete channel There is more...

Page 54: ...press OK Deleting a channel from a group Note You cannot delete the priority 1 channel using the Delete Channel menu 1 In the Edit Group menu select Delete channel and press Select A list of group members that are able to be deleted appears 2 Select the channel you want to delete and press OK Group members C Channel 1 C Channel 2 transmit channel priority 1 channel channel name zone Select Back Ad...

Page 55: ...dentified by the symbol beside the channel name 2 Select the new transmit channel and press OK Changing a group s first or second priority channel 1 In the Edit Group menu select Change P1 or Change P2 and press Select 2 Select the new priority or priority 2 channel and press OK Change tx C Channel 1 C Channel 2 OK Back Change P1 C Channel 1 C Channel 2 OK Back ...

Page 56: ... when you want to hear everything that is being said on a channel even if it is hard to understand you can use the squelch override feature to force the mute open Turning squelch override on and off 1 Press Menu and select Radio settings Functions Squelch override Depending on how your radio is programmed you may be able to press a function key to turn squelch override on and off 2 Scroll to On or...

Page 57: ...he features described in this chapter are only available for radios configured for P25 trunking operation This section covers About P25 trunking Checking that the system is available Making a talkgroup call Receiving a talkgroup call Scanning a group of talkgroups Making an individual call Receiving an individual call Emergency calls Making a phone call Unconnected calls Failsoft mode operation Dy...

Page 58: ... channels are returned to the pool to be used for other calls This system means reduced waiting times to make calls Checking that the system is available When you first switch to a talkgroup configured for P25 trunking the radio attempts to access the network and register on a control channel If registration is successful the trunking system available symbol appears in the display Registration is ...

Page 59: ...e is a problem with a zone controller When this happens the radio enters site trunking mode and you will only be able to communicate with users within a single site While in site trunking mode the display shows Site Trunking and the radio sounds a repeating double beep The double beep continues until normal service is restored When access to the zone controller is available again your radio automa...

Page 60: ...ill not proceed For an explanation of the radio behavior see Unconnected calls on page 68 To make a talkgroup call on a trunking system 1 Select the required zone Press Menu and select Zones Scroll to the zone you want and press Select Depending on how your radio is programmed you may be able to press a function key or use your Quick Access menu to select a zone Your radio now indicates the zone i...

Page 61: ...Your radio now indicates the currently selected talkgroup 3 To call this talkgroup hold the microphone about 2 inches 5 cm from your mouth 4 Press and hold the PTT key to transmit 5 When you hear three short beeps speak clearly into the microphone and release the PTT key when you have finished talking While you are transmitting the red LED glows and appears in the display Channels Talkgroup 2 Chan...

Page 62: ...mation about selecting a talkgroup see Making a talkgroup call on page 60 and for information about scanning talkgroups see Scanning a group of talkgroups on page 63 When you receive a call from a talkgroup the radio displays the name or the identity of the talkgroup and that of the calling radio Press the PTT key to accept the call or Cancel to reject the call Car 1 Talkgroup 2 Menu Cancel talkgr...

Page 63: ... amber LED and symbol flash Activating talkgroup scanning Talkgroup scan is turned on using a programmed function key When the function key activates talkgroup scan the currently selected talkgroup automatically becomes a member of the talkgroup scan group To turn talkgroup scan on Press the function key Suspending a channel from a talkgroup scan group If a member channel of a talkgroup scan group...

Page 64: ... the radio is turned off and then on again Note The function key programmed to activate talkgroup scanning may be programmed so that a short key press activates scanning and a long key press activates nuisance delete Editing a talkgroup scan group You can use the Edit Group menu to view group membership details and make permanent changes to your radio s talkgroup scan groups if your radio is progr...

Page 65: ...pending on your radio model and how it is programmed you may be able to dial the identity of the radio you want to call press a function key or use your Quick Access menu to select an individual call 2 Scroll to the person you want to call and press Select or press the PTT key The message Calling briefly appears 3 Press and hold the PTT key to transmit 4 When you hear three short beeps speak clear...

Page 66: ... radio enters emergency mode For more information on emergency mode see Understanding emergency mode on page 74 Making an emergency call You can make and emergency call using the emergency function key or a hidden switch Press the function key or hidden switch to activate emergency mode The message Emergency mode appears and the radio sounds three short beeps rising in pitch non stealth emergency ...

Page 67: ... trunking system 1 Press Menu and select Phone call The phone call you last dialed appears in the display Depending on how your radio is programmed you may be able to press a function key or use your Quick Access menu to open the Phone Call menu 2 Scroll to the number or person you want to call or dial the required number using the alphanumeric keys 3 Press Select or the PTT key 4 Press and hold t...

Page 68: ...ing double beep You have selected a talkgroup that does not currently exist on the system Your display shows that you have lost service and no longer appears See Service is lost on page 59 The radio sounds two short beeps You have attempted to make an individual call to a radio that does not currently exist on the system You have attempted to make an individual or phone call but you are not author...

Page 69: ...ws No service After a short time your radio switches to a programmed conventional communications channel The radio remains on that channel until you select a trunked talkgroup with access to the trunking system Infrastructure failsoft Your radio receives a message from the trunking infrastructure to say that the trunking system is now operating in failsoft mode While in failsoft mode the display s...

Page 70: ...iously using Dynamic regrouping The dynamic regrouping feature allows you to send a dynamic regrouping request to your dispatcher Your dispatcher can then reassign your radio to a special communications group Note While you are operating on this group normal channel selection may be disabled To send a dynamic regrouping request Press Menu and select Trunking Dyn Regrouping When you press Select a ...

Page 71: ...ng you and your radio This section describes how to prevent unauthorized use of your radio how to make your communications completely private and how to get help when you need it most This section covers About locking the radio About emergency calls ...

Page 72: ...our radio may be automatically locked each time it is powered up The message Enter PIN appears in the display Using the menu to lock the radio 1 Press Menu and select Radio settings Functions Lock radio Depending on how your radio is programmed you may be able to press a function key to turn radio lock on and off 2 Scroll to either On or Off and press Select The current setting is highlighted The ...

Page 73: ...urn the priority call feature on and off 1 Press Menu and select Priority call Depending on how your radio is programmed you may be able to press a function key to turn priority call on and off 2 Scroll to On or Off and press Select Call type Explanation Priority call Digital channels only An emergency alert is automatically sent to the current talkgroup Calls made when the priority call feature i...

Page 74: ...ed to operate in one of these ways Stealth you often work in situations where you do not want an assailant to know that you have acti vated emergency mode For this reason the radio is silent and the display remains unchanged there is no indication that the radio has entered emergency mode An optional feature of stealth emergencies is false powerdown keep alive When an unauthorized person attempts ...

Page 75: ... emergency mode Digital channels the radio continually sends emergency alerts to the dispatcher until a response is received Details of your location may also be sent if this feature is available for your radio The radio alternately transmits and receives so the dispatcher can hear what is happening in the vicinity of your radio Non stealth emergencies end once this phase is complete or when you e...

Page 76: ... happens during an emergency call on page 74 Note If your microphone is removed or damaged by an assailant you still may be able to communicate with the dispatcher using the concealed microphone This microphone is hidden behind the speaker and can only be used during emergency mode if your radio is programmed in this way 2 Turn the radio off and on again to end emergency mode including false power...

Page 77: ...o 77 7 Customizing your radio This section describes the ways in which you can customize your radio This section covers About display and keypad backlighting Reducing power consumption Customizing the audible alert settings ...

Page 78: ...ng timer The duration of this timer is set when the radio is programmed The radio s display can also be made darker or lighter to suit your working conditions See Adjusting the display contrast on page 79 Turning backlighting on or off 1 Press Menu and select Radio settings Display settings Backlighting Depending on how your radio is programmed you may be able to press a function key to turn backl...

Page 79: ...ct Radio settings Display settings Backlight level 2 Scroll to the setting you want high medium or low and press Select The current setting is highlighted The backlighting level of the your radio s display now changes Adjusting the display contrast To change the contrast of your radio display to suit the lighting conditions that you are working in 1 Press Menu and select Radio settings Display set...

Page 80: ...educe the drain on your vehicle battery by transmitting at low power When low power transmit is turned on appears in the display and calls are made at low power rather than at the programmed power setting Note Some channels may always transmit at low power To turn low power transmit on or off for all channels 1 Press Menu and select Radio settings Functions Low power tx Depending on how your radio...

Page 81: ...ll Warning tones when there is an error Changing the volume of all audible tones You can set the volume of all the audible sounds that the radio makes to indicate what is happening To change the volume of the audible tones between high or low 1 Press Menu and select Radio settings Alert settings Indicator level Depending on how your radio is programmed you may be able to press a function key to ch...

Page 82: ...unction key to switch the volume of the keypress beeps between high low and off 2 Scroll to High Low or Off and press Select The current setting is highlighted Turning off radio controls and keypress tones You can turn off all the tones and beeps you hear when you press the keys or use the radio controls This is known as quiet operation You will still hear incoming call and warning tones To turn q...

Page 83: ...c This is known as silent operation When silent operation is turned on appears in the display To turn silent operation on or off 1 Press Menu and select Radio settings Alert settings Silent operation Depending on how your radio is programmed you may be able to press a function key to turn silent operation on or off 2 Scroll to On or Off and press Select The current setting is highlighted The messa...

Page 84: ...section describes troubleshooting procedures and basic maintenance This section covers Troubleshooting System error message When your radio won t turn on Checking the version of your radio Removing the microphone General care Cleaning the radio ...

Page 85: ...ating your radio you may find the following sections helpful Consult your radio provider for assistance if necessary System error message If your radio displays a system error message take a note of the number X XXXXXXXX and consult your radio provider System error X XXXXXXXX ...

Page 86: ...radio provider for further assistance Identifying the radio s audible tones The radio s audible tones can help you identify a potential problem Audible tone Meaning One short high pitched beep The radio has been made inoperable stunned or inhibited by your service provider Two short beeps The radio has been made operable revived or uninhibited by your service provider Two low pitched beeps The rad...

Page 87: ...ing or removing your radio from a vehicle refer to the TM9100 Installation Guide 1 Using your thumb or forefinger lift up one of the corners of the microphone grommet and firmly but gently pull that corner until the seal comes away from the cavity Caution Remove the grommet carefully as it serves two important functions Firstly it prevents damage to the microphone socket due to movement of the mic...

Page 88: ...and that no damage has occurred to the antenna or wiring To prevent permanent damage to the radio cover do not allow the radio to come into contact with detergents alcohol aerosol sprays or petroleum based products Cleaning the radio If you need to clean the radio cover use a cloth dampened with clean water Do not immerse the radio in fluids ...

Page 89: ...he trunking site to let the radio units in the site s coverage area know when they can transmit their call information conventional operation In conventional operation the radio is tuned to a programmed channel and communicates with other radios either on that channel or through a repeater system F failsoft Failsoft operation offers P25 conventional operation if the radio cannot acquire a control ...

Page 90: ...ocal government representatives to develop standards for interoperable digital radios and systems to meet the needs of public safety users See http www project25 org for further information R repeater A repeater is a relaying site usually situated above a city or town The repeater extends the range of radio communications by receiving and re transmitting signals received from radios RF Radio Frequ...

Page 91: ...use in a new call trunking operation In trunking operation the trunking system manages the communications channels used by the radio and shares a number of channels among a large number of radio users V valid signal A valid signal is a signal that the radio responds to by unmuting the receiver A signal may be valid for example when it is stronger than a minimum level or has special signaling that ...

Page 92: ...checking missed calls 35 identifying caller 42 making 39 permitted length of 34 priority call 73 receiving 42 to talkgroup conventional 41 two tone 43 care of radio 88 channel checking that clear monitor 45 home channel 46 removing from scan group 51 scanning 48 voting 46 cleaning radio 88 compliance information 6 concealed microphone 76 control channel registration 58 70 conventional operation in...

Page 93: ...on key settings 32 G green LED 25 grommet functions of 87 removing 87 group scanning groups 48 talkgroups 40 voting groups 46 H hand held control head 23 hardware version identifying 87 I identifying caller 42 incoming call tone See audible tones indicators volume of 81 individual calls conventional 39 individual calls trunking 65 infrastructure failsoft 69 invalid keypress beep 26 in zone scan ac...

Page 94: ...at happens during 75 nuisance delete scan groups 51 voting groups 47 O on off key 28 P P25 trunking See trunking operation 58 phone calls trunking 67 power up radio 28 priority call making 73 priority channels scanning 48 Q quick access menus 30 31 quiet operation 82 R radio locking 72 maintenance 88 turning on and off 28 unlocking 72 version 87 radio check feature 39 radio controls 21 radio contr...

Page 95: ...r volume adjusting 29 squelch mute 56 squelch override turning on and off 56 stealth emergency about 74 what happens during 75 T talkaround See repeater talkaround talkgroup conventional making a call to 41 selecting 41 talkgroup trunking making a call to 62 priority 63 scanning 63 selecting 62 talking directly to other radios 44 Talking Party ID turning on and off 42 time out timer 34 traffic cha...

Page 96: ...wo tone signaling receiving two tone calls 43 U unlocking the radio 72 V Valid 26 version information of radio 87 volume of keypress beeps changing 82 volume changing 29 voting 46 voting groups removing channels from 47 W warning tones See audible tones warnings on radio display 85 Z zone controller 59 zones about 33 selecting 33 ...

Page 97: ...puter carries out in hardware Executable code may also refer to programs written in interpreted languages that require additional software to actually execute Intellectual Property Rights and Intellectual Property mean the following or their substantial equivalents or counterparts recognized by or through action before any governmental authority in any jurisdiction throughout the world and includi...

Page 98: ... Licenses will take precedence For information about Open Source Components contained in Tait products and the related Open Source licenses see http support taitradio com go opensource SECTION 4 LIMITATIONS ON USE 4 1 Licensee may use the Software only for Licensee s internal business purposes and only in accordance with the Documentation Any other use of the Software is strictly prohibited Withou...

Page 99: ...ervices remains vested exclusively in Tait and Licensee will not have any shared development or other Intellectual Property Rights SECTION 6 LIMITED WARRANTY DISCLAIMER OF WARRANTY 6 1 The commencement date and the term of the Software warranty will be a period of one 1 year from Tait shipment of the Software If Licensee is not in breach of any obligations under this Agreement Tait warrants that t...

Page 100: ...e is acting as a subcontractor from the interim transferee s and from the ultimate end user sub license an enforceable sublicense agreement that prohibits any other transfer and that contains restrictions substantially identical to the terms set forth in this Software License Agreement Except as stated in the foregoing Licensee and any transferee s authorised by this Section may not otherwise tran...

Page 101: ...however Tait may at its election bring proceedings for breach of the terms hereof or for the enforcement of any judgment in relation to a breach of the terms hereof in any jurisdiction Tait considers fit for the purpose of ensuring compliance with the terms hereof or obtaining relief for breach of the terms hereof 11 5 THIRD PARTY BENEFICIARIES This Agreement is entered into solely for the benefit...

Page 102: ...s terms and conditions Licensee also agrees that subject only to the express terms of any other agreement between Tait and Licensee to the contrary this is the complete and exclusive statement of the Agreement between it and Tait in relation to the Software This Agreement supersedes any proposal or prior agreement oral or written and any other communications between Licensee and Tait relating to t...

Page 103: ......

Page 104: ......

Reviews: