18
tagarno MeasureMent appliCation | tool Menu
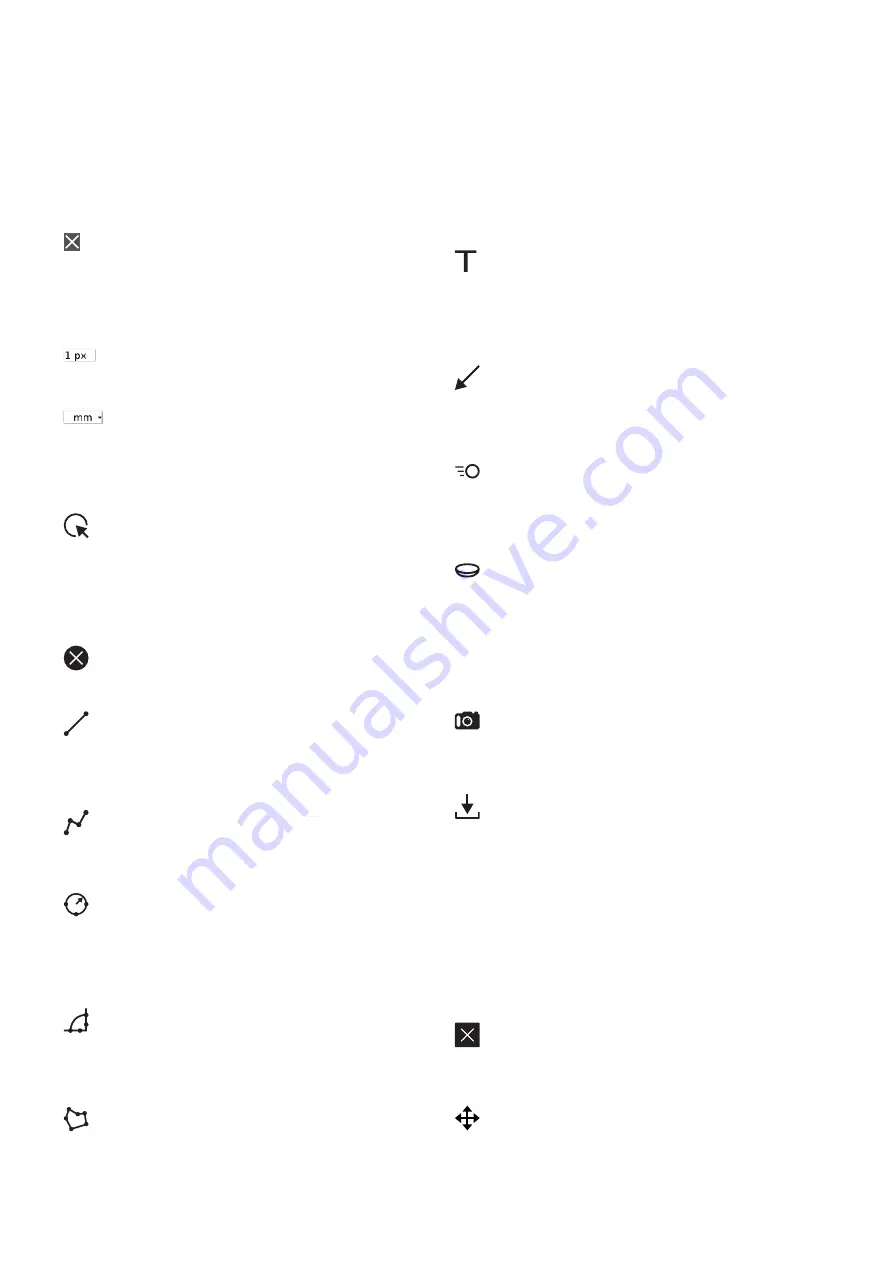
Background color adjustment
Adjust the color of the text annotation background
before using the text annotation tool. The hue is set to
transparent by default. You are not able to edit the color
after using the tool.
Line width
Choose the line width of your measurements lines in pix
Choose measurement units
Choose your prefered measurement units in the dropdown
menu. It is possible to choose between mm, cm and
inches.
Edit
In edit mode all adjustable points will be shown as a
small circle which highlights (red circle) on mouse over.
When a point is highlighted you can choose and relocate
the point. In view mode the points are hidden. By right-
clicking on a point, you are able to delete the point.
Clear all
Use this button to clear all drawings.
Point-to-point measurement
With this measurement tool it is possible to measure the
distance between two points. Use left mouse click to place
the two endpoints.
Polyline measurement
Place three or more points to get the length of each
distance plus the length of the full polyline.
Circle measurement
This tool enables you to calculate a radius of a circle.
Place three points in the periphery of a circle and it will
calculate the radius. Use left mouse click to place the
three points.
Angle measurement
This function makes it possible to measure any given angle.
Use left mouse click to place four points - two on each side
of the angle you want to measure.
Area measurement
Use this function to make a polygon area measurement.
Use left mouse click to place at least three points. To stop
adding points to your polygon just right-click on the mouse.
Text Annotation
This function makes it possible to add text annotations
anywhere in the window. Use the Keyboard to type the text.
Move the text box to the wanted location and left click the
mouse to confirm the position.
Arrow Annotation
With this tool it is possible to add arrow annotations anywhere
in the window. Use the left mouse button to place the endpoints.
The second point is the end of the arrow.
Live View
Use this button to toggle between live and still image mode.
In Live mode the live camera image is active. In Still image
mode the latest snapshot will be shown.
Lens Correction
This function takes the calibration data and corrects the
image for lens curve distortion. Lens correction can only be
processed in a calibrated state, not in lineary calibrated mode.
Moreover this button can be used to toggle between latest
snapshot and a corrected version of the snapshot.
Snapshot
Use this button to take a snapshot of the live image.
The snapshot will not be saved automatically.
Save Image
This button gives a choice between saving the image with or
without drawing overlay. When saving with drawing overlay
the actual view will be saved (including digital zoom).
When taking a picture an information window will appear for a few
seconds showing the file name and storage location.
The image will be saved on the inserted USB memory stick. If
a USB memory stick is not attached, the image is saved internally
on the microscope, provided the share file mode is turned on.
Otherwise an error message will appear and you are not able to
save images.
Close
Use this function or hold center button down for a few seconds
to close the measurement application.
Move Toolbar
Press and hold left mouse button down to move the toolbar
around the window and place it by releasing the mouse button.
mEasuREmEnT appliCaTiOn | TOOl mEnu (3/3)


