24
OPEraTiOn
iMPOrTanT!
never start the saw without first checking the
following: that the saw is secure; the saw table is assembled and
adjusted; that blade tension is as required and that safety devices are
checked. do not connect the saw to the mains before making sure that
all of the above have been completed. Otherwise, the saw may start
up accidentally and lead to serious injury.
1. sTarTinG UP anD sTOPPinG THE MaCHinE:
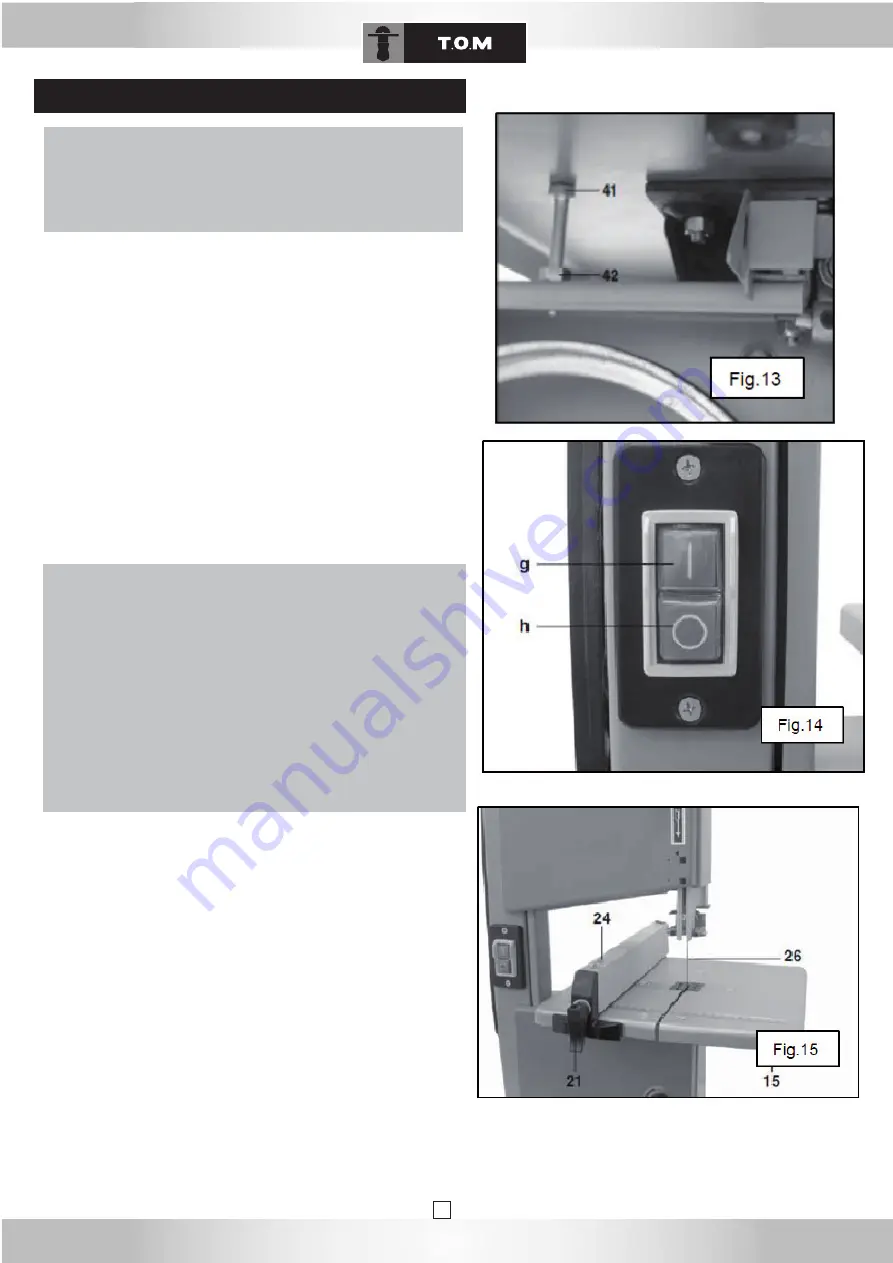
- to start up the machine, push the green button (g) fig.14.
- to stop the machine, push the red button (h) fig.14.
the machine is equipped with a no-volt release switch.
this cuts off power to the machine if there is a voltage drop, if the
power cord is too long, or if the power supply fails. If the machine
stops, set the on/off switch (g) to "I" to switch it back on.
2. insTaLLinG THE riP fEnCE:
a. the rip cutting guide or rip fence (24) fig.15 may be fitted on the
right or on the left of the blade (26). Slide it on to the table and adjust it
as desired.
b. push the locking handle (21) downwards to lock the rip fence (24). If
the rip fence is not sufficiently tightened, turn the handle (21) clockwise
a few times until the rip fence is properly secured.
c. Make sure that the rip fence (24) is always parallel to the blade (26).
d. to unlock the rip fence (24), raise the locking handle (21).
assembly and adjustments
DanGEr
In order to minimise the risk of injury, please follow the safety instruc-
tions below when operating the saw:
- use personal protective equipment.
- Only cut one workpiece at a time
- while sawing, always press the workpiece against the table.
- do not jam the workpiece.
- do not slow down the saw blade by pressing it sideways.
- As required, use the following:
A push stick if the distance between the stop bar and the blade is 120
mm or less;
A support surface for long workpieces, which might otherwise fall off
the table after the cut has been made;
A dust extraction system;
while sawing round stock, use an appropriate retaining device to keep
it from turning.
while sawing thin pieces on edge, an appropriate stop angle must be
used to prevent them from falling over.
before starting work, make sure that the following are in perfect wor-
king order:
- saw blade
- saw blade protection
Replace all damaged parts immediately.
Assume a correct working position while using the machine (the saw’s
teeth must point towards the operator).
never cut several workpieces at the same time. never bundle work-
pieces together to cut them. there is a risk of injury if individual pieces
are caught in an uncontrolled manner by the saw blade.
never cut workpieces to which ropes, cords, strings, cables or wires
are attached or which contain such materials.
OPEraTiOn
Summary of Contents for TR205A
Page 2: ...2...
Page 7: ...7 DESCRIPTION DE L APPAREIL...
Page 41: ...41 vue clat e...
Page 42: ...42 42 r f rences des pi ces...


