background image


37

FD 100 Radio Remote Control 


The 

Music Receiver

 can be controlled remotely using the 

FD 100

 bi-directional 

radio remote control handset if a Gateway module is installed; this is available 
as an optional extra. The 

FD 100

 features an integral full-colour screen which 

provides a convenient means of controlling virtually all the Music Receiver’s 
functions, even when there is no direct line-of-sight contact with it. The handset 
can also display information relating to the selected source or the medium 
currently playing. 


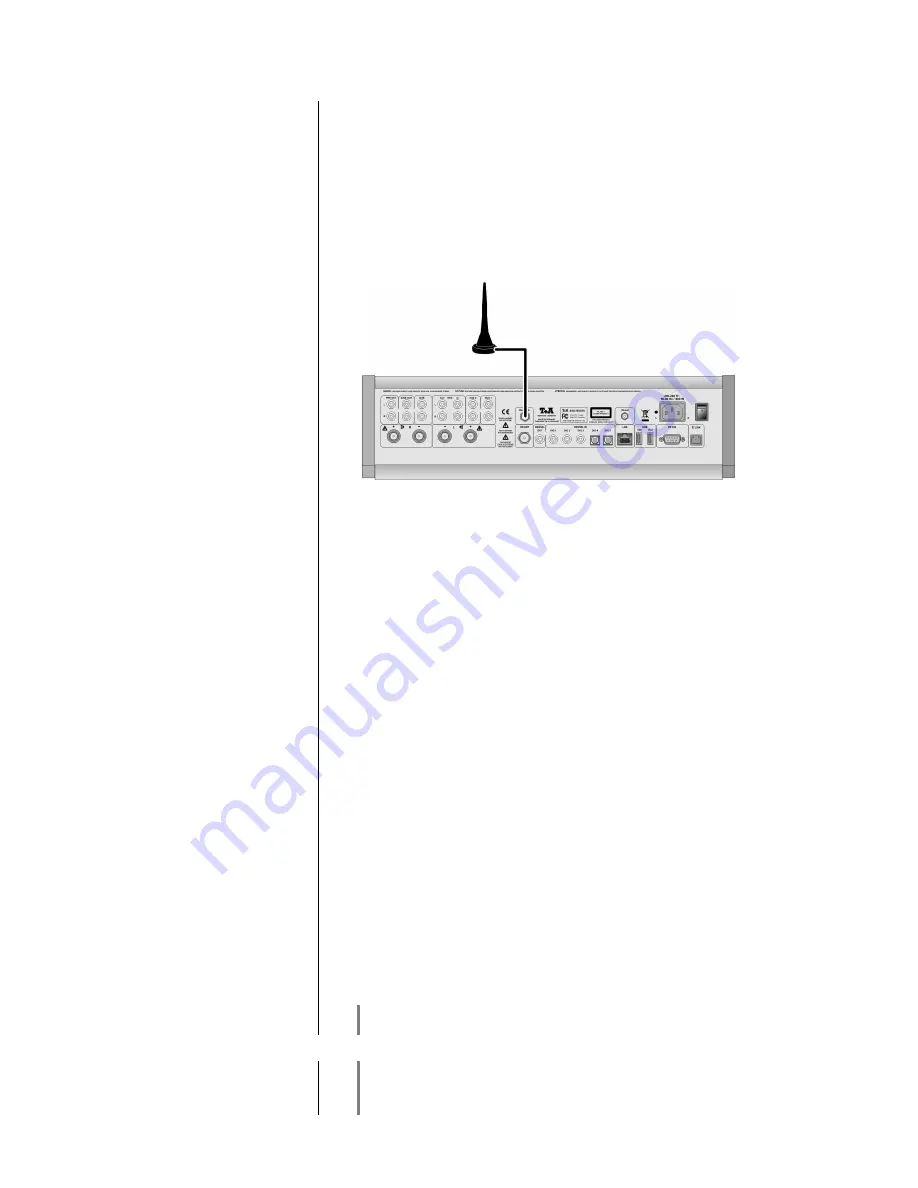
Connecting the radio aerial 


Since the 

FD 100

 operates by a radio link, an aerial must be connected to the 

Music  Receiver

.  This  is  plugged  into  the  socket  on  the 

Music  Receiver


marked  ‘Remote  ANT’.  The  aerial  should  be  free-standing  in  order  to  obtain 
maximum effective range. 


Pairing the FD 100 


Before  the 

Music  Receiver

  can  be  controlled  using  the  FD 100,  the  remote 

control handset must first be registered to the 

Music Receiver

. This process is 

known  as  pairing,  and  only  has  to  be  carried  out  once.  The  procedure  is  as 
follows: 


Press  the 

  button  on  the 

Music  Receiver

  to  call  up  the 

Configuration menu, then select the ‘FD 100 pairing’ menu point using 
the 

 button. 


To confirm the pairing process of the 

FD 100, 

press the 

 button 

until  the  menu  entry  changes  to  'waiting  for  FD 100'.  (the  function 
remains active for thirty seconds). 


Locate  the 

  button  on  the 

FD 100

  and  hold  it  pressed  in  to 

open the 

FD 100’s 

System Settings menu. 


Now select the ‘Start pairing’ point, and press the 

 button: the 

remote control handset automatically seeks the 

Music Receiver


Once  the  device  is  found,  you  will  see  in  the  display  header  the  on-

screen  message  ‘Pairing  successful’.  At  the  same  time  changes  the 
menu  entry  of  the

  Music  Receiver

    to  'Done'.  If  you  wish,  you  can 

change the name of the device at this point (eg. 'Living room'). 


Confirm the name with the 

 button. 


For  faster  access  the 

Music  Receiver

  can  also  be  assigned  to  a 

Hotkey; this is the next step (see 

FD 100

 operating instructions). 


Select  one  -  or  optionally none - of the ‘F’ buttons, and confirm your 

choice by pressing the 

 button. 


The 

FD 100

 is now paired with the 

Music Receiver

, and is ready for 

use. 


  For  detailed  information  on  using  the 

FD 100

  please  refer  to  the  operating 

instructions supplied with the remote control handset. 


The 

Music Receiver

 can be controlled by the 

 App 'TA Control' too. 

For further information please visit our homepage  

www.ta-hifi.com/app


Summary of Contents for E-SERIES

Page 1: ...Software Version V 1 6 Order No 9103 0437 UK USER MANUAL E SERIES MUSIC RECEIVER...

Page 2: ...opposite point of view our products electro magnetic radiation electro smog is reduced to an absolute minimum by the outstandingly effective screening provided by the metal case We would like to take...

Page 3: ...48 Specification 50 About these instructions All the controls and functions of the Music Receiver which are frequently used are described in the first section of these operating instructions The secon...

Page 4: ...ains isolation switch Even when the LED is not glowing some parts of the machine are still connected to mains voltage If the machine is not to be used for a long period we recommend that you turn it o...

Page 5: ...ible to switch inputs in the top menu level of the SCL main menu Navigation Back to the previous point change button Confirms input change button Selects the next point within a list select button Sel...

Page 6: ...tion and context sensitive operating information Symbol Meaning This symbol indicates that it is possible to switch to a higher menu level or select menu using the button Indicates that the selected m...

Page 7: ...on this button selects the analogue input you wish to use Press the button repeatedly until the desired input is displayed on the screen Brief press A brief press on this button selects the digital in...

Page 8: ...ious track during playback Selects the previous piece in the playback list Brief press Manual tuning Long press Search Rewind to search for a particular passage Hold button pressed in for rewind Brief...

Page 9: ...antly displayed in the screen window by a symbol the main menu is displayed Toggle switch between inputs USB 1 and USB 2 blue During character input Switches between numeric and alpha numeric input an...

Page 10: ...nu point At this menu point you can activate and disable external sources and assign a plain text name to each source this name then appears in the screen displays When you call up this menu point usi...

Page 11: ...ver under certain circumstances the use of a large high power subwoofer may still be sensible in order to relieve the strain on the main loudspeakers during loud passages and passages with extreme low...

Page 12: ...The primary purpose of the Balance setting in the Tone menu is to compensate for inadequacies in the audio mix of the recording currently being played Tone Control This menu point can be used to disab...

Page 13: ...ess While recording the volume level of the Music Receiver should not be increased to values higher than 64 If this value is exceeded the level at the record output will change The Music Receiver as a...

Page 14: ...tation can be assessed from the field strength f Display of Stereo Mono Selecting a station using the Favourites list a The selected station is displayed in enlarged form and can be called up using th...

Page 15: ...list Open the Favourites list Select the station you wish to erase from the list hold the red button pressed in for a few seconds the station is now removed from the Favourites list After the erasure...

Page 16: ...es playback A long press on the button opens the CD drawer Track Select During playback Briefly press the or button repeatedly until the number of the track you want to hear appears on the integral sc...

Page 17: ...maining tracks of the program in the same manner and store them by briefly pressing the button It is also possible to enter the track directly using the numeric buttons instead of using the buttons Af...

Page 18: ...ever if you wish to use a network for 96 24 reproduction a cable network must be used since a WLAN network is not generally sufficient for the high data rates see also the note in the chapter entitled...

Page 19: ...higher menu point Plays the selected track or folder During input operations confirms the input Selects the previous or next piece in the playback list Hold button pressed in for fast forward and rew...

Page 20: ...etwork During this period the Music Receiver may be muted and may not respond to commands If this should happen please wait until the symbol disappears Indicates a playable music track or a playback l...

Page 21: ...the individual list points using the buttons and open them with the button If the list entry you open is a folder the screen displays the contents of the folder you can now navigate further within th...

Page 22: ...list using the button before you erase or move files Using Presets Preset function You can store Internet radio stations as Presets using the process familiar from FM radio These stations can subseque...

Page 23: ...es This section describes all those matters which are of fundamental importance when setting up and first using the equipment This information is not relevant in daily use but you should nevertheless...

Page 24: ...peaker terminals One pair of loudspeakers can be connected to the amplifier SPEAKER R and SPEAKER L The impedance of each speaker must not be lower than 4 DIN rating The output stages are designed to...

Page 25: ...ically be disabled USB HDD Socket for USB memory sticks and external hard discs The storage device must be formatted with a FAT16 or FAT32 filesystem The USB device example 2 5 inch HDD can be supplie...

Page 26: ...e a source of danger Be sure to leave at least 10 cm free space above the unit for ventilation If the system components are to be stacked then the amplifier must be the top unit Do not place any objec...

Page 27: ...any problem concerning connections and system location Mains cables and mains filters The mains power supply provides the energy which your sound system equipment needs but it also tends to carry inte...

Page 28: ...Never exert undue force on mains connectors Protect the unit from drips and splashes of water never place flower vases or fluid containers on the unit Supervision of device operation Like any other e...

Page 29: ...ns invalidates conformity and approval and the unit may not be operated within the EC Improper use of the equipment makes the user liable to penalty under current EC and national laws Any modification...

Page 30: ...work connection please use a cable network exclusively Compatible hardware and UPnP servers The marketplace offers a vast number of routers NAS devices and USB hard discs made by a very wide range of...

Page 31: ...ng SMS news The assignment of letters to the buttons is printed below the buttons Special characters can be accessed using the and buttons 0 1 _ Use the blue button for toggling between numbers capita...

Page 32: ...es for your network Menu Point Description MAC The MAC address is a hardware address which uniquely identifies your machine The address displayed is determined by the manufacturer and cannot be altere...

Page 33: ...ng a WLAN manually After a brief delay the networks present in the vicinity are listed on the screen You can use the Rescan function to start a new search for networks present in the vicinity Please s...

Page 34: ...t be set up manually This is the purpose of the menu point Set Manually If you select this menu point you will see the input window reproduced below you can enter the parameters for your network at th...

Page 35: ...0e 9b cc a4 35 You do not need to enter the separating colons when you enter this data MAC addresses are in hexadecimal format i e the address consists only of the letters a to f and the numbers 0 to...

Page 36: ...net address of any radio station you wish to set up on the vTuner service You will generally find the URL on the station s website Another method of finding the URL is to search for it using an Intern...

Page 37: ...Configuration menu then select the FD 100 pairing menu point using the button To confirm the pairing process of the FD 100 press the button until the menu entry changes to waiting for FD 100 the func...

Page 38: ...bles Cause 3 Overloading due to poor earth contact Remedy Disconnect input cable and wait to see if the amplifier switches back on again if so check the input lead and replace if necessary Unit switch...

Page 39: ...the tuner As a test try using the system with a trailing antenna If you can now receive stations reasonably well we recommend that you call out an expert antenna technician to check your antenna syste...

Page 40: ...LAN network Cause 4 Netzwork parameters not properly configured Remedy Configure the network parameters correctly see chapter Network configuration Cause 5 operation without network connection For pro...

Page 41: ...sed Cause 1 The storage device especially USB hard discs without separate power supply draws more electrical current from the USB interface than is permitted by the USB standard Remedy Only use USB st...

Page 42: ...process delivers a very much better more finely graduated signal to the converter which can then be converted with correspondingly higher precision For the upsampling of the digital audio signals diff...

Page 43: ...uffle the titles of a CD or the titles of a program are played back in a random order Muting Hiss suppression The Music Receiver features automatic hiss suppression which cuts out the annoying hissing...

Page 44: ...unique address house number to the components in the local network This number must not be present more than once in the local network The Device IP mask should always be assigned the address 255 255...

Page 45: ...Clients Many UPnP AV servers also offer functions such as cataloguing and easy identification of media content using criteria such as artiste album name genre etc UPnP AV Network protocol that makes m...

Page 46: ...short circuits at the connections and that all cables are plugged in correctly Software update Software update generally Software updates keep your Music Receiver up to date They bring new optimisatio...

Page 47: ...47 Anhang Appendix...

Page 48: ...rs it is possible to use active speakers which are connected to the pre amplifier output External output stages can also be connected to the pre amplifier output The volume control for the pre amplifi...

Page 49: ...e of internet radio a DSL access to the internet is needed For questions regarding setting up your network and internet connection please ask your system administrator or any network specialist 1 Musi...

Page 50: ...servers Standards DLNA UPnP MS DRM 10 Designed to play Plays for sure guidelines Features Web server remote PC Web browser control vTuner Internet Radio Station database automatic updates over Interne...

Page 51: ...51...

Page 52: ...elektroakustik GmbH Co KG Herford Deutschland Germany...

Reviews: