Systor EventCD 5200 Series Operator'S Manual Download Page 20


20 


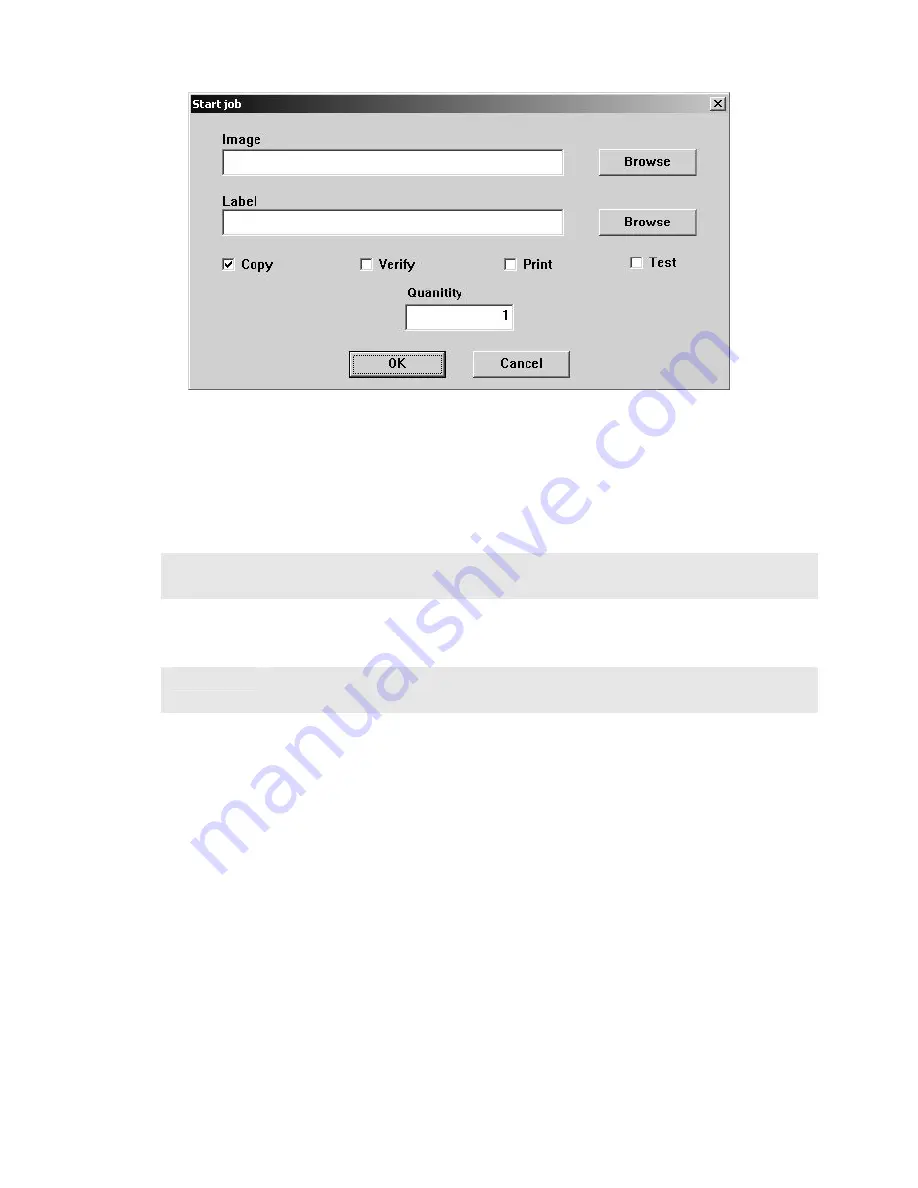
Click on the BROWSE button and select an image file to use (.ISC, .ISO, or 
.IMG). Likely this will be the .ISC file made in the previous step. 


Leave LABEL blank as the 5200 does not support in-line direct to disc printing so 
you need not enter anything here. Consider the Systor 9000 Series for automating 
duplication and printing if desired. 


Select the desired job options: 


COPY:


If you would like to write the disc, check this option. Typically this 
will always be checked 

 VERIFY: 

If you would like to verify the disc, select this option. This will 
perform a bit-for-bit verify of the disc. Selecting COPY and TEST 
at the same time will perform a 

VERIFY 

on the disc once written 


PRINT: 

Not applicable here, but on systems supporting direct-to-disc in-line 
print, this option could be selected to enable printing 

 TEST: 

Select this option, to perform a SIMULATED write of the disc. The 
disc will not actually be written. This is great for learning how to use 
your system, or for troubleshooting purposes. Selecting TEST and 
VERIFY at the same time will result in ALL discs being rejected as 
they contain no data. 


Enter the desired quantity of discs and then click on OK and your job will start: If 
it does not, be sure you have 1 GB of free space on the hard disc 

Method 2 

Starting a job from the STATUS tab: 

Summary of Contents for EventCD 5200 Series

Page 1: ...Systor eventCD...

Page 2: ...STARTED 6 WHAT S IN THE BOX 6 PACKING MATERIALS 6 THE BEST PLACE TO PUT THE 5200 6 SAFETY PRECAUTIONS 6 LOCATION OF 5200 SERIES COMPONENTS 7 Rear View 7 DVD R RW 8 SYSTEM STARTUP 9 LOADING A DISC 10 R...

Page 3: ...ucts they provide As a convenience MFD will honor any service issue related to a defective recorder while under its respective manufacturer s warranty providing that the recorder has been purchased fr...

Page 4: ...n support for programs written in Java Java technology is not fault tolerant and is not designed manufactured or intended for use or resale as online control equipment in hazardous environments requir...

Page 5: ...ies copier module duplicator is professionally designed and manufactured to give you years of trouble free operation To avoid accidental damage to your new duplicator please read and understand this m...

Page 6: ...nic or electromagnetic interference Room temperature should be between 65 and 75 degrees Fahrenheit or between 18 and 23 degrees Celsius Place the 5200 on a solid steady work surface and allow suffici...

Page 7: ...7 Location Of 5200 Series Components Connect a Keyboard Monitor and Mouse not supplied To the corresponding connections below Rear View...

Page 8: ...Volume Control Knob This controls the volume level of the headphones 4 Disc Indicator Light indicates presence of disc in drive 5 Ventilation Hole Do not block 6 Ventilation Hole Do not block 7 Eject...

Page 9: ...s The 5200 Series supports both 115 VAC and 230 VAC at 50 60 Hz Please confirm that the appropriate voltage 115 VAC for North America has been selected Make sure you power on the unit using the primar...

Page 10: ...disc tray so that the disc lays flat Click the eject button on the front of the recorder to close the disc tray Removing A Disc While the 5200 Series power is still switched on click the eject button...

Page 11: ...ing the user to go from recorded event to making multiple CDs with in only a few minutes of the event Features 2 x 2 analog I O 24 bit 96kHz fidelity S PDIF digital I O with 2 channel PCM 1 x 1 MIDI I...

Page 12: ...ws XP Operating System While this may appear to be a conventional PC XP Embedded is specially designed for embedded applications Do not install any non Systor supported software Any damage as a result...

Page 13: ...l IN the analog IN or Midi In Note that the S PDIF and Midi inputs are made via the included breakout cable and each connector is labeled INPUT or OUTPUT Using your mouse click on the AUDIO TAB and th...

Page 14: ...ding Limit Allows you to set a maximum record time Entering 74 here will stop recording from the select input in 74 minutes Insert Track Inserts a START ID at the point the button is clicked A START I...

Page 15: ...desired WAV file Left click to select a file then drag the WAV file into the project to the bottom pane of the screen You can click CTRL or SHIFT when clicking on files to select multiple files or a...

Page 16: ...be displayed The operations available are as follows Set In Point In Point is the point where you wish to begin the track Adjust using the slider above IN POINT digital display Use the up and down arr...

Page 17: ...ibit bit This is not copy protection but merely serves to indicate that digital copying is not allowed and that this is copyrighted material Most recorders ignore this bit except those that are SCMS c...

Page 18: ...will remain unaffected but the resulting CD will not contain the content removed Disc Spanning There are times when your recording will not fit on a single disc The 5200 Live gives you the ability to...

Page 19: ...ich you can create discs These files are relatively small as they contain simply the location of IDs and disc splits You will need the source WAV for future use To undo a span simply click on the trac...

Page 20: ...orm a bit for bit verify of the disc Selecting COPY and TEST at the same time will perform a VERIFY on the disc once written PRINT Not applicable here but on systems supporting direct to disc in line...

Page 21: ...is a handy way to identify your job making it easy to recognize what job is running In the box under TOTAL enter the desired quantity of discs Click on the BROWSE IMAGE button and select an image file...

Page 22: ...ected to enable printing Next choose which systems you wish to allocate to the job If not networked or if this is the only Systor stand alone system on your network only LOCALHOST will appear If you h...

Reviews: