


14
Using your mouse, select the desired input from the Audio Capture Device pull-
down.
•
Click on browse to select location and a filename to save the recording to. Keep in
mind that CD-DA quality recording consumes about 10 MB/min
•
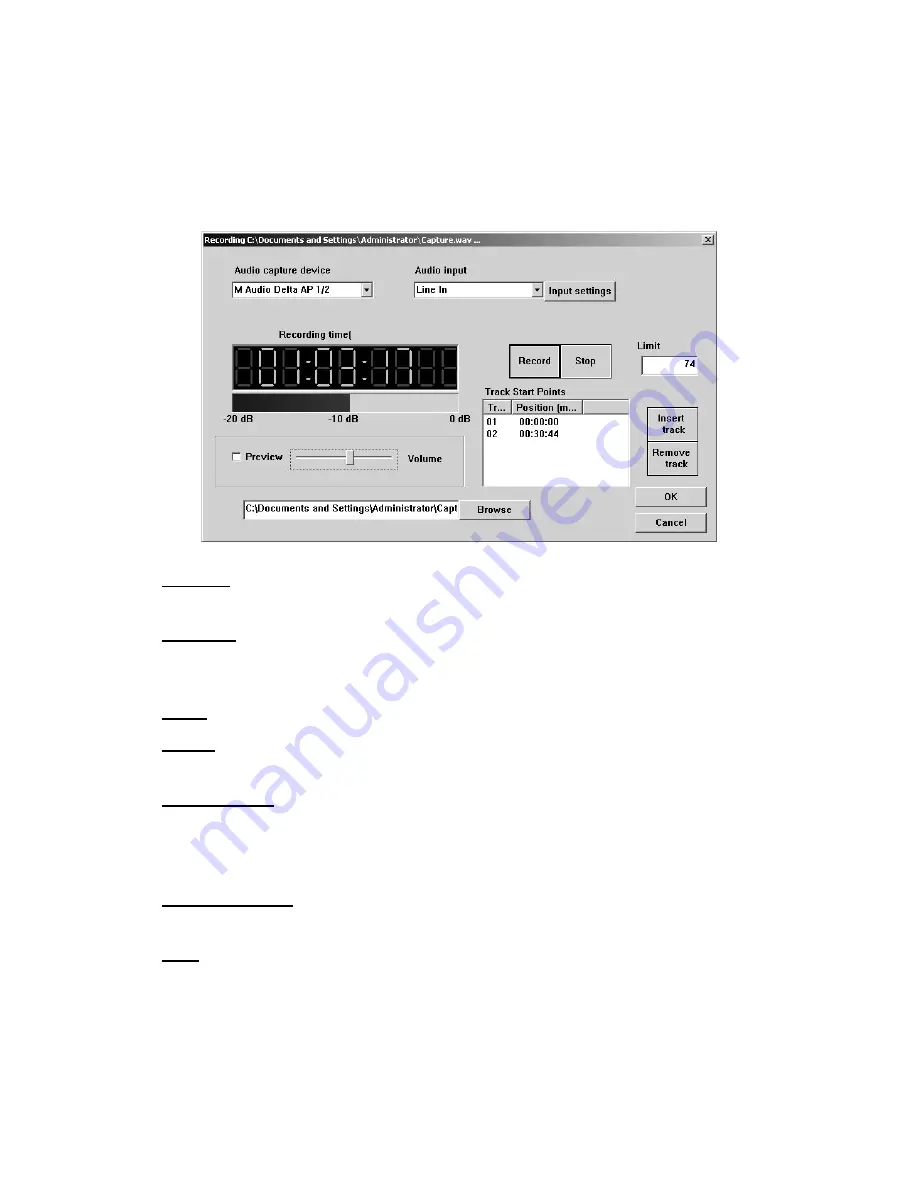
Click on the RECORD button to start recording. During recording, the following
screen is displayed:
Browse:
Selects the desired folder and filename. You will be prompted to over-
write existing files.
Preview:
Check this box to preview the audio as it is being recorded. Attach
speakers to the green jack on the back on the 5200. The output may be adjusted
using the slider.
Stop:
allows you to end recording.
Limit:
Allows you to set a maximum record time. Entering 74 here will stop
recording from the select input in 74 minutes.
Insert Track:
Inserts a START ID at the point the button is clicked. A START ID
serves as a track point in your live recording. These may also be added and
removed manually once recording has been completed. START Ids have no effect
on the audio being recorded but merely serves as the “track” points.
Remove Track:
Removes the selected START ID. All Audio CDs must have an
INDEX 1 so START ID 1 cannot be removed.
OK:
Closes the dialog box.
•
Click “STOP” to end recording and then “OK” to close the dialog.
Editing your recording and Adding tracks
The AUDIO TAB is where you create your CD projects. WAV files and MP3 files may
be dragged and dropped into your project and represent a single track. WAV files must
Summary of Contents for EventCD 5200 Series
Page 1: ...Systor eventCD...


