31/33 |
F-C2
Operation Manual
Warning: Both sides of F-C2 blades are spring loaded in the open position and are closing very quick. To avoid injury,
make sure to keep the blades movement area clear while manipulating with F-C2.
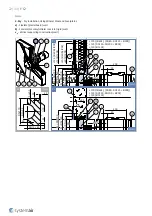
The fire damper is ready for installation when its blades are in open position. The blade position, if using a H1 version,
is indicated by an end switch, which indicates when pushed the damper blades’ closed position.
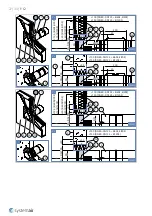
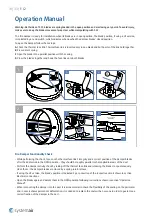
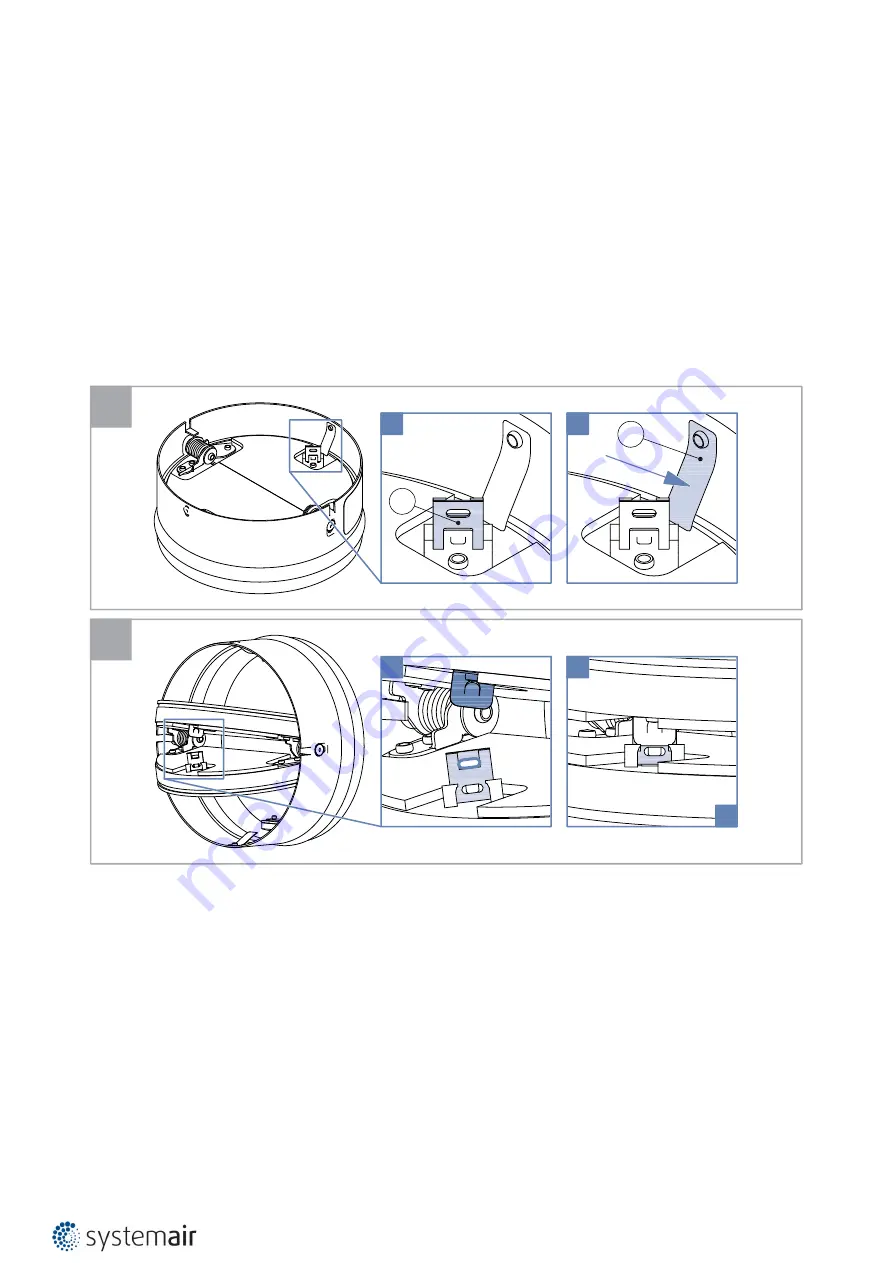
To open the damper follow these steps:
A
Check the thermal fuse link. Thermal fuse link is inserted only in one blade and both parts of the link hold together.
B
Press detent spring.
C
Open the blade into a parallel position with the casing
D
Press the blades together and hook the fuse link onto both blades.
A
B
1.
P3
P5
✓
D
"CLICK!"
C
2.
Fire Damper Functionality Check
• While performing the check, focus on the thermal fuse link’s integrity and a correct position of the damper blades
after their detention in the OPEN position – they should be roughly parallel to the longitudinal axis of the duct.
• Perform the damper activity check by taking off the thermal fuse link and releasing the blades to spontaneously
close them – the damper blades are closed by a spring return release.
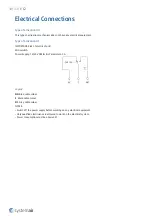
• If using the H1 version, the blade’s position is indicated by a connection of the respective circuit shown in section
Electrical connections
• Open the blades again and detent them in the OPEN position following instructions shown in section “Operation
Manual”.
• When remounting the damper into the duct it is also essential to check the flexibility of the sealing on the perimeter
and in case it shows permanent deformation, it is needed to replace the seal with a new one in order to guarantee a
correct fixation of the damper in the duct.

