10
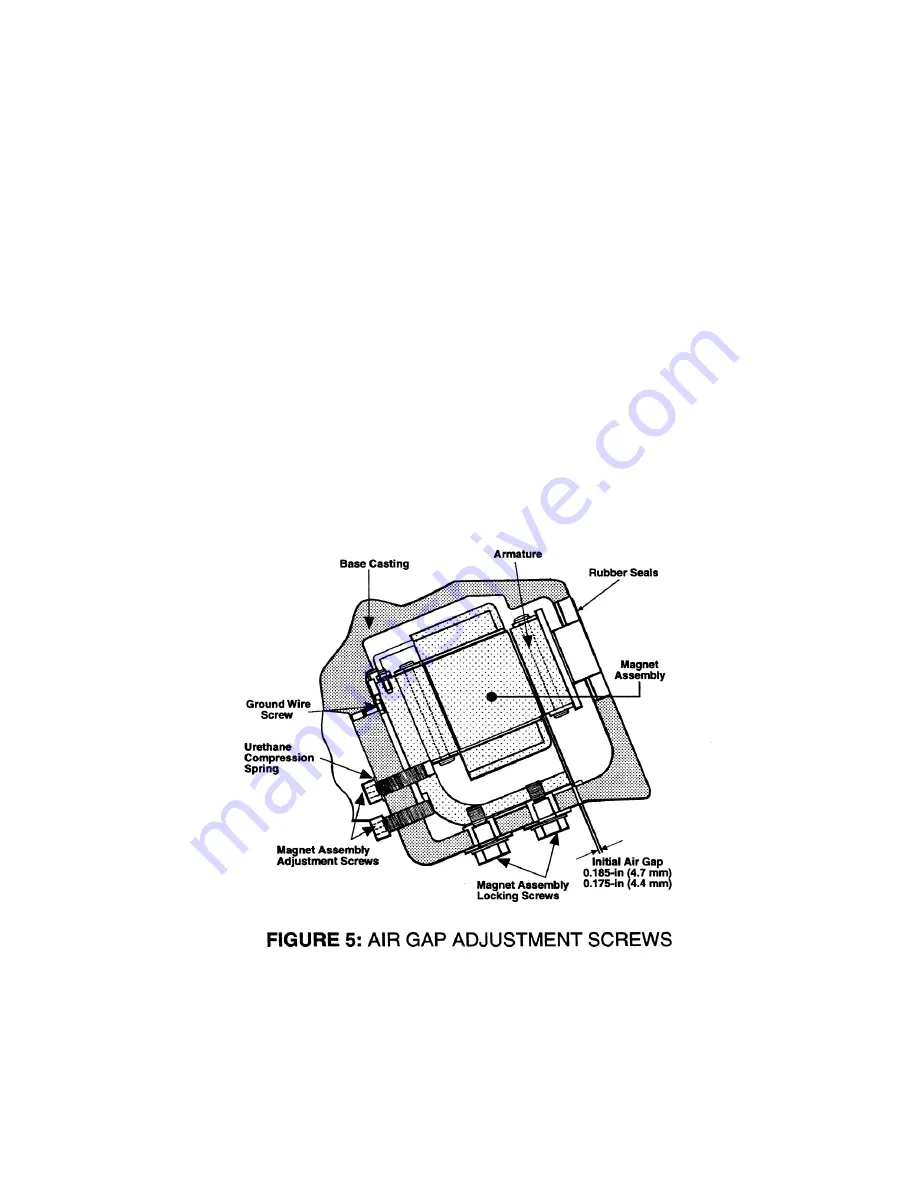
1. Loosen the lower socket head adjustment screw. This is the screw (without the rubber washer)
located on the back of the base casting between the rear spring sets.
2. Tighten the upper socket head adjustment screw. This screw is located directly above the lower
socket head adjustment screw.
3. Once the appropriate gap is attained, tighten the magnet assembly locking screws.
4. When the magnet assembly locking screws are tight, secure both adjustment screws.
5. Finally, turn the unit on to confirm that it does not strike or rattle. If the unit strikes, readjust the air
gap. If the rattles:
A.) Check to make sure that all the magnet screws are secure.
B.) Check to make sure that the longitudinal pan ribs are not contacting the base casting.
To close (tighten) the air gap:
1. Loosen the upper socket head adjustment screw.
2. Tighten the lower socket head adjustment screw. This screw is located on the back of the base
casting between the rear spring sets.
3. Once the appropriate air gap is attained, tighten the magnet assembly locking screws.
4. When the magnet assembly locking screws are tight, secure the upper and lower adjustment
screws.
5. Finally, turn the unit on to confirm that it does not strike or rattle. If the unit strikes, readjust the air
gap. If the unit rattles:
A.) Check to make sure that all the magnet screws are secure.
B.) Check to make sure that the longitudinal pan ribs are not contacting the base casting.


