Synapse AT&T SB67030 User Manual Download Page 225

Deskset Settings

225

Synapse SB67030/031 Deskset and Accessories User’s Guide

.

Setting the Cordless Handset to Factory Default

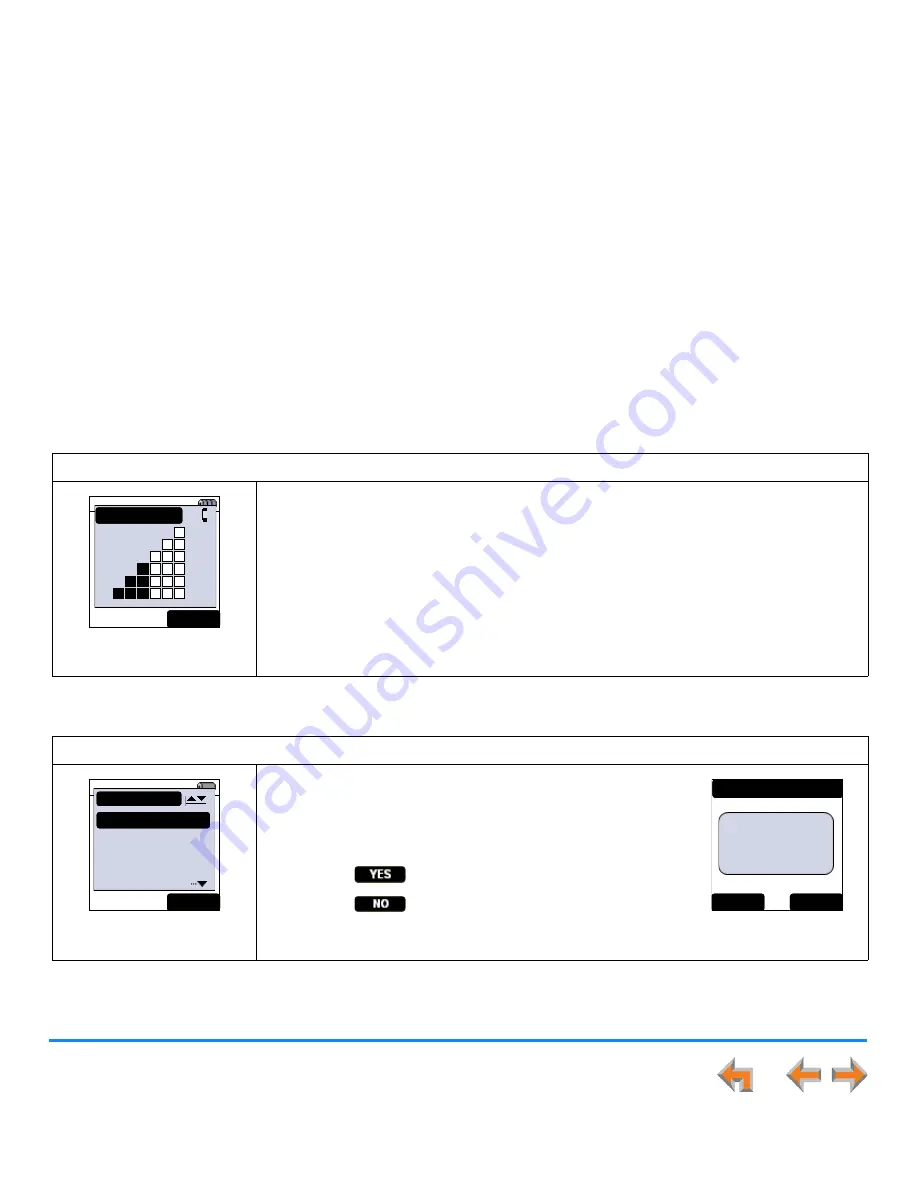
To adjust the incoming voice volume:

Figure 315.  Voice Volume

During an active call or during message playback:

Press 

VOLUME


to increase the incoming voice volume.

OR

Press 

VOLUME 

to decrease the incoming voice volume.

A screen similar to the one shown in Figure 315 appears. The example shows the volume set 
to 3. There are six volume levels. 

If you are using the speakerphone, the speakerphone volume is adjusted.

To reset the Handset to default settings (factory defaults):

Figure 316.  Settings Menu

1. Press 

OPTIONS

, then 

5

 to display the 

Settings

 menu shown 

in Figure 316.

2. Press


to display the 

Restore Default

 screen shown in 

Figure 317.

Press 

 to clear all Handset custom settings. 

Press 

 to keep current settings.

12:30p Feb 23

2 Missed Calls

5 New MSGs

EXT 249

John Smith

EXIT

PHONE

12:30p Feb 23

2 Missed Calls

5 New MSGs

EXT 249

John Smith

SETTINGS

1. Display

2. Sounds
3. Restore Default
4. Deregister

EXIT

YES

NO

 RESTORE DEFAULT

Do you want to 

restore default 

settings?

Figure 317.  Restore 

Default

Summary of Contents for AT&T SB67030

Page 1: ...d the AT T logo are trademarks of AT T Intellectual Property licensed to Advanced American Telephones San Antonio TX 78219 Synapse is a registered trademark of Advanced American Telephones Issue 5 0 9...

Page 2: ...Keys 17 Deskset Idle Screen 18 Modes of Operation 19 Call Appearance Mode 19 Line Appearance Mode 20 Deskset Soft Keys 21 Deskset Status Indicators 23 Call Indicators in Call Appearance Mode 24 Call I...

Page 3: ...Call While Another Device is on a Call 43 Incoming Calls 43 Held Calls 43 Clocks 43 Status 43 Cordless Handset Battery Charging 44 Cordless Handset Low Battery Notification 45 Power Save Mode 45 Cordl...

Page 4: ...wering 70 Answering Calls in the Call Queue 71 Answer a Call with the Cordless Handset 73 Incoming Call Indication 74 Answer a Call 75 Multiple Incoming Calls 76 Call Management 77 Call Management 78...

Page 5: ...sing a Corded Headset 102 Call Management Using a Headset 103 Accessing Items in Lists 104 Accessing the Call Queue 105 Accessing the Park List 106 Accessing Voicemail 107 Accessing the Directory 109...

Page 6: ...Entry 132 Editing a Personal List Entry 133 Storing Directory Entries from the Call Log or Redial List 134 Deleting a Personal List Entry 135 Directory Sort 136 Accessing the Directory with the Cordle...

Page 7: ...Call Logs 175 Storing Call Log Entries 176 Deleting Call Log Entries 177 Accessing the Call Log with the Cordless Handset 179 Using the Call Log with the Cordless Handset 180 Managing Missed Calls wi...

Page 8: ...without the Deskset 214 Cordless Accessory Registration and Deregistration Time Out 215 Setting and Changing a User Password 216 Admin Settings 217 Deskset Information 218 Using Do Not Disturb DND 21...

Page 9: ...ming Calls 250 Outgoing Calls 252 Voicemail 255 Other Deskset Features 257 WebUI 260 PC Deskset Interaction 261 SB67040 Cordless Handset 262 TL7600 Cordless Headset 269 Appendixes 274 Appendix A Soft...

Page 10: ...and troubleshooting information necessary to operate your new AT T product The following sections provide instructions for using this guide Topic Navigation on page 11 Text Conventions on page 12 Desk...

Page 11: ...to return to your original topic Figure 1 illustrates the navigation conventions within the User s Guide Figure 1 User s Guide Navigation Task Link Click on this link to move to the beginning of the i...

Page 12: ...EY or DIAL PAD KEY Identifies a hard key including the dial pad keys Identifies a soft key Figure 1 Table 1 Identifies a figure or table Topic Navigation on page 11 Identifies a hyperlink to another p...

Page 13: ...key to highlight the function and press SELECT or press a dial pad key The procedures in this guide use dial pad entry as the preferred method for selecting a function Additional Documentation Downloa...

Page 14: ...e Synapse Business Phone System provides simplicity without sacrifice it s simple to install manage and use without sacrificing any of the features you need and expect from a business telephone system...

Page 15: ...tem Synapse differs from conventional telephone systems in that calls are not coordinated by a central controller Instead Synapse uses a distributed control system over a Local Area Network LAN Figure...

Page 16: ...Deskset Voicemail Indicator Illuminates when there are new Voicemail messages Call Appearance Line Appearance Five keys that access active calls and held calls Corded Handset Soft Keys Four keys that...

Page 17: ...the other party cannot hear you Does not mute the optional Cordless Headset 3 CALL LOG Accesses the incoming Call Log 10 VOL VOL Increases decreases the ringer and voice volume 4 MESSAGES Accesses Voi...

Page 18: ...s Messages Status indicators appear in this space Call Appearance Line Appearance Icons Show whether there is an active conference or held call or whether there is a location available for placing a c...

Page 19: ...when the Deskset is first turned on and when there is no call activity In Line Appearance mode the Deskset does not display missed calls Figure 6 Idle Screen in Call Appearance mode Call Appearance Mo...

Page 20: ...receive external calls One key is reserved for internal Intercom calls Other Desksets in the system share these lines and display the line status Incoming calls on a line ring at all Desksets that sha...

Page 21: ...ft keys as shown in Figure 8 Figure 8 Deskset Idle Screen Table 2 Idle Screen Soft Keys Call Appearance Mode Key Description Key Description Key Description Key Description Turns Do Not Disturb on or...

Page 22: ...ccessories User s Guide Table 3 Idle Screen Soft Keys Line Appearance Mode Key Description Key Description Key Description Key Description Accesses Held Calls list Pages internal extensions Turns Do N...

Page 23: ...cemail recording time is available The ringer is silenced Audible Ring Delay is delayed 10 seconds The number that appears varies with the delay you have set The silent ringer and the Voicemail indica...

Page 24: ...change accordingly See Call Status Icons on page 26 for a complete description of the available icons Figure 11 Sample Call Appearance Screen Conferencing or transferring outside calls requires two C...

Page 25: ...creen identify the status of each call When there are several lines active press Line Appearance keys to access calls The soft keys change accordingly See Call Status Icons on page 26 for a complete d...

Page 26: ...coming calls when there are other calls This icon also appears when there is an incoming call with no other calls Off Hook Indicates that you have lifted the corded handset pressed SPEAKER or HEADSET...

Page 27: ...ll on line 3 on hold the Line Appearance key for line 3 flashes slowly on all the Desksets that share PSTN line 3 Conference Indicates a conference call Conference On Hold Flashes when a conference ca...

Page 28: ...ey four times enters the number or the upper case fourth letter for keys 7 and 9 that require an additional press to cycle into lower case letters 5 Pressing the dialing key five times enters the lowe...

Page 29: ...nt to delete all messages Press Yes to delete all messages Press No to cancel Messages Figure 15 Confirmation Screen DND CallFw d Page More 1 2 Quick Dial 12 30PM Thu Feb 25 2010 Ext 249 John Smith 2...

Page 30: ...ate a call press SPEAKER The key becomes backlit and you hear a dial tone Begin dialing To end a call press SPEAKER The key backlight goes out During an active call if you are using the corded handset...

Page 31: ...y brief descriptions of how to use some of the features To use the Deskset Help Figure 17 Deskset Help 1 Press HELP to see a menu of features Figure 17 shows the Help menu in Call Appearance mode The...

Page 32: ...a target that the system administrator designates which could be a group of extensions Caller Options Until callers get through to a live person they can press 0 at any time to redirect their call to...

Page 33: ...Appearance mode including hands free speakerphone once it is registered to your Deskset Use your Deskset to register your Cordless Handset See Registering an Optional Cordless Handset on page 209 Figu...

Page 34: ...le on an active or conference call Press and hold to access Quick Dial numbers DIR Accesses the Directory VOLUME on side Decreases and increases the ringer or incoming voice volume Dial Pad 0 9 Dials...

Page 35: ...cycles through list entries Use during message playback to jump forward eight seconds in message Adjusts display contrast level Navigate Left Scrolls or cycles through list entries Performs backspace...

Page 36: ...when highlighted to see the missed calls list New Messages Number of new messages Press SELECT when highlighted to see a Message Review screen similar to the one shown in Figure 217 on page 164 Once a...

Page 37: ...navigation key to view dialing options Confirmation screens require that you confirm a choice by pressing or 12 30p Feb 23 9 503 555 0194 00 12 ON A CALL INCOMING Graham Bell 232 555 0176 Mary William...

Page 38: ...nteraction screens display lists of choices you can make To access items in the Handset menus you can either use the navigation key to highlight the function and press SELECT or press a dial pad key T...

Page 39: ...ng ring or ringer on Appears during an incoming call or during volume control Speaker or page Appears when you switch to speakerphone or when paging Silenced incoming ring or ringer silenced muted App...

Page 40: ...2 Press on the Handset To switch a call from Handset to Deskset 1 On the Deskset press the lit Call Appearance key or press SPEAKER To use the speakerphone Figure 22 Speakerphone To initiate a call pr...

Page 41: ...the Deskset multiple incoming calls are listed on the screen View Voicemail list You can cycle through individual Voicemail records See Retrieving Personal Voicemail with the Cordless Handset on page...

Page 42: ...Appearance mode Record a Voicemail greeting Copy Call Log entries or Redial numbers into your Personal Directory list Create edit or delete your Personal Directory list Program Quick Dial entries Cal...

Page 43: ...ither device If there is a subsequent incoming call the device currently on an active call emits an abbreviated ringtone but the other device does not Held Calls Both the Handset and Deskset display h...

Page 44: ...ndset in Charger Place the Handset in the charger as shown in Figure 24 The CHARGE light is on when the Handset is charging If the Handset has not yet been registered the Register screen shown in Figu...

Page 45: ...ress no keys for 30 seconds the screen backlight turns off to save power Press any key to turn the backlight on To handle low battery notification Figure 26 Low Battery 1 Press to exit the notificatio...

Page 46: ...re 27 and the Handset searches for the Deskset If the Deskset is not found within five seconds the Searching for Deskset notification screen appears If you see either of these screens move closer to t...

Page 47: ...creen See Dial Pad Entry on page 48 for more information on dial pad keys The Handset finds a name that begins with that letter If there is no name starting with that letter the Handset finds the next...

Page 48: ...y 3 Pressing the dialing key three displays names starting with enters the third letter on the key 4 Pressing the dialing key four times displays names starting with the number or the fourth letter fo...

Page 49: ...nal This optional Cordless Headset shown in Figure 30 provides a 500 foot range and easy one button answering once it is registered to your Deskset Use your Deskset to register your Cordless Headset S...

Page 50: ...en on a call Earpiece ON OFF Press to make and or answer a call and to end a call The light is on when the Headset is charging in the Headset charger The light flashes slowly when you are on a call an...

Page 51: ...s the VOLUME keys on the side of the Headset to adjust the listening volume Mute Press MUTE FLASH to turn the Headset microphone on or off When mute is on there is a short beep every 10 or 15 seconds...

Page 52: ...et ON OFF key is pressed to start or end a call ON OFF light status On Headset is registered to the Deskset and is charging in the Headset charger Flashes quickly There is an incoming call Flashes thr...

Page 53: ...have calls on hold you can predial a phone number and then go off hook to call the number You can make a call at any time by choosing an off hook method then dialing a number This is referred to as Li...

Page 54: ...ence call Call Appearance mode only Parks a call Call Appearance mode only Moves to the next set of soft keys More 1 3 indicates that you are on page one of three Turns Do Not Disturb on or off Call A...

Page 55: ...ber CANCEL to cancel predial 2 Lift the corded handset or press SPEAKER HEADSET or a Call Appearance or Line Appearance key to go off hook and call the number as shown in Figure 34 To do this with the...

Page 56: ...any that must be dialed first Hyphens are automatically inserted except when whatever digit if any which must be dialed for outside calls is followed by a 0 for an outgoing international call When yo...

Page 57: ...as shown in Figure 38 Call Appearance mode shown More 1 3 Use or to scroll or use dial pad f or quick search Quick Dial ABC Accountants Personal 9 503 555 0194 Amy Lee 203 Angela Martin 9 1 732 555 7...

Page 58: ...To make an intercom call Figure 39 Making an Intercom Call Figure 40 Active Intercom Call 1 With the Deskset in Idle mode and the handset on hook do one of the following Press the INTERCOM key lift t...

Page 59: ...SB67040 Cordless Handset Active Call Screen The Active Call screen as shown in Figure 41 appears while you are on a call Figure 41 Active Call Screen Cordless Handset operation is compatible with Call...

Page 60: ...in Accessing and Managing Items in Lists with the Cordless Handset on page 121 Before you call the number you can press The navigation key to delete a digit and move the cursor back one space to inser...

Page 61: ...he Cordless Handset on page 121 The Active Call screen shown in Figure 44 appears EXT_ s CID 12 30p Feb 23 ON A CALL 12 30p Feb 23 9 503 555 0194 00 12 ON A CALL XFER CONF For outside phone numbers in...

Page 62: ...To make a call with the Cordless Headset Figure 45 Making a Call 1 Press ON OFF on the Headset as shown in Figure 45 The Headset is active when you hear a dial tone 2 Dial the extension or phone numbe...

Page 63: ...reen You can answer or ignore each call You can also answer calls with the optional TL7600 Cordless Headset When you hear the ring press ON OFF on the Headset If you have an analog telephone such as a...

Page 64: ...tive Call screens are shown in Figure 46 Table 10 Incoming Call Screen Soft Keys Key Description Key Description Key Description Answers incoming call Silences ringer during incoming call Call Appeara...

Page 65: ...not forward Incoming Ring Group Calls to Voicemail If your company has caller ID the Incoming Call screen displays caller information If the caller ID information is absent because it is unavailable U...

Page 66: ...he system administrator The default setting for Call Forward No Answer is Voicemail To see incoming call notifications on the Cordless Handset see Incoming Call Indication on page 74 Line Appearance M...

Page 67: ...r each call You can also press to return the highlight to your active call The active call screen appears as shown in Figure 51 Figure 52 shows an ignored call Call Appearance mode shown in both figur...

Page 68: ...dset it also stops ringing The Call Appearance or Line Appearance key LED continues to flash You can press the flashing Call Appearance or Line Appearance key to answer the incoming call In Line Appea...

Page 69: ...Listen If there is more than one active call use the and navigation keys to highlight the call marked with the Message icon Press to listen to a message that is being recorded as shown in Figure 53 T...

Page 70: ...after the tone If you do not want the Deskset to automatically answer the call you can press CANCEL to send the call to the Call Forward No Answer target See Call Forward All and Call Forward No Answ...

Page 71: ...n the Call Queue Your system administrator may have set up your Deskset as a Call Queue Agent The key in the bottom right corner will have a Call Queue label Incoming calls are directed to your Deskse...

Page 72: ...D flashes orange slowly when there are calls waiting in the Call Queue as shown in Figure 57 Press Call Queue to view the Queued Calls list as shown in Figure 58 Use the and navigation keys to highlig...

Page 73: ...When the extension receives an incoming call the Handset rings and the incoming call information appears as shown at right The screen displays the caller s name and number if available To answer the c...

Page 74: ...incoming call screen shown in Figure 60 appears The most recent incoming call is highlighted Press the or navigation key to switch between the calls or press See Ignoring a Call on page 68 Other acti...

Page 75: ...ons for a call received during an active call Figure 62 Incoming Call During an Active Call Press PHONE or SELECT to answer the incoming call The current call is automatically placed on hold Press to...

Page 76: ...Deck See Call Deck on page 91 Options during multiple incoming calls Figure 63 Multiple Incoming Calls Press the or navigation key to view the incoming calls Press SELECT PHONE or SPEAKER to answer th...

Page 77: ...ding on whether your system is in Call Appearance or Line Appearance mode This chapter describes the differences between the two modes Call Management on page 78 Placing a Call on Hold Call Appearance...

Page 78: ...arks a call Call Appearance mode only Moves to the next set of soft keys More 1 3 indicates that you are on page one of three Turns Do Not Disturb on or off Call Appearance mode only Turns Call Forwar...

Page 79: ...et reminds you with a brief ring every 30 seconds 2 To take the call off hold highlight the call and press SELECT or press the associated Call Appearance key To do this with the Cordless Handset see M...

Page 80: ...ED flashes slowly Someone at any other Deskset assigned that line can press the flashing Line Appearance key to take the call off hold making it an active call on their Deskset All Desksets including...

Page 81: ...ed by your system administrator The call transfer function is enabled by default Transfer Rules The following rules apply when transferring a call An extension can transfer only one call at a time The...

Page 82: ...ction can be canceled by pressing CANCEL The call remains on hold To do this with the Cordless Handset see Transferring on page 92 Transfer Quick Dial 12 30PM Thu Feb 25 2010 Graham Bell 1 9 232 555 0...

Page 83: ...as shown in Figure 73 If there are no Group Mailboxes only your Personal Mailbox appears 3 Press the or navigation key to highlight the desired Mailbox and press SELECT or 4 A Call Transferred screen...

Page 84: ...nsion is now in conference with the other two phone numbers as shown in Figure 77 If you hang up while on the conference the conference ends If you make or take another call the conference continues w...

Page 85: ...ting with each other The held conference icon as shown in Figure 78 designates a held conference A conference is automatically put on hold when you Press an available Call Appearance or Line Appearanc...

Page 86: ...igure 79 you can press to end the conference Both calls hang up and the system returns to whatever Call Appearance or Line Appearance you were on before the conference call to terminate the highlighte...

Page 87: ...s then the Idle screen appears Pick up a parked call within three minutes or the Deskset rings To answer a call that is ringing back press the soft key that appears when there is an incoming call To d...

Page 88: ...the Parked Calls list as shown in Figure 83 3 Press the or navigation key to highlight the desired entry 4 Press to retrieve the parked call The Active Call screen appears as shown in Figure 84 To do...

Page 89: ...alls with the optional SB67040 Cordless Handset using the following functions Call Deck on page 91 Transferring on page 92 Conferencing on page 94 Managing Held Calls on page 97 Held Call Options on p...

Page 90: ...ment 90 Synapse SB67030 031 Deskset and Accessories User s Guide Active Call Screens The Handset Call Management functions begin with one or more active calls as shown in Figure 85 Figure 85 Active Ca...

Page 91: ...o return to the beginning The order of priority is a Incoming calls Always on top b Active calls On top as shown in Figure 86 except when there is an incoming call c Ignored calls When you have receiv...

Page 92: ...igure 89 3 Press the or navigation key to scroll through the Extension list entries 4 Press SELECT SPEAKER or PHONE to select an Extension number as a transfer destination The screen shown in Figure 9...

Page 93: ...the selected number as a transfer destination press SPEAKER or PHONE A screen similar to the one shown in Figure 92 appears 4 Press to complete the transfer Transfer To EXT_ s CANCEL Graham Bell Grah...

Page 94: ...reen shown in Figure 93 appears 2 Establish a second call The second call can be dialed normally as shown in Figure 94 or it can be from one of the lists Once the second call has been established the...

Page 95: ...on Hold Press HOLD or PHONE to place the conference on hold A screen similar to the one shown in Figure 97 appears If you press PHONE you hear a dial tone and are in the Live Dial mode The first and...

Page 96: ...ure 99 using the or navigation key b Press SELECT to drop the highlighted call from the conference and hang it up You return to an active call mode with the remaining call as shown in Figure 100 OR Pr...

Page 97: ...Press HOLD The screen changes from ON A CALL as shown in Figure 101 to ON HOLD as shown in Figure 102 Press to transfer the held call to another number Press to retrieve the held call Press PHONE to s...

Page 98: ...103 Call on Hold in the Call Deck Press the or navigation key to review calls in the Call Deck as shown in Figure 103 Press when the call you want to retrieve is displayed You return to the active cal...

Page 99: ...Accessing the Redial List with the Cordless Handset on page 125 2 Page All Pages all other extensions See Paging with the Cordless Handset on page 191 3 Park Places the current held call in the Parked...

Page 100: ...call to display the OPTIONS screen as shown in Figure 105 2 Press 3 to park the call as shown in Figure 106 The parked call is given a parked call number and is available at all system extensions To p...

Page 101: ...the Parked Call list 1 From Idle mode press OPTIONS then 3 OR If you are on a call already press OPTIONS then 4 as shown in Figure 107 The parked call list appears as shown in Figure 108 To retrieve a...

Page 102: ...orded headset with the Cordless Handset Figure 109 Corded Headset Lift the rubber flap to insert an optional 2 5 mm corded headset into the jack on the left side of the Cordless Handset While a corded...

Page 103: ...1 888 883 2474 To use a Headset Figure 110 Headset From Idle mode or during a call using the corded handset or speakerphone press HEADSET as shown in Figure 110 If you have a headset connected to the...

Page 104: ...following lists Call Queue List See Accessing the Call Queue on page 105 Park List See Accessing the Park List on page 106 Voicemail List See Accessing Voicemail on page 107 Directory List See Access...

Page 105: ...r Deskset screen to show the Call Queue key in the bottom right corner The Call Queue key can also show on non Agent Desksets The Call Queue key LED flashes orange slowly when there are calls waiting...

Page 106: ...e press then appears 2 Press to display the Parked Calls list as shown in Figure 114 3 Press the or navigation key to highlight the desired entry 4 Press to retrieve the parked call The Active Call sc...

Page 107: ...to create a message to send to a Voicemail Distribution List See Forwarding a Message to a Distribution List on page 150 Press to view the Mailbox List if you have Group Mailboxes as shown in Figure 1...

Page 108: ...ox b Press SELECT The Messages screen shown in Figure 116 on page 107 appears 2 Press the or navigation key until you highlight the desired Messages entry See Voicemail on page 139 for more informatio...

Page 109: ...irectory screen shown in Figure 119 appears 2 Press the or navigation key until you highlight the desired entry 3 Press CANCEL to exit the Directory list To do this with the Cordless Handset see Acces...

Page 110: ...e or add or remove a 1 Press the or navigation key to step through the dialing options 2 Press CANCEL to exit the Call Log To do this with the Cordless Handset see Accessing the Call Log with the Cord...

Page 111: ...Figure 122 Extension List Functions Quick Dial Douglas Lew is Edgar Williams Gary Keys John Smith Karl Anders Nick Gibson 205 211 202 225 204 211 Amy Lee 203 Use or to scroll or use dial pad f or qui...

Page 112: ...to the first name that begins with the first letter of the key that you press 3 Press to call the highlighted extension or press CANCEL to exit the Extension list To do this with the Cordless Handset...

Page 113: ...as shown in Figure 125 2 Press a Quick Dial button to the right of a label to dial that number The Quick Dial entries are not associated with the Directory To do this with the Cordless Handset see Ac...

Page 114: ...to erase the highlighted character if there is one or else the character before the cursor a Enter the name b Press the navigation key and enter the number Enter the digit 9 or whatever digit if any t...

Page 115: ...Moves to the next set of soft keys If this key appears there are more than four soft keys available More 1 2 indicates that you are on page one of two Shows more details for a particular entry Deletes...

Page 116: ...in Figure 131 2 Press CANCEL to exit the Redial list To do this with the Cordless Handset see Accessing the Redial List with the Cordless Handset on page 125 To call press SELECT or Call To call pres...

Page 117: ...number if available If necessary edit the name and number Press the navigation key to move the cursor to the Last Name and Phone entries 4 Press to save the entry To call press SELECT or Call To call...

Page 118: ...2 of 2 1 Press REDIAL to access the Redial list as shown in Figure 134 2 Press to display the soft key as shown in Figure 135 3 Press A Confirmation screen appears as shown in Figure 136 4 Press to co...

Page 119: ...mation on entering other individual letters This searching function uses only the uppercase letters When an exact match is found the highlight bar moves to that entry as shown in Figure 138 If you ent...

Page 120: ...mple your department may have lines 1 to 4 assigned to your Desksets Another department in your company may have lines 5 to 8 assigned to their Desksets Using the Held Calls List at your Deskset you c...

Page 121: ...sion List See About the Cordless Handset Extension List on page 122 Quick Dial List See Accessing the Quick Dial List with the Cordless Handset on page 124 Redial List See Accessing the Redial List wi...

Page 122: ...ion list illustrated in Figure 140 from Idle Live Dialing Transfer and Conference Setup modes Figure 140 Extension List Functions Amy Lee 203 Douglas Lewis Edgar Williams Gary Keys EXTENSION 1 16 EXIT...

Page 123: ...key until you highlight the desired entry You can use the dial pad for a quick search when viewing the Extension list 3 Press SELECT or PHONE to dial the highlighted number If you are accessing the Ex...

Page 124: ...E QUICK Figure 143 Quick Dial Entries 1 Press and hold MUTE QUICK as shown in Figure 142 for at least two seconds The Quick Dial entries display as shown in Figure 143 2 Press the or navigation keys t...

Page 125: ...AL screen as shown in Figure 145 Press the or navigation key to view Redial entries Press SELECT or PHONE to dial out the highlighted number in the Redial list If you are accessing the Redial list fro...

Page 126: ...es press OPTIONS The Redial Options menu appears as shown in Figure 148 Press 1 or SELECT to display the Delete All Confirmation screen Press to delete all Redial entries Press to return to the REDIAL...

Page 127: ...e Handset screen The Handset searches for an exact match or the closest match as follows If you press 4 once the Handset searches for names beginning with G If you press 4 twice the Handset searches f...

Page 128: ...the WebUI These entries are available only at your extension System This public directory is created and maintained by the system administrator You can sort and view this directory but you cannot mod...

Page 129: ...than eight soft keys available More 1 3 indicates that you are on page one of three Allows you to change previously entered information Deletes the highlighted entry Opens the Directory List Options...

Page 130: ...ays the first entry in the selected list 5 Press to display the Directory List screen again 6 To change the default list press the or navigation key to highlight the desired list Then press More 1 3 U...

Page 131: ...s Personal and appear Press to make changes to the entry See To edit a Personal list entry on page 133 Press to delete the entry See To delete a Personal list entry on page 135 9 Press CANCEL to retur...

Page 132: ...try you have the following options Press the or navigation key to move the cursor Press the or navigation key to move to the previous or next field Press to erase the highlighted character if there is...

Page 133: ...Press the or navigation key to move to the previous or next field Press to erase the highlighted character if there is one or else the character before the cursor Press to insert a two second pause i...

Page 134: ...entries Press to erase the highlighted character if there is one or else the character before the cursor Press to insert a two second pause into the phone number The pause appears as a P in the field...

Page 135: ...Use or to scroll or use dial pad f or quick search Quick Dial ABC Accountants Personal 9 503 555 0194 Amy Lee 203 Angela Martin 9 1 732 555 7318 Davis Caterer 9 1 317 555 0129 Charlie Johnson 9 1 888...

Page 136: ...s shown in Figure 166 To sort the entries by last name press as shown in Figure 166 To sort the entries by first name press as shown in Figure 167 The Directory stays in the chosen sort order until yo...

Page 137: ...ctory screen appears as shown in Figure 169 2 Press the or navigation key to scroll to the desired entry OR Press a dial pad key as shown in Dial Pad Entry on page 48 to reach the first name in the al...

Page 138: ...n in Figure 170 2 Press to display the Options menu shown in Figure 171 3 Press 1 though 4 to select the desired list OR Use the or navigation key to scroll to the desired list then press SELECT 4 Pre...

Page 139: ...al Mailbox at each Deskset You can also create a new message and send it to a Voicemail distribution group that you have created See Voicemail Distribution on page 237 Your system administrator may gi...

Page 140: ...messages appears as shown in Figure 173 If you have enabled Voicemail distribution pressing MESSAGES presents a choice of whether to listen to messages or leave a new message If your system administr...

Page 141: ...s Select a mailbox to access the messages stored in that mailbox A screen with the list of messages in that Mailbox appears as shown in Figure 173 on page 140 Messages or the name of the Group Mailbox...

Page 142: ...your Group Mailboxes When a mailbox is nearly full 5 Min appears and when it is full Full appears next to that Group Mailbox as shown in Figure 176 Delete messages to make more room The optional Cordl...

Page 143: ...e next set of soft keys If this key appears there are more than eight soft keys available More 1 3 indicates that you are on page one of three Initiates Message Forward function Deletes all messages P...

Page 144: ...Messages If you have access to at least one Group Mailbox and you select New Messages or press MESSAGES a list of Mailboxes to which you have access appears similar to the screen shown in Figure 179 F...

Page 145: ...to messages privately or press to pause message playback to delete the message If there are more messages the next message is highlighted or to jump back or forward in 8 second increments The or navi...

Page 146: ...back or forward in 8 second increments The or navigation key to skip to the previous or next message CANCEL to cancel playback and leave the highlight on the last played message Press f or next or f o...

Page 147: ...age to a Voicemail Distribution List You can also record a message and forward it to a Distribution List If there is at least one Group Mailbox you can forward a message to a Group Mailbox Forwarding...

Page 148: ...ppears See To forward an existing Voicemail message to a Distribution List on page 150 If your system has Group Mailboxes the soft key appears See To forward a Voicemail message to a Group Mailbox on...

Page 149: ...own in Figure 189 appears The forwarded message appears in the recipient s Messages list To forward a message to an extension with the Cordless Handset see Managing Personal Voicemail with the Cordles...

Page 150: ...ges list such as the one shown in Figure 191 3 Highlight the desired message using the or navigation key 4 Press to display the soft keys shown in Figure 191 5 Press to begin the forwarding process Th...

Page 151: ...tribution Lists as shown in Figure 193 7 Highlight the desired list using the or navigation key and then press SELECT 8 Optional Press to record an optional introductory message to append to the begin...

Page 152: ...t of Group Mailboxes as shown in Figure 196 6 Highlight the desired list using the or navigation key and then press SELECT The Forward Message screen appears 7 Optional On the Forward Message screen p...

Page 153: ...igure 198 3 When finished recording press Reaching the 30 second limit automatically stops recording The screen shown in Figure 199 appears You have options to play delete and record the announcement...

Page 154: ...on Lists 1 Press MESSAGES With Voicemail Distribution enabled the screen shown in Figure 200 appears 2 Press The Distribution Lists screen appears as shown in Figure 201 3 Highlight the desired Distri...

Page 155: ...n in Figure 204 appears Reaching the 120 second limit automatically stops recording You have options to and the message again 7 Press to forward the message Press Record to create a message f or distr...

Page 156: ...in Figure 207 b Press to confirm To do this with the Cordless Handset see Managing Personal Voicemail with the Cordless Handset on page 167 Press f or next or f or prev ious message Press f or next o...

Page 157: ...Figure 210 Press f or next or f or prev ious message Press f or next or f or prev ious message Press f or next or f or prev ious message Messages 1 3 Graham Bell 10 17a 232 555 0176 Feb 23 Private 8 0...

Page 158: ...ark the currently highlighted message as new as shown in Figure 212 Press f or next or f or prev ious message Press f or next or f or prev ious message Press f or next or f or prev ious message Messag...

Page 159: ...message while the time or date is playing the message is still considered new To access Voicemail remotely 1 Dial your company phone number 2 After the call is answered enter your extension number 3 I...

Page 160: ...o listen to new messages press 1 To listen to old messages press 2 Once you press 1 or 2 and the messages start playing you have the following options To change Voicemail options press 8 To stop messa...

Page 161: ...ram in Figure 214 you have the following options To record a primary greeting press 1 To record an alternate greeting press 2 To choose the Primary or Alternate greeting press 7 2 Begin recording afte...

Page 162: ...th the optional SB67040 Cordless Handset Voicemail Notification on the Cordless Handset on page 163 Retrieving Personal Voicemail with the Cordless Handset on page 164 Reviewing Voicemail Records with...

Page 163: ...s a personal Voicemail message the Idle screen displays a New MSGs indication as shown in Figure 216 Once the new message is reviewed in the Voicemail records the Handset updates the Idle screen notif...

Page 164: ...in Figure 217 appears OR When New MSGs is highlighted press SELECT to play new Personal Messages The New Message Review screen appears as shown in Figure 218 2 Press to begin playing the Voicemail see...

Page 165: ...essage progress bar indicates how much of the message has played The message timer displays the remaining time in seconds of message playback Press SPEAKER to hear message playback through the speaker...

Page 166: ...Voicemail with the Cordless Handset on page 167 If a message is playing message playback stops Press to return to Idle mode To do this with the Deskset see Message Playback on page 145 For outside pho...

Page 167: ...a Press 1 The screen shown in Figure 222 appears b Press to confirm Press to cancel To delete the selected message press 2 The screen shown in Figure 223 briefly appears to confirm that the message ha...

Page 168: ...n press SELECT OR Use the dial pad to find the desired entry by name See Deskset Dial Pad Entry on page 28 Once you have selected the destination appears as shown in Figure 227 MESSAGES 1 13 Graham Be...

Page 169: ...xtension The confirmation screen shown in Figure 228 appears confirming that the message has been forwarded The Handset returns to the same message screen as shown in Figure 229 EXIT PLAY MESSAGES 1 1...

Page 170: ...ing New Missed Calls in the Idle screen and pressing SELECT You can also access the Call Log with an optional Cordless Handset See Accessing the Call Log with the Cordless Handset on page 179 Call Log...

Page 171: ...ials the highlighted entry Moves to the next set of soft keys If this key appears there are more than eight soft keys available More 1 3 indicates that you are on page one of three Stores number in yo...

Page 172: ...shown in Figure 231 To display the New Missed Calls list as shown in Figure 232 highlight New Missed Calls and press SELECT In the New Missed Calls list a call record is no longer considered new once...

Page 173: ...emove a 1 Press the or navigation key to view the dialing options The following dial options are available nnn nnnn 7 digits 1 nnn nnnn 8 digits nnn nnn nnnn 10 digits 1 nnn nnn nnnn 11 digits Press t...

Page 174: ...g Group and no one left a message The time and date of the call The Msg Length if the caller left a message Details for Ring Group calls include the Ring Group name When viewing Call Log details you c...

Page 175: ...he dial pad to enter your user password and press SELECT 3 Press while the message is playing to delete the voice message There is a slight delay until the message indicators change 4 When the message...

Page 176: ...skset Dial Pad Entry on page 28 4 Press to store the entry and return to the Call Log shown in Figure 239 5 Press CANCEL to exit the Call Log Call Log 1 7 Graham Bell NEW 9 55a 232 555 0176 Feb 25 Mar...

Page 177: ...42 3 Press CANCEL to exit the Call Log To do this with the Cordless Handset see Deleting Call Log Entries with the Cordless Handset on page 184 Call Log 1 7 Graham Bell NEW 9 55a 232 555 0176 Feb 25 M...

Page 178: ...og To do this with the Cordless Handset see Deleting Call Log Entries with the Cordless Handset on page 184 Call Log 1 7 Graham Bell NEW 9 55a 232 555 0176 Feb 25 Mary Williams 9 55a Unknow n Caller 1...

Page 179: ...Handset on page 184 You can display the entire Call Log shown in Figure 247 on page 180 by pressing You can display the missed calls that you have not yet seen by highlighting Missed Calls in the Idl...

Page 180: ...10 01a UNKNOWN Jan 14 CALL LOG Graham Bell 232 555 0176 NEW Feb 23 9 55a 1 7 EXIT DELETE Current Call Log entry number total number of entries NEW Indicates call was not answered and has not been rev...

Page 181: ...ess SELECT when Missed Calls is highlighted on the Idle screen as shown in Figure 248 Press the or navigation key to scroll through the Missed Call entries as shown in Figure 249 Press to delete the h...

Page 182: ...2 Press the or navigation key to scroll to the desired Call Log entry 3 Press SELECT or PHONE to dial the highlighted Call Log entry If you are accessing the Call Log from Idle mode pressing SPEAKER...

Page 183: ...re 250 on page 182 2 Highlight the desired message using the or navigation key 3 Press OPTIONS to display the Call Log Options screen shown in Figure 251 4 Press 2 to play the message as shown in Figu...

Page 184: ...all Log entries To delete a single Call Log entry Figure 253 Call Log 1 Press to display the Call Log as shown in Figure 253 2 Highlight the desired message using the or navigation key 3 Press The hig...

Page 185: ...IONS to display the Call Log Options screen shown in Figure 254 3 Press 1 or SELECT to display the Delete All Confirmation screen as shown in Figure 255 Press to delete all Call Log entries Press to r...

Page 186: ...optional overhead paging OHP system you may be able to page through loudspeakers If the OHP is a single zone paging system it is included when you page All Extensions The single zone OHP may also be i...

Page 187: ...screen appears as shown in Figure 257 2 Select All Extensions or a Paging Zone 3 Press The system emits a short paging tone and displays the Page screen as shown in Figure 258 on page 188 4 Speak int...

Page 188: ...sage or playing or recording a name or greeting do not receive pages Press the VOL or VOL keys to adjust the volume This volume setting affects current and future incoming pages only Lifting the hands...

Page 189: ...ng 1 From Idle or from a held call press as shown in Figure 256 on page 187 It may be necessary to first press from Idle or to press then from Hold The Paging Zones screen appears as shown in Figure 2...

Page 190: ...ld The Paging Zones screen appears as shown in Figure 261 2 Select Overhead Paging 3 Press The system displays the multi zone Overhead Page screen as shown in Figure 262 If necessary enter the desired...

Page 191: ...ars b Press 2 to begin the page The screen shown in Figure 264 appears OR From the Parked Call list Press to begin the page The Handset originating the page emits a single short tone for half a second...

Page 192: ...eskset and SB67040 optional Cordless Handset using the following menus and features Deskset Menu on page 193 Deskset Settings on page 194 User Settings on page 198 Setting and Changing a User Password...

Page 193: ...u See User Settings on page 198 for further instructions Press 3 to display the Admin Settings menu See Setting and Changing a User Password on page 216 for further instructions Press 4 to display the...

Page 194: ...nu appears as shown in Figure 267 Table 16 Deskset Settings Menu Structure Example Screen Function Submenu Figure 267 Deskset Settings Menu 1 Display on page 195 1 Contrast 1 9 2 Backlight Lo Hi Off 2...

Page 195: ...isplay menu shown in Figure 268 Press 1 to set the desired Contrast level Press the or navigation key to adjust the level from 1 to 9 The default is 5 Press 2 to set the desired Backlight level Press...

Page 196: ...the volume to zero Press 2 on the dial pad to set the Audible Ring Delay from 0 to 40 seconds Press the or navigation key to select one of the delay values The default is 0 which also disables the fe...

Page 197: ...ccess the Preferred Audio menu Figure 270 Preferred Audio Menu 1 Press MENU then 1 and then 3 to access the Preferred Audio menu shown in Figure 270 2 Select the preferred audio Press 1 to select the...

Page 198: ...ard All and Call Forward No Answer on page 202 Call Appearance mode only Call Fwd All Target Mailbox Phone Ext to Mailbox to Phone to Ext 3 Automatic Answering on page 204 Call Appearance mode only Au...

Page 199: ...User Password screen shown in Figure 274 appears Enter your password and press SELECT To correct errors use the key To cancel your changes on that screen press at any time The Deskset will return to t...

Page 200: ...ord a new Primary or Alternate greeting see Recording a Greeting on page 201 2 Press to save the greeting The system checks to see if the selected greeting has been recorded If the greeting has been r...

Page 201: ...eeting If you wish to record the greeting on the corded handset lift the handset 3 To record your greeting press The screen shown in Figure 277 appears 4 Press when you are finished The screen shown i...

Page 202: ...cemail To turn Call Forward All on or off press when the telephone is idle When activated appears in the upper right corner of the display Call Forward All overrides the Call Forward No Answer setting...

Page 203: ...ation key to move to the to Ext field and enter a valid extension number Then press the navigation key to move to the to Phone field and enter a valid phone number It is not necessary to enter a prece...

Page 204: ...ion key to select either or 3 Press the navigation key then the or keys to select the delay before the Deskset automatically answers each call 4 Press to confirm the change The User Settings menu appe...

Page 205: ...MENU then 2 and then 2 to display the Voicemail Memory status screen The Voicemail Memory screen displays the remaining minutes left for recording a message in Voicemail This screen is for information...

Page 206: ...upon entering your name To create a useful recording for incoming callers you should say your name slowly clearly and at a reasonable volume Your system administrator may also recommend that you state...

Page 207: ...ss to review the recorded name 6 Press The Name Recording menu appears Figure 284 Recording in Process Figure 285 Recording Complete Quick Dial 1 Play Rec Personal Name 2 Delete Personal Name Name Rec...

Page 208: ...Press 2 to delete the personal name A confirmation screen appears as shown in Figure 287 3 Press to confirm After you delete your recorded name the Auto Attendant will announce your extension number i...

Page 209: ...ess Handset You can register only one AT T SB67040 Cordless Handset and only one AT T TL7600 Cordless Headset to a Deskset When a Deskset has cordless accessories they are all part of the same extensi...

Page 210: ...Even if the Cordless Handset has been in its charger remove and replace the Cordless Handset right before you press on the Deskset Quick Dial 1 Handset 2 Headset Not Registered Cordless Settings Not...

Page 211: ...d the Registration in progress screen appears on the Cordless Handset as shown in Figure 291 When registration is complete Cordless Handset is currently Registered appears on the Deskset and the Hands...

Page 212: ...Registration screen shown in Figure 293 3 Press Registration in Progress appears while the Deskset searches for the Handset 4 When registration is complete Cordless Headset is currently Registered ap...

Page 213: ...n 1 to deregister the Cordless Headset 2 Press 1 to display the Cordless Handset Registration menu shown in Figure 294 3 Press The confirmation message shown in Figure 295 appears 4 Press to confirm d...

Page 214: ...n 5 The Deregister Setting screen appears as shown in Figure 297 2 Press 4 for Deregister The Deregister Confirmation screen appears as shown in Figure 298 3 Press To deregister the Cordless Headset a...

Page 215: ...red cordless accessory startup screen The Handset displays Registration Failed if the process times out If the registration process times out on the Deskset it displays Registration Failed and returns...

Page 216: ...gits To correct errors press or to start over press Press the navigation key and enter the new password again To accept the change press The Password Saved screen appears then the User Settings menu a...

Page 217: ...see the Synapse Administrator s Guide downloadable at www telephones att com synapseguides Menu Quick Dial 1 Deskset Settings 2 User Settings 3 Admin Settings 4 Deskset Information Use or to scroll t...

Page 218: ...se the WebUI To display Deskset Information Figure 302 Deskset Information 1 Figure 303 Deskset Information 2 1 Press MENU and then 4 to display the Deskset Information screen shown in Figure 302 The...

Page 219: ...o Idle mode at any time 3 Press to turn DND off disappears from the top right of the display DND DND DND CallFw d Page More 1 2 Quick Dial 12 30PM Thu Feb 25 2010 2 New Missed Calls 5 New Messages Pre...

Page 220: ...to set the Auto Attendant s response to incoming calls Press 1 to follow the scheduled times Press 2 to use the Day menu Press 3 to use the Lunch menu Press 4 to use the Night menu Press 5 to turn off...

Page 221: ...set up the Cordless Handset Setting Cordless Handset Contrast on page 222 Setting the Cordless Handset Sounds on page 223 Using the VOLUME key to set the Cordless Handset Ringer and Voice Volume on p...

Page 222: ...menu shown in Figure 309 2 Press 1 to display the Contrast screen shown in Figure 310 3 Press the or navigation key to adjust the contrast until the desired level is reached 4 To accept the changes y...

Page 223: ...as it is adjusted You can also alter the ringer volume in the Idle mode by pressing the Handset volume control To choose one of nine ringtones press the navigation key once to highlight Ringtone To se...

Page 224: ...When not on an active call Press VOLUME to increase the ringer volume OR Press VOLUME to decrease the ringer volume A screen similar to the one shown in Figure 313 appears The example shows the volume...

Page 225: ...evels If you are using the speakerphone the speakerphone volume is adjusted To reset the Handset to default settings factory defaults Figure 316 Settings Menu 1 Press OPTIONS then 5 to display the Set...

Page 226: ...Settings menu shown in Figure 316 2 Press 5 to display the Product ID screen shown in Figure 318 This page displays the Handset s identification information including serial number model number softwa...

Page 227: ...erface WebUI that resides on the Deskset After you log in to the WebUI you can configure the following features Accessing the Web User Interface WebUI on page 228 Basic Settings on page 231 Extension...

Page 228: ...2 Press 4 to display Deskset Information 3 Find your IP Address as highlighted in Figure 319 4 Open an Internet browser on your computer AT T recommends Internet Explorer 7 or higher The PC must be on...

Page 229: ...extension number Unless you have created a password leave the password blank 8 Click You can create or change your user password once you are logged in The system displays the Basic Settings page sho...

Page 230: ...elds and click the page is not saved The WebUI displays an error message at the top of the page The field with the incorrect value is highlighted in yellow as shown in Figure 322 You can view a more d...

Page 231: ...Name which the system administrator enters is displayed on internal calls In Call Appearance mode callers using the Auto Attendant can search for your Extension Name to reach your extension 1 Configur...

Page 232: ...l calls click the Call Forwarding Off button You can set Auto Answer to have your Deskset automatically answer calls after a specified time Set the delay here and turn the feature on or off from the D...

Page 233: ...al list on the Deskset that is only available from your extension To add an entry to the Extension Directory Figure 325 Extension Directory Figure 326 Add Extension Directory List 1 In the Navigation...

Page 234: ...Edit Extension Directory List 1 In the Navigation Menu at left click Extension Directory to display the page shown in Figure 328 2 Click Edit next to the entry to be edited The Edit Extension Director...

Page 235: ...entries by last name click The button then changes to This action only works during the current session The sort order reverts to listing the names by first name when you log in the next time To dele...

Page 236: ...f any that must be dialed first to indicate this is an outside call To edit or delete an entry type over the entry 3 To save the entries click or to reject the changes click 4 Press the key to the rig...

Page 237: ...s MESSAGES to access your Voicemail See Accessing Your Messages on page 144 To enable and disable Voicemail Distribution Lists Figure 333 Enable Voicemail Distribution Lists Figure 334 Disable Voicema...

Page 238: ...own in Figure 335 appears 3 Enter a Name for the Voicemail Distribution List 4 Assign Distribution List Members Select one or more extensions from the Available Extensions list and click OR Select one...

Page 239: ...Click for the Distribution List you want to edit The page shown in Figure 336 appears 3 Edit the Distribution List Name as needed 4 Assign Distribution List Members Select one or more extensions from...

Page 240: ...access WebUI Help Figure 337 WebUI Help Figure 338 WebUI Help Sample 1 In the Navigation Menu at left click Help A PDF Help file opens The page shown in Figure 337 appears 2 To view a topic click the...

Page 241: ...on page 260 PC Deskset Interaction on page 261 Calls Generally on page 246 Incoming Calls on page 250 Outgoing Calls on page 252 Voicemail on page 255 Other Deskset Features on page 257 SB67040 Cordle...

Page 242: ...e another power outlet Verify that the DC plug is plugged into the power jack on the device The system devices are not immediately active when powered up and after a power interruption Allow at least...

Page 243: ...has power When removed from the charger the Handset screen is lit for about 30 seconds When removed from the charger the Headset emits a dial tone or three beeps when you press ON OFF If there is no p...

Page 244: ...e Gateway is failing to synchronize with a Deskset configured for a different system configuration Always disconnect the LAN cable before restoring factory defaults by pressing the RESET button more t...

Page 245: ...ithout the network cable connected Use a paper clip to press and hold the reset switch for more than five seconds The device software version is different than the rest of the system Ask your system a...

Page 246: ...es were made to your extension while you were on a call that call is dropped Deskset cannot make or receive phone calls Putting the T1 Gateway into loopback test mode prevents phone calls from occurri...

Page 247: ...t switches that carry traffic at a nominal rate of 100 Mbit s The office network infrastructure should use Cat5 wiring Do not connect a network server PC to the PC port on the Deskset Make sure the ne...

Page 248: ...ear in the top right corner of the screen while in Idle mode Ensure that a valid extension number has been entered as a destination extension Confirm that the Call Forward All Target is set to You are...

Page 249: ...if any that must be dialed first for an outside call Call Appearance mode only Confirm that the Call Forward All Target is set to On the Deskset press MENU 2 2 Check that forwarding to an outside phon...

Page 250: ...irected to a Ring Group or Call Queue that you are not part of Calls may also be redirected via DID numbers and Trunk Routing The ringer volume is too low or a ring delay is set Press the VOL key to i...

Page 251: ...em administrator to assign a DID number to your extension and ask people whose calls you want auto answered to dial your DID number Caller ID is not working The display shows and a digit for the name...

Page 252: ...u cannot make calls to an outside number An outside phone number cannot be accessed through the Gateway Ensure that you enter a 9 or whatever digit if any that must be dialed first for an outside call...

Page 253: ...n the extensions take precedence In other words dialing 411 calls extension 411 not the 411 directory service 911 cannot be assigned as an extension number Consult your system administrator Ensure tha...

Page 254: ...cessories User s Guide DDNs Directory Dial Numbers do not dial out properly from the Call Log This system does not support DDN DDNs in the Call Log are treated like all other caller ID phone numbers S...

Page 255: ...this feature off will not be in the top right corner of the Deskset display To set the Call Forward All target log in to the WebUI On the Basic Settings page set the Target Type to Voicemail Then clic...

Page 256: ...Group Mailbox changed spontaneously Group Mailboxes are accessed by multiple users None Group Mailboxes are accessed by multiple users Messages can be marked as old or deleted by other users The syst...

Page 257: ...ting Call Appearance mode only The selected Deskset is set up to forward all calls Select a different Deskset on which to record the greeting Disable the call forwarding on the selected Deskset Press...

Page 258: ...ite over an existing entry a Log in to the WebUI and click Quick Dial Keys b Edit the Quick Dial entries c Click Your SB67030 031 Deskset has been configured for Call Queue The Quick Dial key and Quic...

Page 259: ...ut the Deskset still indicates it is registered Deregister the Cordless Handset on the Deskset On the Deskset press MENU 2 6 If the Handset is registered the screen indicates 1 Handset Registered Pres...

Page 260: ...e information Ensure that there is an Ethernet cable attached to Network port on the Deskset and to the LAN If a PC at the same workstation is sharing the LAN connection attach an Ethernet cable to yo...

Page 261: ...e limited to 100 Mbits s Use separate Ethernet connections for the Deskset and the computer so that the computer can take advantage of the network s greater bandwidth Your PC which is connected to the...

Page 262: ...the charger s AC power outlet has power such as plugging in some other AC device If nothing works contact an electrician or use another power outlet If the battery is completely depleted it can take u...

Page 263: ...te that it is registered but the Deskset indicates that it is not registered Deregister the Handset at the Handset Press OPTIONS 5 4 Register the Handset at the Deskset Press MENU 2 6 1 The Synapse sy...

Page 264: ...isplay Turn this feature off by using the Deskset Idle screen soft keys If the Handset does not ring for an incoming call press Volume on the side of the Handset to increase ringer volume Incoming cal...

Page 265: ...tered Sometimes when you deregister a Cordless Handset from the Deskset the Deskset does not reflect the Cordless Handset s new unregistered status Deregister the Handset then reregister the handset a...

Page 266: ...Handset press OPTIONS 5 4 b On the Deskset press MENU 2 6 1 Caller ID is not working Your organization does not subscribe to this service Caller ID is a subscription service You must subscribe to this...

Page 267: ...ing The network is down Verify that your office network is active and that your Deskset has power Ensure that the Ethernet cable is securely plugged into the network port beneath your Deskset labeled...

Page 268: ...uch as televisions microwaves or other cordless devices including other Handsets The Deskset audio is poor Check audio quality on the Deskset If a problem exists contact your system administrator Your...

Page 269: ...eadset into the charger 4 Wait for the ON OFF light on the Headset to display a blue light indicating that the Headset was able to reestablish its connection with the Deskset Allow up to one minute fo...

Page 270: ...OFF on the Headset or HEADSET on the Deskset to turn on the Headset Replace the Headset battery The TL7600 Headset registration is not working The Headset and the Deskset are not communicating with ea...

Page 271: ...dset cannot communicate with Deskset Verify that the Deskset can make outside calls For more information see Outgoing Calls on page 252 You may be out of range of the Deskset move closer At the Deskse...

Page 272: ...stered b If a Headset is registered it may not be yours Deregister your Headset from the Deskset and ask all users in the vicinity to deregister their Headsets At a Deskset press MENU 2 6 2 Call Appea...

Page 273: ...OL MUTE VOL VOL MUTE You cannot identify or locate the Deskset that the Headset is registered to If the Headset is registered to an unknown Deskset which has AC power you must carry the Headset out of...

Page 274: ...t and Accessories User s Guide APPENDIXES Appendix A Soft Keys The Synapse Desksets and Cordless Handsets feature keys below the LCD screen The bottom of the LCD displays the appropriate label for eac...

Page 275: ...essages Initiates a conference call Confirms that DND is on Deletes multiple records Deletes a record Removes an extension destination when forwarding a Voicemail message Deletes the highlighted Voice...

Page 276: ...ndicates page one of two Moves to the next set of soft keys If this key appears there are more than eight soft keys available More 1 3 indicates page one of three Marks an old message as new Creates a...

Page 277: ...a three way conference Exit from the current screen and return to the previous mode Access the Extension list Silence the incoming call and place it in the Handset Call Deck Complete the conference s...

Page 278: ...n and IC Industry Canada Actual operating range might vary according to environmental conditions at the time of use Voice Channels Deskset Cordless Handset Cordless Headset 5 Size Cordless Handset 6 9...

Page 279: ...nstall the equipment near a sink bathtub or shower Electrical Storms Electrical storms can sometimes cause power surges harmful to electronic equipment For your own safety exercise caution when using...

Page 280: ...rest on the power cord Do not install this product where the cord may be walked on Never push objects of any kind into this product through the slots in the unit because they may touch dangerous volt...

Page 281: ...uct If the product has been exposed to rain or water If the product does not operate normally when following the operating instructions Adjust only those controls that are covered by the operating ins...

Page 282: ...od materially defective PRODUCT During the Limited Warranty period the manufacturer s authorized service representative will repair or replace at the manufacturer s option without charge a materially...

Page 283: ...roblem experienced is caused by signal conditions network reliability or cable or antenna systems or PRODUCT to the extent that the problem is caused by use with non AT T accessories or PRODUCT whose...

Page 284: ...any further repair activity You must pay for the cost of repair and return shipping costs for the repair of products that are not covered by this limited warranty 6 What must you return with the PROD...

Page 285: ...state to state or province to province Limitations Implied warranties including those of fitness for a particular purpose and merchantability an unwritten warranty that the PRODUCT is fit for ordinary...

Page 286: ...e Synapse system It also provides Group Mailboxes to allow different people to access the same Mailbox Auto Answer When the system is in Call Appearance mode you can set the Deskset to automatically a...

Page 287: ...l Office An office to which subscriber home and business lines are connected The central office has switching equipment that can switch calls locally or to long distance carrier phone offices CPT Call...

Page 288: ...queries against its database DSL Digital Subscriber Line High speed Internet service through your telephone line Telephone lines with DSL service require DSL filters to separate the telephone and dat...

Page 289: ...to the Synapse system G 711 A digital fax protocol Gateway A network device equipped for interfacing with another network that uses different protocols greeting preset The voice message that plays to...

Page 290: ...and other network services over the traditional circuits of the public switched telephone network IT Controller Part of a computer network infrastructure that connects different parts of the network s...

Page 291: ...ok Indicates that you are on a phone call have lifted the corded handset or have pressed SPEAKER or HEADSET to answer a call or to prepare to place a call You are off hook from the moment that you hea...

Page 292: ...elephone Network The world s telephone network Quick Dial Provides two touch dialing for frequently called phone numbers quota The maximum recording time for a Group Mailbox reboot Restart a device Re...

Page 293: ...stem configurations This system administrator can be an employee or your telephone equipment provider System Directory see System list System list This list of names and phone numbers is created and m...

Page 294: ...mmunications over IP networks such as the Internet or other packet switched networks Other synonymous terms include IP telephony Internet telephony Voice Over BroadBand VoBB broadband telephony and br...

Reviews: