4 of 6
QUICK START GUIDE:
T-10 Glass Touchscreen
Software Installation
ComposerTM is the software that provides real-time set-up
and control of the T-10 Glass touchscreen from a
Windows PC environment.
Use the following procedure to install ComposerTM on
your computer
1. Download the Composer™ software installer from the
Symetrix web site (https://www.symetrix.co).
2. Double-click on the downloaded file and follow the on-
screen directions to install.
After installing the software, refer to the Help File for full
connection and configuration information.
Network Setup
About DHCP
T-10 Glass touchscreen boots with DHCP enabled by default.
This means that as soon as you connect it to a network, it will
look for a DHCP server in order to obtain an IP address. If a
DHCP server is present, T-10 Glass touchscreen will obtain an
IP address from it. This process may take several minutes. With
your PC attached to the same network, and thus getting its IP
address from the same DHCP server, all will be ready to go.
If your network does not have a DHCP server, T-10 Glass
touchscreen will not be able to obtain an IP address. While
waiting, T-10 Glass touchscreen will default to a private IP
address in the range of 169.254.x.x where x.x is the last four
alphanumeric characters of T-10 Glass touchscreen’s MAC
address (MAC address hex value is converted to decimal for IP
address). T-10 Glass touchscreen’s MAC address can be found
on a sticker on the bottom of the hardware.
When there is no DHCP server present to assign IP addresses
to the T-10 Glass touchscreen, or your PC, you may need to
configure your PC with a static IP in the range of 169.254.x.x
with a Subnet Mask of 255.255.0.0 in order to communicate
with T-10 Glass touchscreen in a direct connect mode.
However, if your PC is using the default network settings, it
should also have automatically self-assigned a similar private IP
address in the range of 169.254.x.x, and if this is the case, you
should be able to connect to T-10 Glass touchscreen directly.
Even if the PC’s default settings have been changed, T-10
Glass touchscreen will try to establish communications by
setting up appropriate routing table entries to reach devices with
169.254.x.x addresses.
Connecting to T-10 Glass from a host computer
on the same LAN
The T-10 Glass and the host computer require the following
3 items:
1. IP Address - The unique address of a node on a network.
2. Subnet Mask - Configuration that defines which IP addresses
are included in a particular subnet.
3. Default Gateway (optional) - The IP address of a device that
routes traffic from one subnet to another. (This is only needed
when the PC and T-10 Glass are on different subnets).
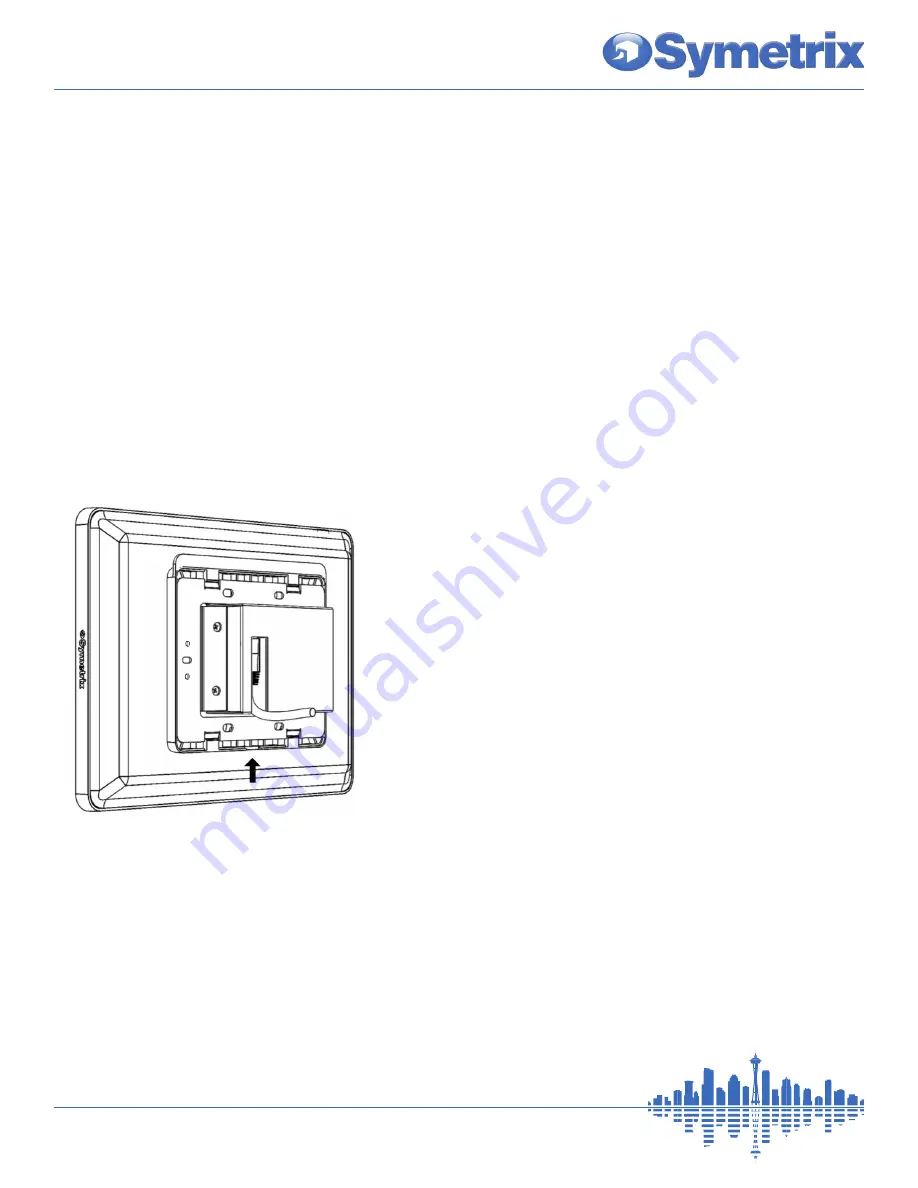
Connect the CAT5/6 cable to the T-10 Glass touchscreen.
3.
Align and gently press the T-10 unit onto the wall mount
bracket by first hooking the snaps on the touchscreen rear
panel onto the top tabs of the wall bracket. Then press the
bottom of the touchscreen enclosure to snap the bottom
hooks onto the tabs of the wall bracket. Ensure the device
is seated and flush to the tabletop stand.
4.
To remove the T-10 Glass from the universal wall mount
bracket, insert a pry-tool (e.g. flat head screwdriver)
between the universal wall mount bracket and the support
bracket. Gently twist/rotate the tool from one side to the
other to disengage the tabs on support bracket from the
flanges on the wall mount bracket.
5.
www.symetrix.co
| +1.425.778.7728
PN 53-0088 Rev A 05/22


