2-5
Setting Up the iPOS TX System
USB Installation
The iPOS TX connects to a powered or unpowered USB-enabled host device.
Unpowered USB Installation
To install the iPOS TX:
1. Shut off power on the host device.
2. Insert the Type B connector of the USB cable into the USB port on the back of the
iPOS TX.
3. Insert the Type A connector of the USB cable into the USB port on the host device.
4. If using the HDB15/DB9 serial cable, plug the 15-pin connector of the cable into the
serial port of the iPOS TX, and the 9-pin connector into the host. Insert the
connector on the AC power adapter cable into the port on the back of the serial
cable’s 9-pin connector (DB9).
If using the DB15 Power Adapter, insert this adapter into the serial port of the iPOS
TX, and plug the connector of the AC power adapter cable into the socket on the
back of the DB15 Power Adapter.
5. Connect the end of the AC adapter to a standard 120V, 60 Hz AC power outlet.
6. Turn on the host device. The iPOS TX autoconfigures to USB.
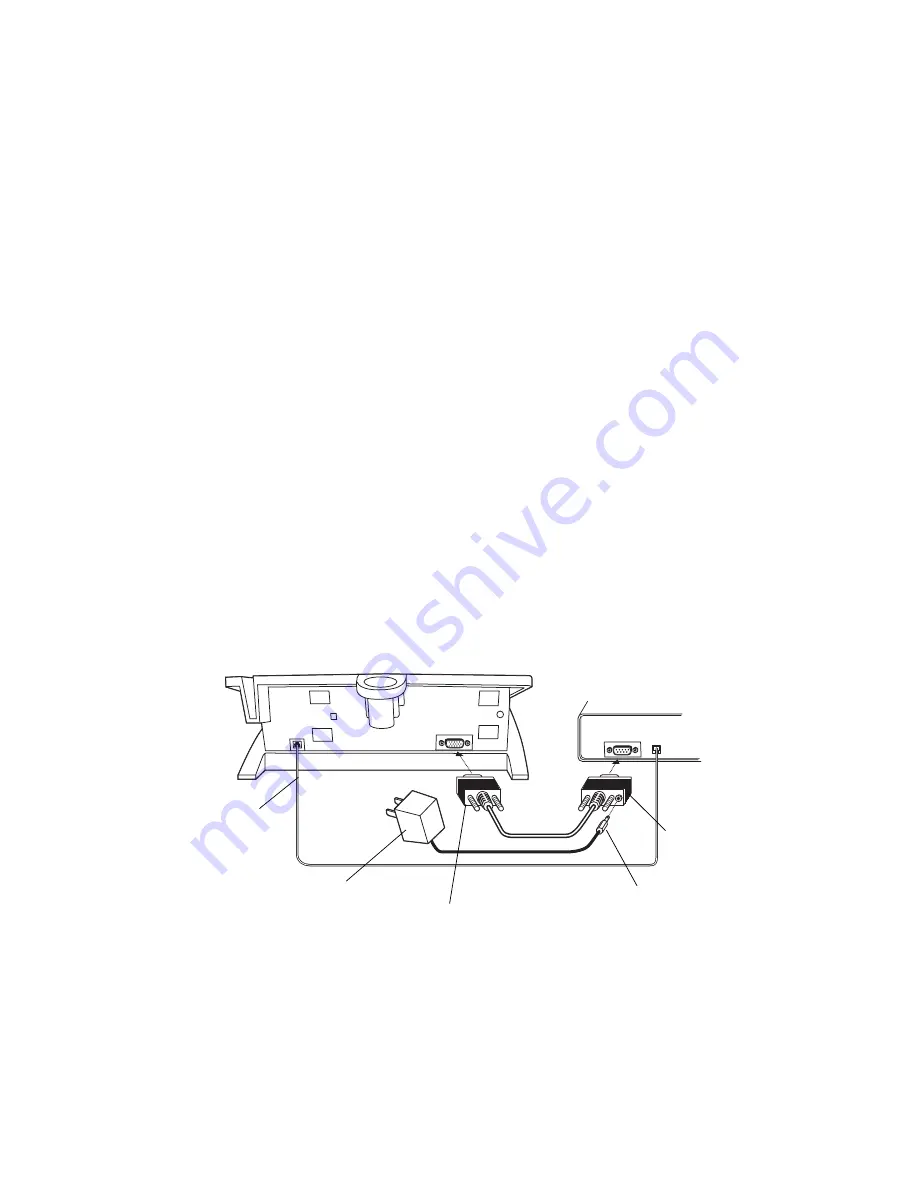
Figure 2-3. Unpowered USB Configuration
iPOS TX
AC Power Adapter
Power Adapter
Connector
HDB15 Connector
DB9
Connector
POS Host Device
USB Cable
Summary of Contents for iPOS TX
Page 1: ...iPOS TX Product Reference Guide...
Page 2: ......
Page 3: ...iPOS TX Product Reference Guide 72 61856 01 Revision A July 2003...
Page 12: ...x iPOS TX Product Reference Guide...
Page 16: ...1 4 iPOS TX Product Reference Guide...
Page 26: ...2 10 iPOS TX Product Reference Guide...
Page 50: ...3 24 iPOS TX Product Reference Guide...
Page 56: ...Index 4 iPOS TX Product Reference Guide...
Page 58: ......
Page 59: ......


