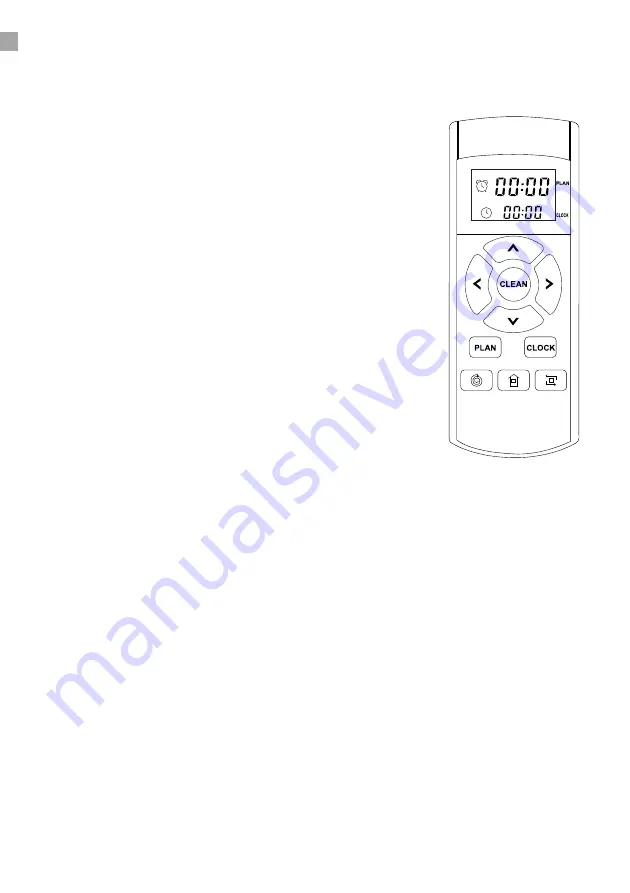
PRODUCT DIAGRAM
5
Remote control
Note:
• Install two AAA type batteries into the remote.
• Take out the batteries if the remote control is not used for long time.
1. Button ,,CLEAN”
Press this buttot to start cleaning in selected mode.
Press this button to make the robot stop when it’s cleaning.
2. Directional buttons
A. Button “
▲
”
Press this button to increase number in scheduling or clock mode. Press
this button to make robot move forward in selected mode or make robot
stop when robot is moving forward.
B. Button “
▼
”
Press this button to decrease number in scheduling or clock mode. Press to
make robot move backward for little step in selected mode.
C. Button “
◄
”
Press this button to exchange from minute to hour in scheduling or clock
mode. Press this button to make robot turn left.
D. Button “
►
”
Press this button to exchange from hour to minute in scheduling or clock
mode. Press this button to make robot turn right.
3. Button ,,PLAN”
Press this button to enter scheduling mode when in selected mode. Press
this button to confirm scheduling in scheduling mode.
4. Button ,,CLOCK”
Press this button to enter clock mode when in selected mode. Press this
button to confirm clock setting in clock mode.
5. Button ,,SPIRAL”
Press this button to make robot start spot cleaning.
6. Button ,,HOME”
Press this button to return robot to charging home base.
7. Button ,,EDGE”
Press this button to make robot clean along wall.
Summary of Contents for D410
Page 2: ......
Page 15: ...www symbo eu RECYKLACE A LIKVIDACE 12 ...
Page 16: ......
Page 29: ...www symbo eu RECYKLING I LIKWIDACJA 12 ...
Page 30: ......
Page 43: ...www symbo eu RECYKLÁCIA A LIKVIDÁCIA 12 ...
Page 44: ......
Page 57: ...www symbo eu RECYCLING AND DISPOSAL 12 ...
Page 58: ......
Page 72: ......
Page 86: ...Poznámky Notatki Poznámky Notes ...
Page 87: ......


