background image

75

Others

Recor

ding

Disc Pla

yback

Editing

Bef

o

re

 y

ou star

t

Connections

Getting star

ted

Others

Espa

ñ

ol

Changing the Setting men

u

Troubleshooting (cont’d)

Language

Code

Language

Code

Language

Code

Language

Code

(Afan) Oromo

6

1

59

Abkhazian

4748

Afar

4747

Afrikaans

4752

Albanian

6563

Amharic

4759

Arabic

4764

Armenian

547

1

Assamese

4765

Aymara

477

1

Azerbaijani

4772

Bashkir

4847

Basque

5

1

67

Bengali;Bangla

4860

Bhutani

5072

Bihari

4854

Bislama

4855

Breton

4864

Bulgarian

4853

Burmese

597

1

Byelorussian

485

1

Cambodian

5759

Catalan

4947

Chinese

7254

Corsican

496

1

Croatian

5464

Czech

4965

Danish

5047

Dutch

6058

English

5

1

60

Esperanto

5

1

6

1

Estonian

5

1

66

Faroese

526

1

Fiji

5256

Finnish

5255

French

5264

Frisian

527

1

Galician

5358

Georgian

5747

German

505

1

Greek

5

1

58

Greenlandic

5758

Guarani

5360

Gujarati

5367

Hausa

5447

Hebrew

5569

Hindi

5455

Hungarian

5467

Icelandic

5565

Indonesian

5560

Interlingua

5547

Interlingue

555

1

Inupiak

5557

Irish

5347

Italian

5566

Japanese

5647

Javanese

5669

Kannada

5760

Kashmiri

5765

Kazakh

5757

Kinyarwanda

6469

Kirghiz

577

1

Kirundi

6460

Korean

576

1

Kurdish

5767

Laothian

586

1

Latin

5847

Latvian; Lettish

5868

Sindhi

6550

Singhalese

6555

Siswat

6565

Slovak

6557

Slovenian

6558

Somali

656

1

Spanish

5

1

65

Sundanese

6567

Swahili

6569

Swedish

6568

Tagalog

6658

Tajik

6653

Tamil

6647

Tatar

6666

Telugu

665

1

Thai

6654

Tibetan

486

1

Tigrinya

6655

Tonga

666

1

Tsonga

6665

Turkish

6664

Turkmen

6657

Twi

6669

Ukrainian

6757

Urdu

6764

Uzbek

6772

Vietnamese

6855

Volapuk

686

1

Welsh

497

1

Wolof

696

1

Xhosa

7054

Yiddish

5655

Yoruba

7

1

6

1

Zulu

7267

Lingala

5860

Lithuanian

5866

Macedonian

5957

Malagasy

5953

Malay

5965

Malayalam

5958

Maltese

5966

Maori

5955

Marathi

5964

Moldavian

596

1

Mongolian

5960

Nauru

6047

Nepali

605

1

Norwegian

606

1

Occitan

6

1

49

Oriya

6

1

64

Panjabi

6247

Pashto; Pushto

6265

Persian

5247

Polish

6258

Portuguese

6266

Quechua

6367

Rhaeto-Romance

6459

Romanian

646

1

Russian

6467

Samoan

6559

Sangho

6553

Sanskrit

6547

Scots Gaelic

5350

Serbian

6564

Serbo-Croatian

6554

Sesotho

6566

Setswana

6660

Shona

6560

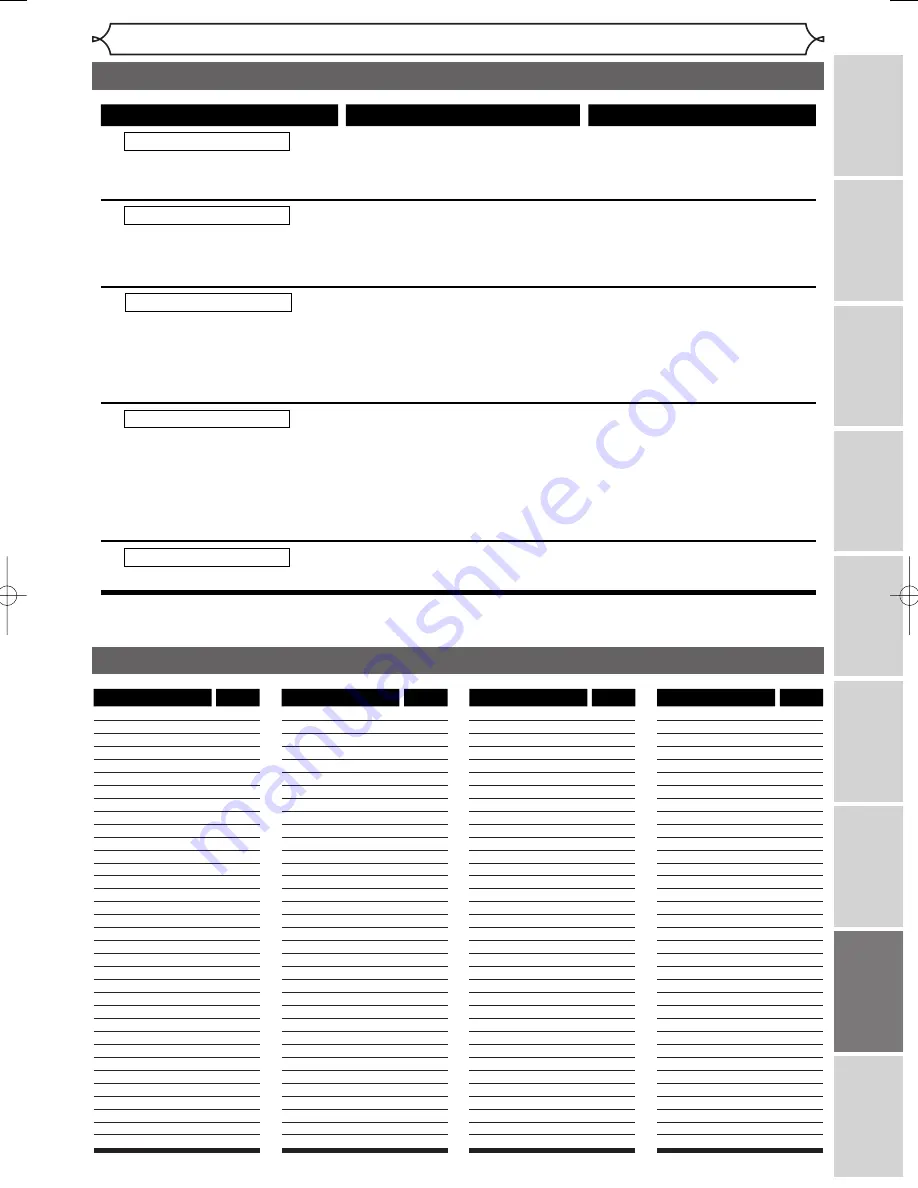
Recording Error

You cannot record more 
than 99 titles on one disc.

Recording Error

You cannot record more than 
999 chapters on one disc.

Recording Error

You cannot record on this disc 
as Control Information is full.

Recording Error

You cannot record on this 
disc as Power Calibration 
Area is full.

Recording Error

This disc is already finalized.

Cause

Error message

Solution

You are trying to record onto the 
disc on which the number of 
recording titles already reached the 
maximum (99). 

You are trying to record onto the 
VR mode DVD-RW disc on which 
the number of recording chapters 
already reached to the maximum 
(999).

This disc has no space to write 
the Control Information when 
recording or deleting contents.

When editing has been repeatedly 
performed, the control Information 
area may become full even if the 
recording area still has enough space.

When recordings are performed 
repeatedly onto an unstable disc, 
this area may become full.

Every time you insert a disc for 
recording, the disc's working area 
will be taken up.  And if you repeat 
this frequently, it will be used up 
sooner and you may not be able to 
record full 99 titles.

You are trying to record onto 
the disc already finalized.

Delete unnecessary titles 
(pages 52, 55).

This unit cannot delete the original
chapter. Delete unnecessary chapter
marker using other DVD recorders.

Delete unnecessary titles from the 
Original list (page 55).

Delete unnecessary titles 
(pages 52, 55).

Insert a new disc.

Undo finalizing of the disc 
(page 35).

(The maximum is 99)

(The maximum is 999)

Language code

* If you are still having trouble with the unit after checking Troubleshooting, write down the error code and the error

description, and call our help line mentioned on the front page to locate an Authorized service center.

E6701UD_ENSP.qx3  05.4.26 12:02  Page 75

Summary of Contents for DVR95DF

Page 1: ...le ReWritable The number inside the globe refers to region of the world This unit can play DVDs that are labeled for ALL regions or for Region 1 Q Q Q Qu u u ui i i ic c c ck k k k G G G Gu u u ui i i id d d de e e e DVR95DF Example of aTV 1 Switch the input selector on your TV to an appropriate external input channel usually near channel 0 2 Hit a button on the TV s original remote control see th...

Page 2: ...OSE TIMER PROG 1 2 3 4 5 6 7 8 9 A CH ABC DEF GHI JKL MNO PQRS TUV WXYZ You can set up to 8 programs once daily or weekly Be sure to set the clock before starting a timer programming Timer Programming display appears Select any blank line and hit ENTER DISPLAY SETUP TOP MENU MENU LIST REPEAT CLEAR 7 8 9 SPACE 0 ENTER RETURN PQRS TUV WXYZ B K L Timer Programming 2 3 4 5 6 7 8 1 Date Start End CH Sp...

Page 3: ...EO AUDIO VIDEO RF Modulator commercially available In this case follow the instructions below 1 The antenna input jack of your TV may have been already occupied If so disconnect the RF cable from your TV and then connect the RF cable to the ANTENNA IN jack of this unit 2 Connect the ANTENNA OUT jack of this unit to your RF Modulator usually marked ANT IN by the RF cable 3 Connect your RF modulator...

Page 4: ...ular installation If this equipment does cause harmful interference to radio or television reception which can be determined by turning the equipment off and on the user is encouraged to try to correct the interference by one or more of the following measures 1 Reorient or relocate the receiving antenna 2 Increase the separation between the equipment and receiver 3 Connect the equipment into an ou...

Page 5: ...s at plugs convenience receptacles and the point where they exit from the appliance 13 Outdoor Antenna Grounding If an outside antenna or cable system is connected to the product be sure the antenna or cable system is grounded so as to provide some protection against voltage surges and built up static charges Article 810 of the National Electrical Code ANSI NFPA No 70 provides infor mation with re...

Page 6: ...ense heat Avoid dusty or humid places Avoid places with insufficient ventilation for proper heat dissipation Do not block the ventilation holes on the sides of the unit Avoid locations subject to strong vibration or strong magnetic fields Avoid the Hazards of Electrical Shock and Fire Do not handle the power cord with wet hands Do not pull on the power cord when disconnecting it from AC wall outle...

Page 7: ...ion Do not use solvents such as benzine thinner commercially available cleaners detergent abrasive cleaning agents or antistatic spray intended for analogue records CLEANINGTHE DISC LENS If this unit still does not perform properly although you refer to the relevant sections and to TROU BLESHOOTING GUIDE in this Owner s Manual the laser optical pickup unit may be dirty Consult your dealer or an Au...

Page 8: ...ing 72 Language code 75 Glossary 76 Frequently Asked Questions 76 Specifications 77 Español 78 Before you start 2 Precautions 2 Table of contents 6 Features 7 Functional overview 8 Installing batteries in the remote control 10 Using a remote control 10 DISPLAYS 10 On screen displays 10 Front panel display 12 Connections 13 Connection to a TV 13 Connection to a cable box or satellite box 14 Connect...

Page 9: ...rding Quick search for what you want to watch You can easily find the part you want to watch using the search function Search for a desired point on a disc by title chapter or time Start Playback from Original and Playlist You can play back titles from either the Original list or the Playlist Editing Deleting titles You can delete titles which you do not need anymore Making your own Playlist VR mo...

Page 10: ...AUDIO OUT VIDEO OUT L1 IN IN OUT OUT S VIDEO COMPONENT VIDEO OUTPUT L Y PB CB PR CR R DIGITAL AUDIO OUTPUT PCM BITSTREAM COAXIAL 1 2 3 4 5 6 7 8 9 10 11 1 ANTENNA IN jack Use to connect an antenna 2 VIDEO IN jack LINE1 Use to connect external equipment with a standard video cable 3 VIDEO OUT jack Use to connect a TV monitor AV receiver or other equipment with a standard video cable 4 AC Power Cord...

Page 11: ...reen 3 Number buttons Hit to select channel numbers Hit to select a title chapter track on display Hit to enter values for the settings in the Setting menu 4 DISPLAY button Hit to display the on screen menu 5 TOP MENU button Hit to display the top menu 6 MENU LIST button Hit to display the Disc menu To change ORIGINAL and PLAYLIST on the TV screen VR mode only 7 Cursor K L B buttons Hit to select ...

Page 12: ...hin 15 Below approx 10 feet 3m within 30 Installing batteries in the remote control Install two AA size batteries supplied to match the polarity as indicated inside battery compartment of the remote control Note Incorrect use of batteries can result in hazards such as leakage and bursting Please follow the instruction below Do not mix new and old batteries together Do not use different kinds of ba...

Page 13: ...t Disc CD Playback Mode is available only when an Audio CD disc or a CD RW R disc with MP3 files is inserted into the unit 1 Title List Playlist Original Turns on a title list playlist or Original which shows the record ed titles on the disc 2 Format DVD RW only Allows you to erase all of the recorded content on the disc The disc will be completely blank Erased content cannot be called back A DVD ...

Page 14: ... DVD RW disc is inserted in the disc tray 3 Recording speed Indicates the recording speed of the disc Display message 4 Title Track and Chapter mark Appears when indicating a title track number Appears when indicating a chapter number 5 Displays the following Playing time remaining time Current title chapter track number Recording time Clock Channel number OTR One touch Timer Recording remaining t...

Page 15: ...ignal or Cable TV signal Connect Connect Connect Connect Disconnect Antenna Antenna Back of this unit Back of TV 3 2 1 4 5 Plug in the AC power cord of this unit 6 Note Connect this unit directly to the TV If the A V cables are connected to a VCR pictures may be distorted due to the copy protection system When Progressive Scan mode is selected no video signal will be output from the VIDEO OUT or S...

Page 16: ...O IN VIDEO RF cable supplied Video cable supplied Audio cable supplied Back of TV Cable TV signal Connect Connect Connect Connect Back of this unit 2 1 3 4 IN OUT Cable box or Satellite box RF cable If your TV is compatible with Progressive Scan 525p 480p and you want to enjoy that high quality picture You must select the connection Method 2 on page 13 and Progressive Scan mode To set the mode pre...

Page 17: ...lly available Dolby Digital decoder MD deck or DAT deck This unit If output is Dolby Digital encoded audio connect to a Dolby Digital decoder Unless connected to a Dolby Digital decoder Connecting to an MD deck or DAT deck Note By hooking this unit up to a Multi channel Dolby Digital decoder you can enjoy high quality Dolby Digital 5 1 channel surround sound as heard in the movie theaters The audi...

Page 18: ...sc that has already been recorded on you can delete those con tents by formatting that disc It is necessary to prepare the disc for recording Details are on pages 26 27 When you format a disc the entire contents on that disc will be erased The unit automatically starts initializing when a brand new disc is inserted DVD disc types DVD RW VR DVD RW Video You want to Record TV programs Reuse by delet...

Page 19: ...es Titles may be further divided into chapters Hint 2 Edit the recorded disc You will find editing discs is easy This unit offers convenient editing functions which are possible only with DVD R RW discs You can edit the following from a title list Putting names on titles Setting pictures for thumbnails Setting clearing chapter markers Deleting titles or scenes Possible editing functions depend on ...

Page 20: ...etting is cancelled during presetting some channels not yet preset may not be received The selection will depend on how you receive the TV channels To cancel the auto presetting during scanning Press RETURN or SETUP to cancel To select a channel You can select a channel by directly entering channel num ber using the Number but tons on the remote control Notes for using the Number buttons When sele...

Page 21: ... the chan nel memory Then the next chan nel number will appear so that you can continue adding or delet ing channels 6 Hit SETUP to exit Manual Preset CH 2 Add Delete Adding deleting channels The channels you no longer receive or seldom watch can be deleted from the memory You can also add channels into memory 1 Hit SETUP in the stop mode Easy Setting Menu or Advanced Setting Menu will appear 2 Us...

Page 22: ...V Audio Select SAP Stereo POWER ZOOM DISPLAY SETUP TOP MENU MENU LIST REC SPEED REC MONITOR REC OTR PAUSE SKIP SKIP PLAY CM SKIP REPEAT OPEN CLOSE TIMER PROG FWD REV CLEAR 1 2 3 4 5 6 7 8 9 SPACE 0 A H G ENTER CH RETURN ABC DEF GHI JKL MNO PQRS TUV WXYZ B C B K L h g F STOP 1 2 3 4 5 6 Notes on TV channel audio If you want to record a TV program available in second audio or stereo on a DVD RW R yo...

Page 23: ...K L select Auto Hit ENTER The setting will be activated If you know the PBS channel number in your area Using K L select Manual Hit ENTER Using the Number buttons or K L enter the PBS channel number Hit ENTER The setting will be activated If you want to set the clock manually and cancel the auto clock setting Using K L select OFF Hit ENTER The auto clock setting will be canceled 6 Hit SETUP to exi...

Page 24: ... time hour minute Press B A cursor will move on AM or PM 6 Press K L to select AM or PM Hit ENTER Clock menu will appear then the settings will be activated Although seconds are not displayed they will be counted from zero 7 Hit SETUP to exit Clock Setting JAN 01 2005 SAT 12 00 AM Clock Setting JAN 01 2005 SAT 12 00 AM Note Your clock setting will be lost if either there is a power fail ure or thi...

Page 25: ...an 16 9 Wide 4 3 Letter Box Note If you have a standard TV Select 4 3 Letter Box so that black bars appear on the top and bottom of the screen Select 4 3 Pan Scan for a full height picture with both sides trimmed If you have a widescreen TV Select 16 9 Wide POWER ZOOM DISPLAY SETUP TOP MENU MENU LIST REC SPEED REC MONITOR REC OTR PAUSE SKIP SKIP PLAY CM SKIP REPEAT OPEN CLOSE TIMER PROG FWD REV CL...

Page 26: ...d Recording speed XP 1H SP 2H LP 4H EP 6H SLP 8H SEP 10H Recording time 18 min 36 min 72 min 108 min 144 min 180 min Video Sound Quality Disc Size 8cm Disc XP 1H SP 2H LP 4H EP 6H SLP 8H SEP 10H 60 min 120 min 240 min 360 min 480 min 600 min 12 cm Disc Disc type Disc format Video mode VR mode Video mode Functions Playback limited recording limited editing Playback recording Original Playlist editi...

Page 27: ...lly or edit DVD RW disc recorded with VR mode can record additionally and edit contents even after you final ized the disc When DVD RW R Video mode is finalized title menu will be created automatically Finalize discs recorded on this unit in order to play them back on other DVD players Disc type format Copy free Copy once Copy prohibited Recordable Not Recordable DVD RW DVD RW VR DVD RW DVD RW Vid...

Page 28: ...0 minutes OFF DVD RW Recording Format VR mode Video mode Video mode DVD Player Compatibility mode VR mode Editing possibility mode Recording Auto Chapter 10 minutes Timer Programming DVD RW Recording Format Video mode Recording Audio Select XP Dolby Digital Auto Finalize DVD RW DVD RW VR DVD RW DVD RW Video Note The recording format setting is effective only for DVD RW discs You cannot change the ...

Page 29: ...R Final confirmation window will appear 5 Using K L select Yes Hit ENTER Formatting will start 6 Formatting is complete 100 will be indicated Formatting 100 Formatting 90 Format No Yes Are you sure Yes No Format No Yes DVD RW DVD RW VR DVD RW DVD RW Video Reformatting a disc Note When you reformat the disc all contents of the disc will be erased If you want to cancel format at step 3 or 4 select N...

Page 30: ... in Video mode 4 Using CH K L or the Number buttons select a desired channel to record 5 Hit REC OTR to start recording I mark will be displayed for 5 seconds Hit PAUSE F to pause Hit REC OTR or PAUSE F to resume 6 Hit STOP C to stop record ing This operation may take a while to be completed I CH 12 XP 0 58 This operation may take a while to be recognized DVD R DVD R DVD RW DVD RW VR DVD RW DVD RW...

Page 31: ...SPEED select a recording speed Refer to Recording speed on page 24 3 Make sure that the recording format is set to the desired mode Refer to Formatting a disc on pages 26 27 When a DVD RW disc is loaded You can choose Video mode or VR mode from the Setting menu Video mode has been selected as the default Refer to page 26 Choosing the recording format of a blank disc When a DVD R disc is loaded DVD...

Page 32: ... SAT FRI SUN L L L L L L L L Timer Programming 2 3 4 1 JAN 01 L1 Date Start End CH Speed Timer Programming 2 3 4 1 Date Start End CH Speed Recording Auto Chapter 10 minutes Timer Programming DVD RW Recording Format Video mode Recording Audio Select XP Dolby Digital Auto Finalize DVD R DVD R DVD RW DVD RW VR DVD RW DVD RW Video POWER ZOOM DISPLAY SETUP TOP MENU MENU LIST REC SPEED REC MONITOR REC O...

Page 33: ...it TIMER PROG to check the timer programming in progress When a Timer Recording is in progress that program will be red highlighted In this case you cannot select any other programs The unit will be turned on automatically before the recording time 9 POWER ZOOM DISPLAY SETUP TOP MENU MENU LIST REPEAT OPEN CLOSE TIMER PROG CLEAR 1 2 3 4 5 6 7 8 9 SPACE 0 A ENTER CH RETURN ABC DEF GHI JKL MNO PQRS T...

Page 34: ...l not be avail able To make these operations available cancel the Timer Recording or timer standby first indicator disappears To cancel the timer standby mode hit POWER When the Start and the End time are the same the length of the recording will be set for 24 hours When the disc reaches at the end during the Timer Recording the unit turns itself off When the programmed Start and End time are earl...

Page 35: ...he input jack type to connect Hit ENTER If you want to use S VIDEO IN select S Video In If you want to useVIDEO IN Composite select Video In Select Video L2 Front Video In L1 Rear S Video In L1 Rear S Video In Video In or Settings for an external source REC OTR REC SPEED OPEN CLOSE CHANNEL REV FWD STOP PLAY POWER S VIDEO VIDEO AUDIO L R Front of this unit Rear of this unit ANTENNA AUDIO IN VIDEO I...

Page 36: ...d This operation may take a while to be recognized DISPLAY SETUP TOP MENU MENU LIST REPEAT CLEAR 1 2 3 4 5 6 7 8 9 SPACE 0 ENTER CH RETURN ABC DEF GHI JKL MNO PQRS TUV WXYZ 4 Setting a disc to protect To prevent accidental recording edit ing or erasing of the titles you can protect them from the Setting menu 1 Hit SETUP in the stop mode Easy Setting Menu or Advanced Setting Menu will appear 2 Usin...

Page 37: ... time peri od for finalization Do not unplug the power cord during finalization Details are on pages 25 1 Hit SETUP in the stop mode Easy Setting Menu or Advanced Setting Menu will appear 2 Using K L select Disc Hit ENTER Disc menu will appear 3 Using K L select Finalize Hit ENTER Confirmation window will appear 4 Using K L select Yes Hit ENTER Finalizing will start 5 Finalizing is complete Finali...

Page 38: ...etting Menu or Advanced Setting Menu will appear If Easy Setting Menu is displayed proceed to step 3 2 Advanced Setting Menu only Using K L select Recording Hit ENTER Option window will appear 3 Using K L select Auto Finalize Hit ENTER Option window will appear 4 Using K L select Disc Full or End of Timer Rec Hit ENTER Option window will appear 5 Using K L select ON Hit ENTER Your setting will be ...

Page 39: ...olor sys tem is NTSC which is used primarily in the United States and Canada This unit uses NTSC so DVDs you play must be recorded in the NTSC system You cannot play back DVDs recorded in other color systems Region codes This unit has been designed to play back DVD discs with Region One 1 DVDs must be labeled for ALL regions or for Region 1 in order to be played back on the unit You cannot play ba...

Page 40: ...When a VR mode disc with Playlist is inserted Playlist is dis played automatically You can change Original or Playlist of VR mode using MENU LIST Video mode VR mode MENU LIST To exit the title menu hit TOP MENU again 6 Using K L B select a desired title Hit ENTER Playback will start 7 Hit STOP C to stop play back To eject the disc hit OPEN CLOSE A to open the disc tray then remove the disc before ...

Page 41: ...SETUP TOP MENU MENU LIST REC SPEED REC MONITOR REC OTR PAUSE SKIP SKIP PLAY CM SKIP FWD REV CLEAR SPACE 0 H G ENTER RETURN B C B K L h g F STOP 1 2 1 In stop mode hit TOP MENU to call up the MP3 menu To exit the menu hit TOP MENU again 2 Press K L to select a desired folder group or track Hit ENTER When selecting track Playback will start When selecting the folder The files in folder will appear P...

Page 42: ... always be active with all DVDs Menus vary among discs Refer to the information accompany ing the disc for details Playing back discs using the title menu Some DVDs have a title menu which lists the titles available on them It helps you to start play back of a specific title 1 Hit TOP MENU The title menu will appear If the feature is not available may appear on the TV screen 2 Using K L B select a...

Page 43: ...20 Normal speed playback x1 5 x20 x5 x40 x40 FWD g REV g REV g REV g REV g REV g REV g FWD g FWD g FWD g FWD g FWD g MP3 MP3 CD CD DVD R DVD R DVD RW DVD RW VR DVD RW DVD RW Video DVD V DVD V Note Forward reverse speed will be indicated with icons as follows Forward Approx Speed x1 5 x20 x40 Reverse Approx Speed x5 x20 x40 REC SPEED REC MONITOR REC OTR PAUSE SKIP SKIP PLAY CM SKIP FWD REV H G B C ...

Page 44: ...REV g REV g REV g REV g REV g FWD g FWD g FWD g FWD g FWD g DVD R DVD R DVD RW DVD RW VR DVD RW DVD RW Video DVD V DVD V Note Forward reverse speed will be indicated with icons as follows Forward Approx Speed x1 16 x1 8 x1 2 Reverse Approx Speed x1 16 x1 8 x1 4 DISPLAY SETUP TOP MENU MENU LIST REC SPEED REC MONITOR REC OTR PAUSE SKIP SKIP PLAY CM SKIP REPEAT FWD REV CLEAR 1 2 3 4 5 6 7 8 9 SPACE 0...

Page 45: ...ion allows you to assign a specific point on a disc to be called back later 1 During playback hit DISPLAY The display menu will appear 2 Using B select icon Hit ENTER Marker setup menu will appear Screen for DVD Screen for CD 3 Using K L select a desired marker number When it reaches the desired point hit ENTER The title track number and the time will be displayed 4 To return to the marker later U...

Page 46: ... the playback reaches the scene recorded 1 minute ago the forwarding playback will automatically return to the normal playback 2 Hit STOP C once to stop playback The resume message will appear Screen for the current recording To cancel the resume hit STOP C once To stop recording hit STOP C again DVD RW 4 5 0 45 10 I Resume ON LP 0 11 CH 12 VR Original DVD RW 4 3 0 23 13 B I VR Original DVD RW DVD...

Page 47: ...QRS TUV WXYZ B C B K L h g F STOP 1 POWER ZOOM DISPLAY SETUP TOP MENU MENU LIST REC SPEED REC MONITOR REC OTR PAUSE SKIP SKIP PLAY CM SKIP REPEAT OPEN CLOSE TIMER PROG FWD REV CLEAR 1 2 3 4 5 6 7 8 9 SPACE 0 A H G ENTER CH RETURN ABC DEF GHI JKL MNO PQRS TUV WXYZ B C B K L h g F STOP 2 2 1 Using DISPLAY 1 During playback hit DISPLAY The display menu will appear 2 Using B select icon Hit ENTER The ...

Page 48: ...When time search is not available 0 00 00 0 00 00 for CD is displayed instead of time count 3 Using K L or the Number buttons enter a desired time to search Hit ENTER Time search will start Audio CD 1 0 00 00 DVD Video 1 1 0 00 00 CD CD DVD V DVD V DVD RW DVD RW VR DVD RW DVD RW Video DVD R DVD R Note Time search is available only in the same track or title 3 2 1 Using DISPLAY 1 During playback hi...

Page 49: ...int A Hit ENTER after setting point A to select the ending point B Track The current track will be played back repeatedly CD MP3 only Group The current group will be played back repeatedly MP3 only Track All Group OFF MP3 1 0 00 00 Track All A B OFF Audio CD 1 0 00 00 Title Chapter A B OFF DVD Video 1 1 0 00 00 MP3 MP3 CD CD DVD R DVD R DVD RW DVD RW VR DVD RW DVD RW Video DVD V DVD V DISPLAY SETU...

Page 50: ...l 09 Program Play 0 00 00 Total CD CD DISPLAY SETUP TOP MENU MENU LIST REC SPEED REC MONITOR REC OTR PAUSE SKIP SKIP PLAY CM SKIP REPEAT FWD REV CLEAR 7 8 9 SPACE 0 H G ENTER RETURN PQRS TUV WXYZ B C B K L h g F STOP 2 3 4 1 Selecting a format of audio and video You can select a desired audio and video format Selections depend on the contents of the disc you are playing back Note Some discs will o...

Page 51: ... between stereo the left channel only and the right channel only 1 During playback hit DISPLAY Display menu will appear 2 Using B select icon Hit ENTER Audio menu will appear DVD Video DVD RW VR mode Audio CD MP3 files 3 Using K L select a desired audio soundtrack or audio channel Hit ENTER DVD Video Audio soundtrack will change DVD RW VR mode Audio channel menu will appear Follow step 4 Audio CD ...

Page 52: ...reduces noise in the playback picture When playing back discs recorded in long time mode such as SLP or SEP mode select Type 1 or Type 2 Type 2 is more effective When playing back discs with a few noises such as DVD Video discs select OFF Type 1 Type 2 OFF DVD Video 1 1 0 00 00 DVD Video 1 1 0 00 00 DVD R DVD R DVD RW DVD RW VR DVD RW DVD RW Video DVD V DVD V POWER ZOOM DISPLAY SETUP TOP MENU MENU...

Page 53: ...ing discs in VR mode For discs in VR mode you can use either Original menu or Playlist menu which is created from the original for editing Editing original titles The following items are available to edit the origi nal titles Deleting titles Refer to page 55 Setting titles to protect Refer to page 56 Releasing titles from protecting Refer to page 56 Editing playlists You can create a playlist from...

Page 54: ... the unit 4 Using K L select Title Delete Hit ENTER Confirmation window will appear 5 Using K L select Yes Hit ENTER Title will be deleted 6 After this operation is com pleted hit SETUP to exit Data will be written onto the disc momentarily This operation may take a while to be completed Title List JAN 1 1 00AM CH12 XP 4 5 1 2 3 Title List Title Delete No Yes JAN 1 1 00AM CH12 XP 0 00 59 6 Title L...

Page 55: ... Edit Title Name a b c A B C 1 2 3 JAN 1 1 00AM CH12 XP 0 00 59 6 DVD R DVD R DVD RW DVD RW Video Putting names on titles Press ABC DEF GHI JKL MNO PQRS TUV WXYZ space abc def ghi jkl mno pqrs tuv wxyz space space _ 2 3 4 5 6 7 8 9 0 1 ABC abc Select 123 1 2 3 4 5 6 7 8 9 0 Step1 Step2 Follow the list below press the Number buttons repeatedly until the desired letter appears Select a desired chara...

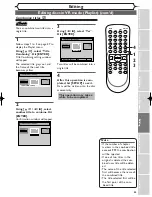
Page 56: ...ar 2 Using K L select a desired time Hit ENTER Confirmation window will appear 3 Using K L select Yes Hit ENTER Chapter markers will be added If you select OFF at step 2 all the chapter markers will be erased 4 After this operation is com pleted hit SETUP to exit Data will be written onto the disc momentarily This operation may take a while to be completed Title List Chapter Mark 5 minutes No Yes ...

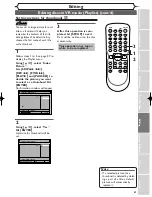
Page 57: ...ll be deleted 6 After this operation is com pleted hit SETUP to exit Data will be written onto the disc momentarily This operation may take a while to be completed Original Title Delete No Yes JAN 1 1 00AM CH12 XP Wait for a moment 3 Original Title Delete No Yes JAN 1 1 00AM CH12 XP 0 00 59 3 Original Protect Title Delete JAN 1 1 00AM CH12 XP 0 00 59 3 Original JAN 1 1 00AM CH12 XP 4 5 6 1 2 3 Dis...

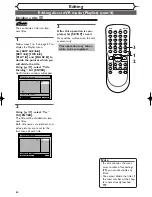
Page 58: ... To prevent accidental editing or title erasing you can protect the contents in the original menu 1 Follow steps 1 to 3 on page 55 to display the Original menu Using K L select Protect Hit ENTER Option window will appear 2 Confirm the indication OFF ON Hit ENTER The key icon will appear on the title in the original list 3 After this operation is com pleted hit SETUP to exit Data will be written on...

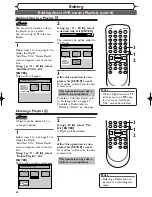
Page 59: ...Title will be deleted 6 After this operation is com pleted hit SETUP to exit Data will be written onto the disc momentarily This operation may take a while to be completed Playlist Title Delete No Yes JAN 1 1 00AM CH12 XP Wait for a moment 3 Playlist Title Delete No Yes JAN 1 1 00AM CH12 XP 0 00 59 3 Playlist Scene Delete Title Delete Edit Title Name Chapter Mark Index Picture Title Dividing Title...

Page 60: ...rt the preview You can check the result of dele tion by preview 3 Using K L select Delete Hit ENTER Confirmation window will appear 4 Using K L select Yes Hit ENTER Part of a title will be deleted 5 After this operation is com pleted hit SETUP to exit Data will be written onto the disc momentarily This operation may take a while to be completed Playlist Scene Delete No Yes JAN 1 1 00AM CH12 XP Wai...

Page 61: ...N 1 1 00AM CH12 XP 0 00 59 3 Playlist Edit Title Name a b c A B C 1 2 3 JAN 1 1 00AM CH12 XP 0 00 59 3 DVD RW DVD RW VR Putting names on titles POWER ZOOM DISPLAY SETUP TOP MENU MENU LIST REC SPEED REC MONITOR REC OTR PAUSE SKIP SKIP PLAY CM SKIP REPEAT OPEN CLOSE TIMER PROG FWD REV CLEAR 1 2 3 4 5 6 7 8 9 SPACE 0 A H G ENTER CH RETURN ABC DEF GHI JKL MNO PQRS TUV WXYZ B C B K L h g F STOP 4 1 2 3...

Page 62: ... ed at the point you have decided Add When you select Delete at step 2 the chapter marker you have selected will be deleted Delete 4 After this operation is com pleted hit SETUP to exit Data will be written onto the disc momentarily This operation may take a while to be completed Chapter 2 2 Playlist Chapter Mark Delete No Yes JAN 1 1 00AM CH12 XP Wait for a moment 3 Chapter 2 2 Playlist Chapter M...

Page 63: ...Using K L select Index Picture Use SKIP H G REV E FWD D PLAYB and PAUSE F to decide the picture you want to select as a thumbnail Hit ENTER Confirmation window will appear 2 Using K L select Yes Hit ENTER A picture for thumbnail will be set 3 After this operation is com pleted hit SETUP to exit Data will be written onto the disc momentarily This operation may take a while to be completed Playlist ...

Page 64: ...his operation is com pleted hit SETUP to exit Data will be written onto the disc momentarily This operation may take a while to be completed Playlist Title Dividing No Yes JAN 1 1 00AM CH12 XP Wait for a moment 3 Playlist Title Dividing No Yes JAN 1 1 00AM CH12 XP 0 00 59 3 F DVD RW DVD RW VR Note If a disc contains the maxi mum number of recordings 99 you cannot divide any titles You cannot divid...

Page 65: ...to exit Data will be written onto the disc momentarily This operation may take a while to be completed Yes No Playlist Title Combining 1 3 Wait for a moment 2 1 2 Yes No Playlist Title Combining 1 2 3 1 2 Playlist Title Combining JAN 1 1 00AM CH12 XP 1 2 3 1 DVD RW DVD RW VR Note If the number of chapter markers in the combined title exceeds 999 the combination will be rejected If one of two title...

Page 66: ...t will not increase the recording disc space A Playlist can be deleted if it is no longer needed 1 Follow steps 1 to 2 on page 57 to display the Playlist Add New Title Delete Playlist menu will appear next to the last title Using K L B select Delete Playlist Hit ENTER Confirmation window will appear 2 Using B select Yes Hit ENTER A Playlist will be deleted 3 After this operation is com pleted hit ...

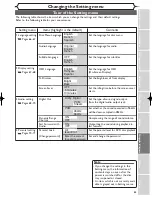
Page 67: ...uage for OSD On Screen Display Set the brightness of front display Set the idling time before the screen saver starts Set the type of sound signal output from the digital audio output jack Set whether the sound recorded in 96kHz will be down sampled in 48kHz Compressing the range of sound volume Outputting the sound during playback in fast forward Set the parental level for DVD disc playback Set a...

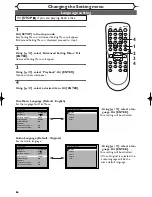
Page 68: ... activated Using K L select a lan guage Hit ENTER Your setting will be activated When Original is selected the audio language will be the disc s default language Audio Language Default Original Set the Audio language 1 Hit SETUP in the stop mode Easy Setting Menu or Advanced Setting Menu will appear If Advanced Setting Menu is displayed proceed to step 3 2 Using K L select Advanced Setting Menu Hi...

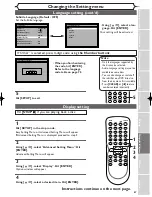
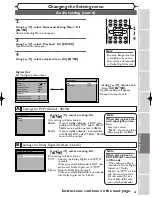
Page 69: ...ed to step 3 2 Using K L select Advanced Setting Menu Hit ENTER Advanced Setting Menu will appear 3 Using K L select Display Hit ENTER Option window will appear 4 Using K L select a desired item Hit ENTER Hit STOP C if you are playing back a disc Instructions continue on the next page Playback Parental Lock All TV Aspect 4 3 Letter Box Digital Out Fast Forward with Audio OFF Dynamic Range Control ...

Page 70: ...d Dark Display FL Dimmer Bright Screen Saver 10 minutes OSD Language English Screen Saver 5 minutes 10 minutes OFF 15 minutes 30 minutes Using K L select a set ting Hit ENTER Your setting will be activated Screen Saver Default 10 minutes Set the idling time before the screen saver starts 5 Hit SETUP to exit 68 1 Hit SETUP in the stop mode Easy Setting Menu or Advanced Setting Menu will appear If A...

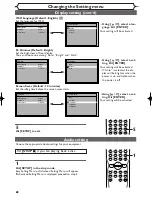
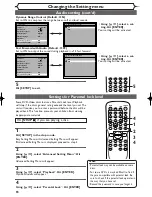
Page 71: ... L select a setting Hit ENTER Your setting will be activated 48kHz If your amplifier decoder is NOT com patible with 96kHz PCM select 48kHz 96kHz sound will be output in 48kHz 96kHz If your amplifier decoder is compatible with 96kHz PCM select 96kHz 96kHz sound will be output B A Note When playing back disc with copyright protec tion Even if you select 96kHz the sound will be down sampled at 48kHz...

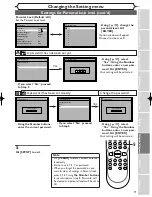
Page 72: ...l appear 4 Using K L select Parental Lock Hit ENTER Hit STOP C if you are playing a disc Some DVD Video discs feature a Parental Lock level Playback will stop if the disc s general rating exceeds the level you set The unit will require you to enter a password before the disc will be played back This function prevents your children from viewing inappropriate materials DISPLAY SETUP TOP MENU MENU LI...

Page 73: ...buttons in input window at step B Password will be cleared and parental levels will be set to All Parental Lock Password Input Using K L select Yes Using the Number buttons enter a new pass word Hit ENTER Your setting will be activated 5 Hit SETUP to exit A password has been set already Parental Lock Yes No Change Password Parental Lock Password Input Change the password Yes If you select No proce...

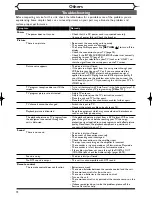
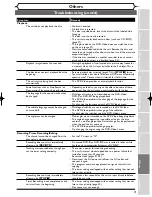
Page 74: ...not fill the screen Try to set the channels with Auto Preset in the Setting menu page 18 Select a channel of anyTV program using CH o p The playback picture or TV program from the equipment connected through the unit is distorted If the playback picture output from a DVD player VCR or tuner goes through the unit before reaching your TV the copy protection signal applied to some programs could affe...

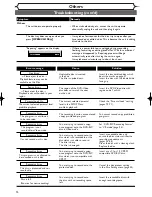
Page 75: ...21 22 Disconnect the AC power cord from the AC outlet and connect it again The program contains copy protection signals that restricts copying The timer setting overlapped with another setting that was set later or has priority The subtitle language cannot be changed or turned off Multilingual subtitle are not recorded on the DVD Video The DVD Video prohibits changing of the subtitles Try changing...

Page 76: ...andardized disc which bears the marks on page 37 Insert the disc with the labeled side facing up Recording Error This disc is protected and not recordable Can not record on this disc Cause Error message Solution The region of the DVD Video disc does not match the ones on the unit The current selected parental level in the SETUP Menu prohibits playback The recording function encountered a copy proh...

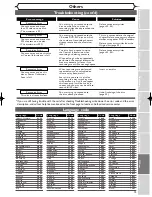
Page 77: ...shto Pushto 6265 Persian 5247 Polish 6258 Portuguese 6266 Quechua 6367 Rhaeto Romance 6459 Romanian 6461 Russian 6467 Samoan 6559 Sangho 6553 Sanskrit 6547 Scots Gaelic 5350 Serbian 6564 Serbo Croatian 6554 Sesotho 6566 Setswana 6660 Shona 6560 Recording Error You cannot record more than 99 titles on one disc Recording Error You cannot record more than 999 chapters on one disc Recording Error You ...

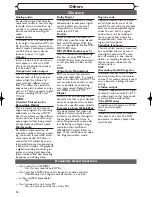
Page 78: ...from the comput er and play back the files on this unit PCM Pulse Code Modulation PCM is a format that converts audio into digital data It is mainly used for Audio CDs and DAT This unit can play back sounds as real istic as possible by converting even compressed Dolby Digital and MPEG audio to PCM Playlist From this list you can play back contents of a disc in your desired order or sequence Also i...

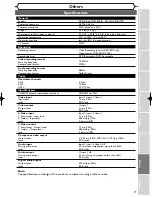
Page 79: ...recording format Sampling frequency Compression format 13 5MHz MPEG 48kHz Dolby Digital Video input Input level Jacks Video output Output level Jack Component video output Output level Jacks S Video input Y Iuminance Input level C color Input level Jacks Audio input During audio input Jacks Audio output During audio output Jacks S Video output Y Iuminance Output level C color Output level Jack VHF...

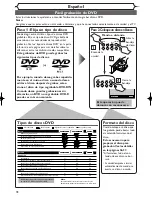
Page 80: ...un disco que fue grabado peude borrar todo el contenido formateando el disco Esto es necesario para preparar el disco para grabación Vea los detalles en las páginas 26 27 Al formatear todo el con tenido de ese disco se bor rará La unidad empieza a iniciar automáticamente cuando se inserta un disco no usado Tipos de discos DVD DVD RW VR DVD RW Video Desea Grabar programas de TV Volver a utilizar bo...

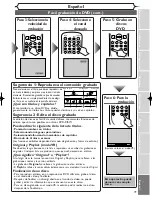
Page 81: ...títulos o escenas Las funciones editables dependen del modo de grabación y forma de edición Original y Playlist modo VR Puede editar las grabaciones en la lista a reproducir sin cambiar las grabaciones originales Cualquier lista a reproducir no ocupa mucho espacio en el disco Qué significa Original o Playlist A lo largo de este manual encontrará Original y Playlist que se refieren a las grabacione...

Page 82: ...aintenance commercial use such as hotel rental or office use of this product or damage which results from fire flood lightning or other acts of God THIS WARRANTY DOES NOT COVER PACKING MATERIALS ANY ACCESSORIES EXCEPT REMOTE CONTROL ANY COSMETIC PARTS COMPLETE ASSEMBLY PARTS DEMO OR FLOOR MODELS FUNAI CORP AND ITS REPRESENTATIVES OR AGENTS SHALL IN NO EVENT BE LIABLE FOR ANY GENERAL INDIRECT OR CO...

Reviews: