5
Mounting Bracket
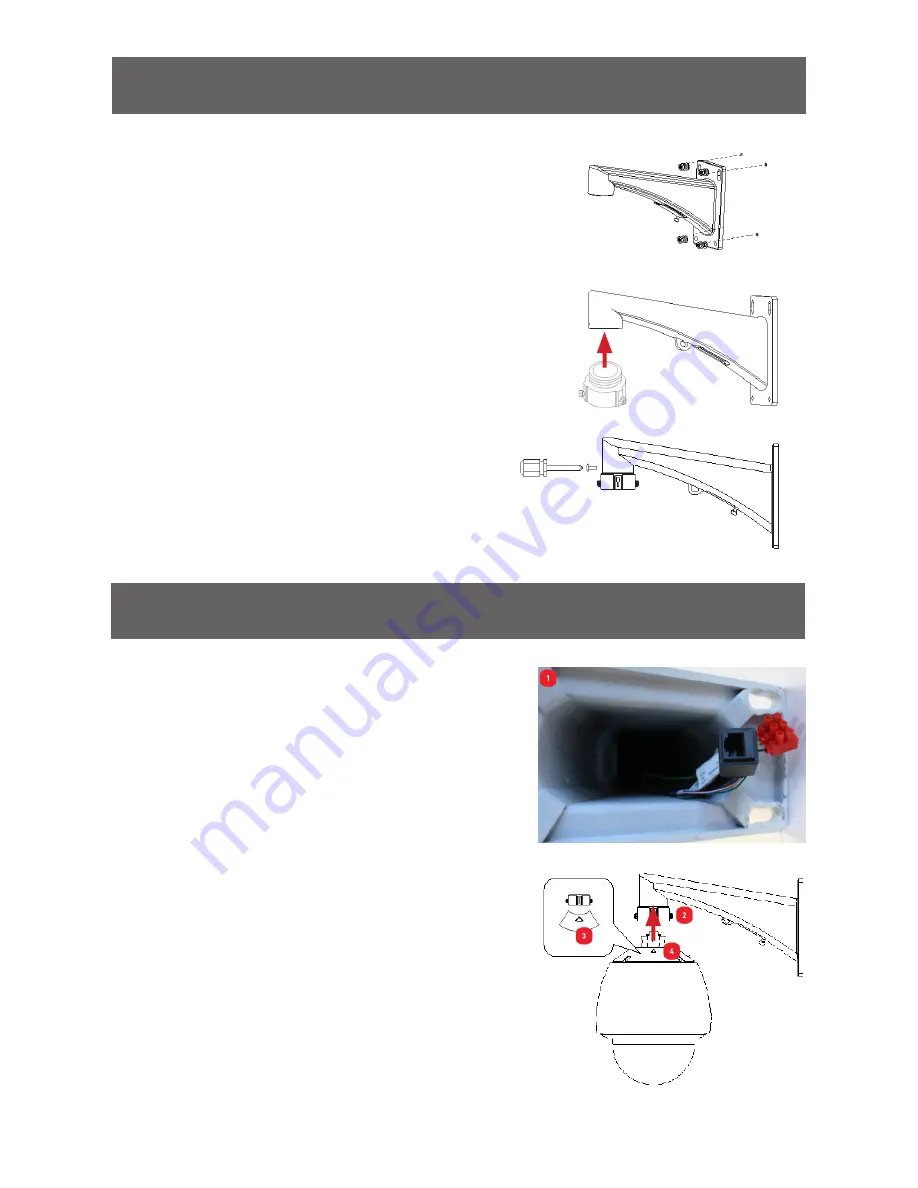
Before installing the mounting bracket, you need
to decide where the camera will be placed.
(1):
When you have selected the desired location,
place the mounting bracket onto the surface and
mark where the mounting screws are going to be
placed. Use a pencil or felt-tip marker.
It’s now time to install the pendant adaptor to the
mounting bracket.
(2):
Use the supplied thread tape to cover the
thread of the pendant adapter and then rotate the
adapter to the mounting bracket.
(3):
Secure the pendant adapter to the mounting
bracket using the supplied screw.
Mounting the Camera
(1):
Before you mount the camera to the bracket,
place the Ethernet and power cable through the
inside of the mounting bracket and pull it through
the other side. It may be a little tricky getting the
cable through the curve of the mounting bracket.
(2):
To install the camera to the mounting bracket,
loosen the lock screws on the pendant adapter
with the Allen key provided.
(3):
Align the direction label on the pendant adapter
with the arrow marking on the camera housing.
(4):
Make sure the camera housing is flush with
the pendant adapter, rotate the mounting bracket
clockwise until it locks into place, then tighten the
lock screws to secure the camera to the mounting
bracket (don’t over tighten each screw).
1
2
3
4


