background image

ENG

17

Operation Manual

EASY SEE-149 LED

EASY SEE-150 DD LED

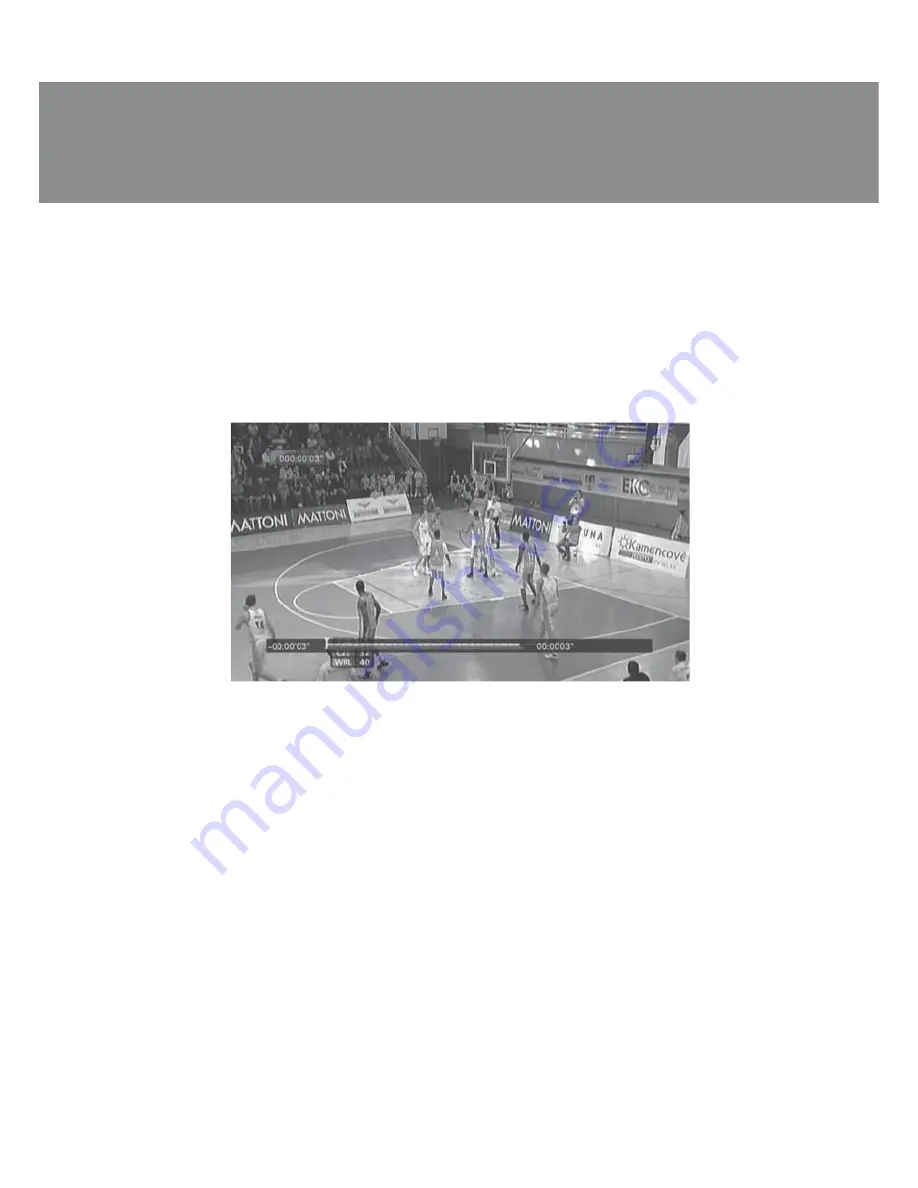
Fig. 24 

Timeshift:

• 

When Timeshift function is activated, it reserves a part of USB disk space and continuously 

records a chosen channel in the background. Timeshift enables to pause during viewing, for 
example, when your attention is drawn away by a phone call, or just to fast rewind a record 
backward and to continue viewing from a skipped place. It is possible to view an interesting moment 
several times time and again, for example, of a basketball match, as well as not to skip the following 
course of events. It is possible (if there is free space on a USB disk) just to record a favorite channel 
around the clock and then to view the records of several skipped days at once after rewinding.

• 

Connect an external USB device to a USB port of the tuner. Make sure, that there is enough free 

space on the USB device for recording in the background (more than 256 MB). During viewing

a television program, if you have to go out for a while, press Pause button 

p

. The television program 

will be automatically paused. The timeshift recording will start. For onward watching, press Play 

button 

p

 on the remote control. The status panel with time reading will appear at the bottom of the 

screen, Timeshift function is switched on. You can rewind a recordable video sequence backward/ 

forward or pause as during playing back of an ordinary video 

fi

le. Press STOP button 

m

 to stop 

recording. Use INFO button 

x

 to display the information about the timeshift record.

Device extracting:

• 

Enter this menu for safe extraction of the connected USB device. 

Summary of Contents for EASY SEE-149 LED

Page 1: ...www sven fi OPERATION MANUAL DVB T T2 TV Tuner with Multimedia Player EASY SEE 149 LED EASY SEE 150 DD LED ...

Page 2: ... Manual is given on as is terms The author and the publisher do not bear any liability to a person or an organization for loss or damage which has arisen from the information contained in this Manual UNPACKING Unpack the device carefully Make sure there are no accessories left in the box Check up the device for damage If the product was damaged during transportation address the company carrier res...

Page 3: ...re not damaged and they provide a reliable contact The power cord must not be deformed or bended Do not place any objects on the power cord and aerial cable It is prohibited to plug the tuner in the network with voltage less than 90 V or higher 242 V and with alternating current frequency different from 50 60 Hz Protect the device against excessive vibrations or being dropped which can result in da...

Page 4: ...programs on a USB device with their following watching as well as watching later a required program Timeshift Tuners have also USB ports to reproduce photo to play back video or musical files from external digital carriers Features Reception of DVB T T2 signal open channels 720p 1080i 1080p high definition television capability Media content reproduction via USB port Personal video recorder PVR ca...

Page 5: ...C IN power cord b ANT IN antenna input connector to connect DVB T T2 c ANT OUT output jack for the through signal supplied to jack a to transfer to another device d L R stereo audio output left right channel e VIDEO composite video output CVBS f HDMI HDMI output gCOAX coaxial audio output h YPbPr component video output YPbPr Rear panels Fig 3 Rear panels of EASY SEE 149 LED and EASY SEE 150 DD LED...

Page 6: ...uttons operations in teletext menu and other comands from OSM p PLAY PAUSE play pause media playback or start Timeshift function q REV FWD rewind backward forward during a media playback r 0 9 numeric buttons s FAVOURITE display favorite channels list t MENU display the main menu u AUDIO audio setting menu v PVR record a TV program w EPG display electronic program guide x INFO display content info...

Page 7: ...fully read the Operation Manual on a device being connected TV set amplifier etc Connect the tuner to a TV set in accordance with the diagram Fig 5 given below using the included АV cable or HDMI cable not included Note We recommend to use HDMI cable to improve the sound quality HDMI interface provides the best quality of the signal transmission to a TV set which is purchased se parately Fig 5 Con...

Page 8: ...actory presets before turning off then the Installation menu will be displayed on the screen see Fig 6 OSD Language Using buttons h on the remote control select the required language for you to display the main menu Country Setting With buttons h select a country where you are now Tuner System With buttons h select a signal type you want to receive Auto Scan Press OK button g on the remote control ...

Page 9: ...er System here you can choose the type of a signal being received Auto Scan select Auto Scan menu for automatic scanning and storage of all channels When Auto Scan is used all previously stored channels will be canceled Press OK button g to start Auto Scan Press EXIT button f to cancel Auto Scan Manual Scan select Manual Scan menu for scanning and storage channels without changing of the stored li...

Page 10: ... list of TV and radio channels or view TV guide Using navigation buttons e select a parameter press OK button g or buttons h to change its value After the operation comp letion press EXIT button f to exit menu TV Radio Channel Editor In this menu you can edit the list of TV radio channels Electronic Program Guide EPG If you watch any TV program and want to switch over to another channel at the pre...

Page 11: ... OFF OFF EXIT Return USB Fig 13 Press OK button g and in the pop up window Event Edit see Fig 15 record a desired program channel number starting and termination dates mode See Timer page 54 Select Book bar in Timer Mode menu and press ОК button g to confirm Press EXIT button f to exit Several seconds before switching over the program a warning will be displayed with time count down to start switc...

Page 12: ... to see tasks to watch record according to the timer Press OK button g to add edit a new task Press Red button Del to delete a created task To record a desired program see Fig 15 Press EPG button w to open the list of TV programs TV Guide Using buttons e on the remote control select a TV program Select a TV program you want to record using buttons h on the remote control Press OK button g and Yell...

Page 13: ...ress MENU button t and select TV Setup submenu In this menu you can set parameters to display video signal on the screen With navigation buttons e select a proper option and press buttons h for its setting Press EXIT button f to exit the menu Format Select the most comfortable display aspect ratio to watch video image 4 3 full screen 4 3 Pan Scan 4 3 Letter Box and 16 9 FIT TV Mode If video conten...

Page 14: ... corresponds to HD resolution of PAL or NTSC system progressive scanning HDMI only Note You can use V FORMAT button to change the screen resolution quickly depending on the remote control model OSD Transparency Set OSD transparency value Banner Display Time Setting of Banner Display Time Language Press MENU button t and select Language bar In this menu you can set a desired OSD language subtitle l...

Page 15: ...d h for its setting Press EXIT button f to exit the submenu Parental Control You can restrict access to the TV channels that are unsuitable for children To restrict lock a channel you need to enter either the default password 0000 or your own password see Fig 19 Update Backup In this menu you can use your USB device to upgrade the newest software and store required user s information on a USB devi...

Page 16: ...r its preset Press EXIT button f to exit the submenu The tuner supports the playback of files from USB devices up to 500 GB with FAT12 16 32 and NTFS systems Multimedia If a USB carrier is not inserted into USB port the following message will be displayed on the screen USB device is not found When you insert a USB carrier into USB port the tuner will identify it automatically To watch multimedia f...

Page 17: ...es file read rate from USB devices decreases it can occur for example in at tempting to playback a high capacity file Read rate drop is not a malfunction of the tuner Do not extract a USB device during playback of files The producer does not bear res ponsibility for the data loss Some files extensions of which belong to the reproduced formats sometimes cannot be reproduced if they are coded in a s...

Page 18: ...the records of several skipped days at once after rewinding Connect an external USB device to a USB port of the tuner Make sure that there is enough free space on the USB device for recording in the background more than 256 MB During viewing a television program if you have to go out for a while press Pause button p The television program will be automatically paused The timeshift recording will s...

Page 19: ...ase volume level Playback another track Connect video cable correctly Press TV RADIO button i to enter TV mode Insert new batteries Remove obstacles check the remote control close to the tuner Amplify the signal No picture No signal message No sound Only sound without picture Remote control does not operate Tessellation mosaic signal Cause Problem Solution 5 TROUBLESHOOTING In the event of malfunc...

Page 20: ...kg 177 5 226 5 VHF 474 858 UHF 220 50 8 SRT SSA ASS MP3 WMA WAV AAC AC 3 в SEE 150 DD LED JPEG BMP PNG MKV AVI XVID MOV VOB FLV DAT MPEG MPG MP4 ANT IN USB ANT OUT Coaxial SPDIF Audio output L R Composite video CVBS Component video YPbPr HDMI 148 96 38 0 4 Parameter Value Notes Technical specifications given in this table are supplemental information and cannot give occasion to claims Technical sp...

Page 21: ... 30 30 MPEG 1 2 4 Н 264 DVD Video Decoder Codec Extension Resolution FPS 7 FILE PLAYING FORMATS USB video player Video MPEG1 MPEG 2 layer І ІІ MP3 32 K 48 KHz 32 K 320 Kbps АСЗ Dolby Digital Е АСЗ Dolby Digital Plus AAC LC HE AAC 5 1 WMA 8 K 48 KHz 32 K 320 Kbps Dolby HD yes yes SEE 150 DD LED yes SEE 149 LED no SEE 150 DD LED yes SEE 149 LED no yes optional yes no Format Support Audio JPEG Progre...

Page 22: ...5 Условия гарантийного обслуживания смотрите в гарантийном талоне или на сайте www sven fi Гарантийный срок 12 мес Срок службы 2 года Производитель СВЕН ПТЕ Лимитед 176 Джу Чиат Роуд 02 02 Сингапур 427447 Произведено под контролем Свен Скандинавия Лимитед 48310 Финляндия Котка Котолахдентие 15 Сделано в Китае Manufacturer SVEN PTE LTD 176 Joo Chiat Road 02 02 Singapore 427447 Produced under the co...

Reviews: