


24
OTHER SETTING
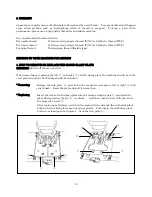
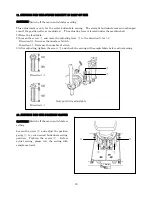
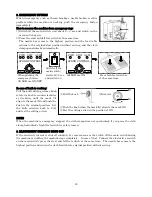
1. SETTING FOR CUT SPACE
CAUTION: Switch off the main switch before setting.
Loosen the screw
②
, rotate the dial
①
to the direction (
+
) or ( – ).
Tighten the screw
②
after adjusting. Before actual sewing, please test the sewing with sample
material.
Direction (
+
) Direction ( – )
Wide Narrow
NOTE: When adjusting the position of dial
①
, loopers corresponded position (timing) against loop of
needle thread change because the factory pre-adjust the looper timing to 0 (+/-) position. You
might readjust the looper timing for the best sewing to prevent skip/jump stitch.
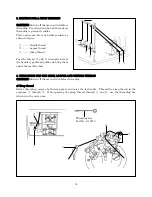
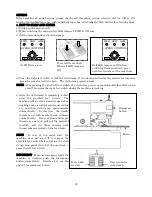
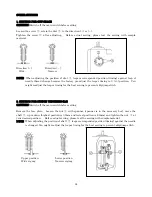
2. SETTING FOR STITCH WIDTH/ZIG-ZAG
CAUTION: Switch off the main switch before setting.
Remove the face plate. Loosen the nut
①
with spanner (spanner is in the accessory box), move the
shaft
②
up or down (highest position is 3.2mm and lowest position is 2,2mm) and tighten the nut
①
at
your desired position. Before actual sewing, please test the sewing with sample material.
NOTE: When adjusting the position of shaft
②
, looper corresponded position (timing) against the needle
is changed. You might readjust the looper timing for the best sewing to prevent skip/jump stitch.
Upper position Lower position
Wide zig-zag Narrow zig/zag


