


7
STEP 4: Attaching the SCSI Cable
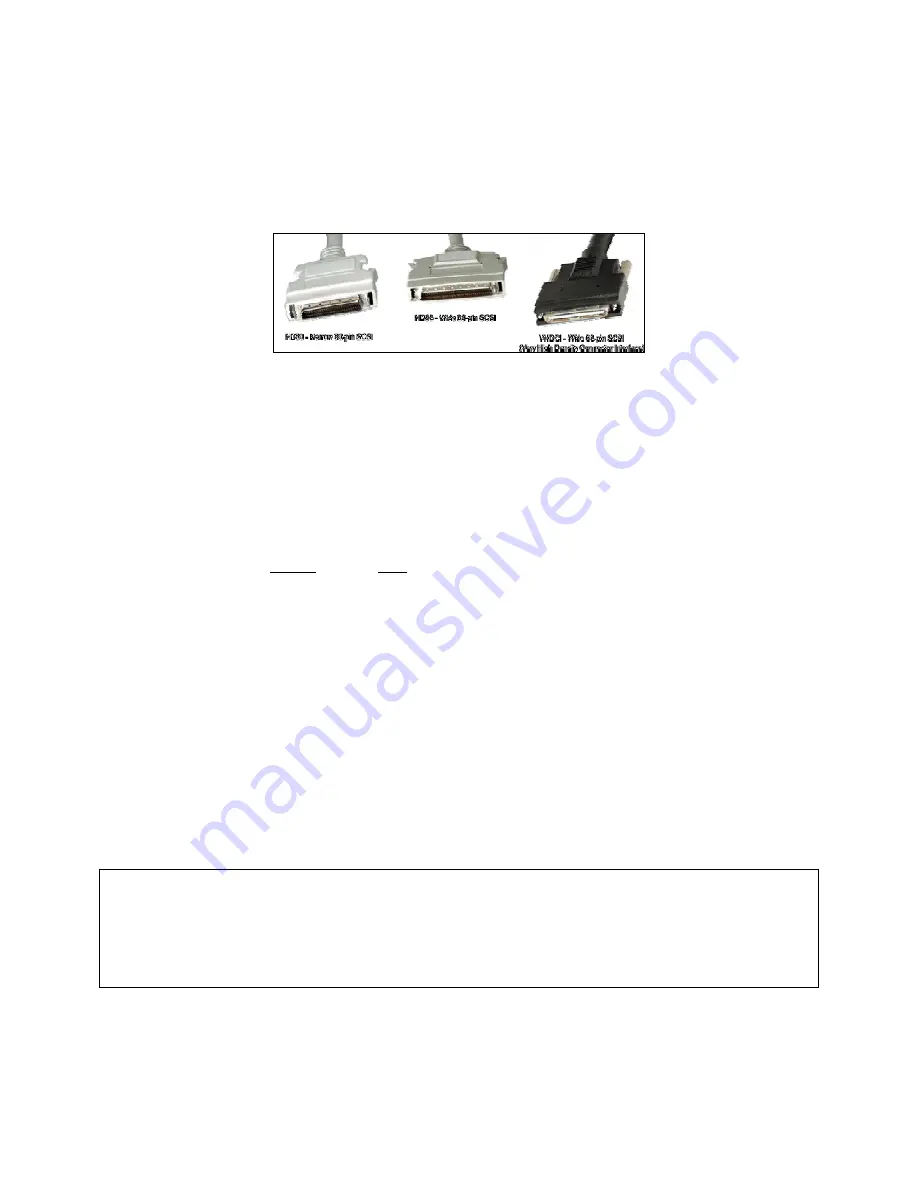
The Sun SCSI host adapter (controller) accesses the SCSI bus through the rear of the Sun chassis with a 50 pin (8-
bit SCSI), 68 pin (16-bit SCSI) D type connector, or Very High Density Connection Interface (VHDCI). Plug the
SCSI cable into the Sun SCSI controller (usually in the back of the system). If the subsystem is in the middle of the
SCSI chain, plug in the cable from the new subsystem into the back of the next subsystem in the SCSI chain. See
Figure 4 for possible connection types to the Host Computer System.
Figure 4: SCSI Connectors
STEP 5: Power Connection & Consumption
Plug the power cord into the SurfSTOR subsystem and into an appropriate power outlet. All SurfSTOR
subsystems have an auto-ranging circuit to support single phase 100-260VAC 47Hz-63Hz automatically.*
*If power in your area has voltage spikes (power goes high) or brownouts (power goes low), it is recommended that
you use a UPS (Uninterruptible Power Supply) or a surge protector to minimize the risk of damaging the subsystem
and losing data. For more information contact your sales representative at Partners, 800-550-3005.
Auto-Ranging Power Supply Performance:
Typical
Peak
+5V
40W
60W
+12
3A
5A
AC Input
96-276 VAC:
50-60 HZ
Fan/CFM
60mm2 ball barring fan / 22CFM
STEP 6: Probing SCSI Devices
Read STEP 6 entirely before proceeding! The following is for SCSI Devices, if you have an IDE unit, proceed to
STEP 6A. The easiest way to make sure that you have attached the new DVD-RW to the system correctly is to use
‘probe-scsi-all’. At this point the Sun and the new DVD-RW should be physically connected together and set up
correctly.
Turn on all of the external devices and then turn on the computer
. Your workstation will check
memory and run various internal tests. It may also automatically boot itself.
If your system starts to boot, stop it
immediately
by pressing and holding down the ‘
STOP
’ key (upper left hand corner) and then the ‘
A
’ at the same
time - also known as ‘L1-A’. This should bring you to an ‘ok’ prompt. This is the “new command mode” and has a
variety of diagnostic and system setup options available.
Now you can test the device and SCSI ID. At the ‘ok’ prompt type ‘probe-scsi-all’. You should see a listing of all
the SCSI devices attached to your primary SCSI interface.
ok
probe-scsi-all
/pci@1f,4000@scsi3
Target 1
Unit 0 SCSI Disk Seagate Disk ST373307LC
Target 6
Unit 0 Removable Read Only Device Plextor DVDR PX-800A
The ‘Target” is the SCSI ID that you set on the DVD-RW before attaching it to the system. You should see a
listing of all the SCSI devices on your system including the new DVD-RW. If you do, proceed to the next step. If
you do not, check the SCSI IDs being used on the system and choose one that is not being used for your new DVD-
RW.
Summary of Contents for SurfBurner
Page 1: ......