2
ENGLISH
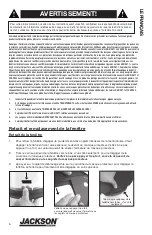
This manual is to be removed by the wearer only. Failure to read and follow these instructions and warnings could result in
serious injury, including blindness.
Note: Some materials, which may come into contact with the wearer’s skin, could cause allergic reactions in susceptible
individuals. Contact Surewerx for information. Check with your supervisor to determine whether this face shield and window
offers the proper protection for the application. Refer to ANSI Z87.1 or CSA Z94.3 for proper application. Face shields offer
limited eye and face protection against common impact hazards, metal chips, particles and sparks. They will not provide
extraordinary protection against severe impact hazards such as, but not limited to, fragmenting grinding wheels, high
speed projectiles, explosive devices, molten metal or hazardous fluids. Impact resistant windows are NOT unbreakable
or impenetrable. Certain Surewerx windows do not meet ANSI Z87.1+ high impact standards and should only be used for
basic impact protection as defined by ANSI Z87.1. This product should not be used for protection in any sport related activity
or simulated war games. Use the proper IR shaded window when exposed to harmful levels of optical radiation, including
burning and cutting. A face shield will not provide any protection against infra-red or ultraviolet radiation unless the window
is marked with a shade numeral per ANSI Z87.1 and CSA Z94.3. Do not use for Arc Welding. Not suitable for protection
against X-rays, gamma rays, high energy particulate radiation or lasers. Inspect face shield and windows frequently and
immediately replace if dull, pitted, scratched or damaged. Chemical contact can cause rapid degradation which severely
reduces impact protection. Do not use face shield until a secure fit has been obtained every time. Primary eye protection, as
defined by ANSI Z87.1 and CSA Z94.3, must be worn whenever using this product. Do not modify in any way.
1.
Inspect the faceshield Window frequently and immediately replace worn, pitted, or scratched Window.
2.
If used with CLEAR Window, this Window will NOT provide any protection against ultraviolet or infrared radiation.
3.
If used with SHADED Window, DO NOT USE FOR ARC WELDING!
4.
This product does NOT conform to ANSI Z87.1 for welding helmets.
5.
A Window must be used at all times.
6.
Product needs to be used only with appropriate Jackson branded Window and headgear.
WARNING!
For your own protection, read these instructions before using. It is the responsibility of the user to
understand the limitations, proper use, care and maintenance of the product. Failure to read these
instructions could result in serious injury, including blindness.
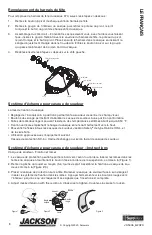
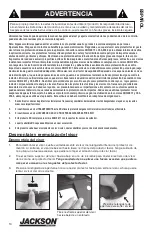
Window Removal and Replacement
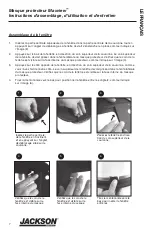
Window Removal
1.
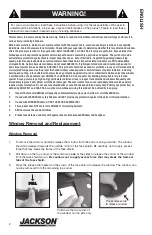
To remove the window, carefully release the window from the bottom chin guard tab. The window
should be released towards the outside / front of the face shield. Be cautious not to apply excess
force that may break the frame of the face shield.
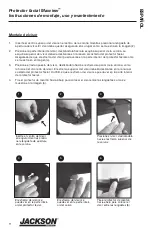
2.
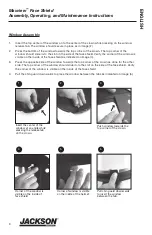
Pull down on the top corner of the window on
one
of the sides to release the corner of the window
from the face shield crown.
Be cautious not to apply excess force that may break the frame or
tabs of the face shield.
3.
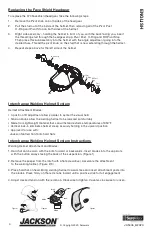
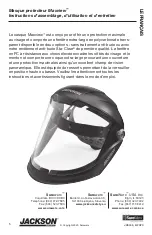
Press the release tab located on the crown of the face shield to release the window. The window can
now be removed from the remaining top corner.
PULL
PULL
Pull down the top corner of
the window on one side only.
Press release tab
to release window.


