2-9
Chapter 2: Chassis Description and Installation Instructions
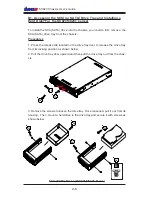
D2. Accessing the IDE Drive Tray and Installing a Hard Disk
(*For the SC823i Series)
To install the IDE drive into the chassis, first, you need to remove the top
cover; then, you need to remove the IDE drive tray from the chassis.
Procedures
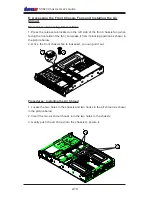
1. Remove the screws from the top of the IDE drive as shown below.
2. Once the top cover and the screws are removed, press on the back side of the
IDE drive tray and push it out from the chassis.
.
1
2
IDE Drives(*SC823i Series)
3a
3c
3d
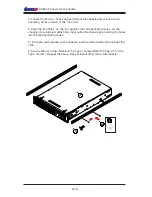
3. Remove the screws to loosen the drive tray. Once loosened, pull it out from its
housing. Then, mount a hard drive in the drive tray and secure it with screws as
shown below.
D
3b

