4-7
Chapter 4: Chassis Setup and Maintenance
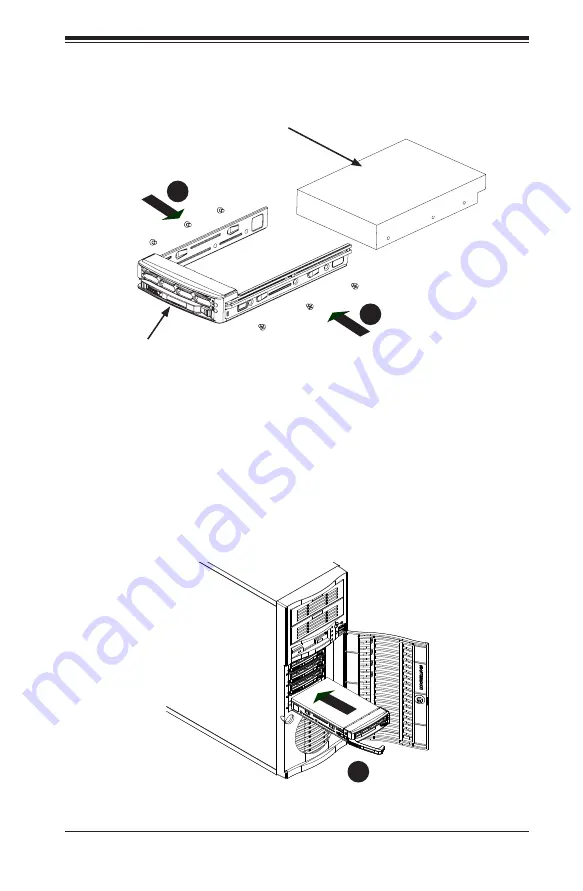
2. Slide the hard drive into the carrier with the printed circuit board side facing
down.
3. Carefully align the mounting holes in both the drive carrier and the hard drive.
4. Secure the hard drive to the carrier using six screws.
5. Replace the drive carrier into the chassis. Make sure to close the drive carrier
handle to lock the drive carrier into place.
Drive Carrier
SAS/SATA
Hard Drive
Figure 4-7: Removing Hard Drive
Figure 4-8: Replacing Hard Drive in the SC733T and SC733TQ Chassis
4
4
5


