


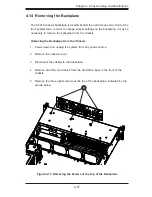


4-7
Chapter 4: Chassis Setup and Maintenance
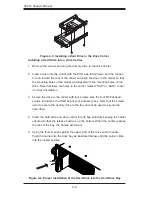
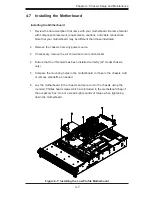
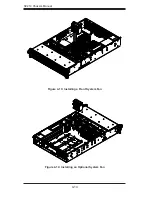
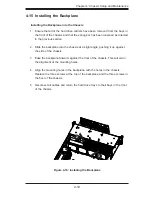
4-7 Installing the Motherboard
Installing the Motherboard
1. Review the documentation that came with your motherboard. Become familiar
with component placement, requirements, cautions, and cable connections.
Note that your motherboard may be different than those illustrated.
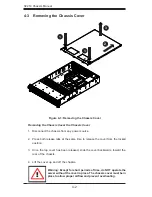
2. Remove the chassis from any power source.
3. If necessary, remove the air shroud and riser card bracket.
4. Ensure that the I/O shield has been installed correctly (LP model chassis
only)
5. Compare the mounting holes in the motherboard to those in the chassis. Add
or remove standoffs as needed.
6. Lay the motherboard in the chassis and secure it to the chassis using the
rounded, Phillips head screws which are included in the motherboard bag of
the accessory box. Do not exceed eight pounds of torque when tightening
down the motherboard.
Figure 4-7: Installing the Low Profile Motherboard
Summary of Contents for SC219 Chassis Series
Page 8: ...SC219 Chassis Manual viii Notes ...
Page 12: ...SC219 Chassis Manual 1 4 Notes ...
Page 40: ...SC219 Chassis Manual 4 20 Notes ...
Page 50: ...SC219 Chassis Manual 5 10 Notes ...
Page 54: ...SC219 Chassis Manual A 4 Notes ...
Page 56: ...SC219 Chassis Manual B 2 Notes ...
Page 67: ...C 11 Appendix C SAS 213A Backplane Specifications Notes ...