Chapter 5: Advanced Motherboard Setup
5-5
1. Remove power from the system
and unplug the AC power cord
from the power supply.
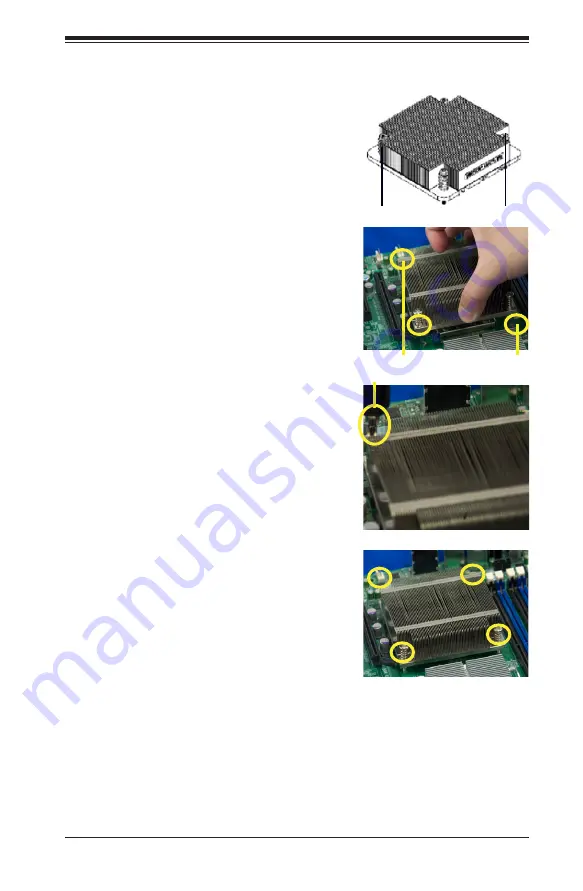
2. Do not apply any thermal grease
to the heatsink or the CPU die;
the required amount has already
been applied.
3. Place the heatsink on top of the
CPU so that the four mounting
holes are aligned with those
on the (preinstalled) heatsink
retention mechanism.
Be sure to
install the heatsink with the fins
aligned with the direction of the
air-flow
.
4. Screw in two diagonal screws (i.e.
the #1 and the #2 screws) until
just snug. Do not fully tighten the
screws or you may damage the
CPU.)
5. Add the two remaining screws
then finish the installation by fully
tightening all four screws.
Installing a CPU Heatsink
Screw #1
Screw #2
Screw #1
Screw #2
Install Screw #1
Note:
Make sure the heatsink is placed so that the fins of the heatsink are in the
direction of the airflow in your system.
Summary of Contents for 2022TG-HLIBQRF
Page 1: ...A SERVER 2022TG HLIBQRF 2022TG HLTRF SUPER USER S MANUAL Revision 1 0c ...
Page 16: ...1 8 A SERVER 2022TG HLIBQRF HLTRF USER S MANUAL Notes ...
Page 30: ...A SERVER 2022TG HLIBQRF HLTRF USER S MANUAL 3 4 Notes ...
Page 50: ...4 20 A SERVER 2022TG HLIBQRF HLTRF USER S MANUAL Notes ...
Page 76: ...5 26 A SERVER 2022TG HLIBQRF HLTRF USER S MANUAL Notes ...
Page 97: ...Chapter 6 Advanced Chassis Setup 6 21 Release Tab Figure 6 20 Changing the Power Supply ...
Page 98: ...6 22 A SERVER 2022TG HLIBQRF HLTRF USER S MANUAL Notes ...
Page 118: ...A 2 A SERVER 2022TG HLIBQRF HLTRF USER S MANUAL Notes ...


