


12
www.supercircuits.com
SECTION 3: SYSTEM SETUP
Table 8. Menu items in SYSTEM SETUP screen
Item
Description
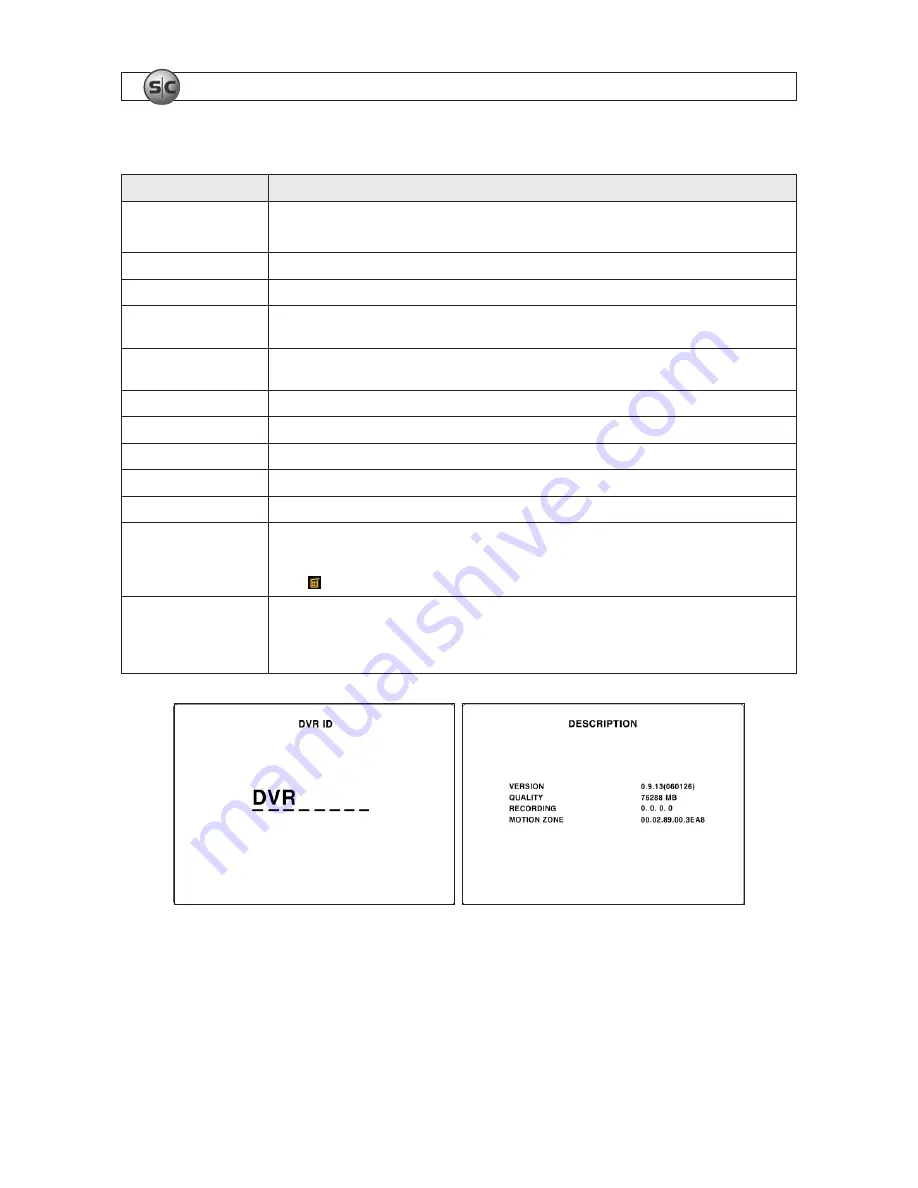
DVR ID
The name of the system . Press the
ENTER
to select this item . Select a character position with the
and
buttons . Press
t
or
u
to change the character .
DESCRIPTION
Press
ENTER
to see system information .
LOAD DEFAULT
Choose OFF or ON . If selecting ON, press
ENTER
to load defaults .
ADMIN PASSWORD
Set the administrator password . The password numbers (1,2,3,4) can be entered with the direction keys or number keys . The
default password is 1111 .
NETWORK PASSWORD
Set the network client password . The password numbers (1,2,3,4) can be entered with the direction keys or number keys .
The default password is 1111 .
DATE FORMAT
Select the preferred date and time display format .
SET DATE & TIME
Set the present date and time . If DLS (daylight savings) is ON, user can not enter this menu or change the date and time .
PTZ CONTROL
Set the camera speed, number, type and ID .
KEY TONE
Enable/disable the key tone .
LANGUAGE
Select system language .
REMOTE CONTROL ID
Select the ID of the remote control . (Default is 0) .
1 . Select ID from 0 to 9 .
2 . On a remote control, press the same number as the remote control ID set in DVR .
3 . The icon is displayed in the LIVE screen of the DVR that responds to the remote control .
DLS
Set to ON or OFF for DLS (Daylight Saving) using the
t
or
u
buttons . After selecting ON, move the cursor to BEGIN (MM/
DD/HH) and press the SELECT button to set the start time of DLS . Move to END (MM/DD/HH) using
or
button to set
the stop time of DLS .
CAUTION
: DLS can’t start from 23:00 . Also, DLS can’t be applied if the BEGIN and END dates are the
same .
DVR ID setup screen Description display screen


