background image

32

POW

E

R


ADAP

TE

R

TU

N

E

R

AN

TE

NNA

 I

NP

UT x1, 

R

O

UT

P

UT x1

SCAR

T

TV x1

1

x

D

E

E

P

S

L

L

U

F

0

.

2

B

S

U

B

S

U

MA

I

N

  U

N

IT

POW

E

R


CONS

U

MP

TI

ON

I

NP

UT: 

~

1

00

-

2

4

0

V, 

50

/6

0

Hz

O

UT

P

UT: 

DC5

V 1

A

DC


5

V I

N

, 1

A

MA

X  

5W

SP

E

C

IFI

CA

TI

ONS

CONN

E

C

TI

ON

POW

E

R


S

U

PP

LY

Summary of Contents for DTB700PT

Page 1: ...MANUAL DE UTILIZADOR DTB700PT ...

Page 2: ...o 2 4 3 Ligação de sistema 5 OPERAÇOES BASICAS 4 Páginas de boas vindas 6 5 Edição de canal 6 9 6 instalação 9 11 7 Configuração de sistema 11 16 8 Ferramentas 17 22 9 Jogos 22 10 Gravar 22 25 11 HOT 25 29 12 Solução de problemas 30 31 32 s e õ ç a c i f i c e p s E 3 1 ...

Page 3: ...ção dado que pode ser perigoso Verifique a ligação regularmente Se ocorrer qualquer ruptura ou erro no isolamento do cabo e da unidade desligue imediamente e solicite reparo do aparelho Não use ligação de cabo de alimentação em qualquer lugar próximo da água ou líquidos tais como banho bacia piscina lavandeira etc Não coloque a unidade em cima de um objecto instável O aparelho pode cair e causar le...

Page 4: ...de choque ou incêndio não abra o gabinete Use um pano ligeiramente humedecido com água para limpar o exterior da unidade Desligue a unidade da ficha de parede se não utilizar o aparelho por um longo tempo Não coloque o em um local quente e sim com bastante ventilação Desligue a alimentação antes de ligar a antena Acessórios Controlo remoto 1 Manual de utilizador 1 Adaptador CA 1 Cabo IV 1 USE O AMB...

Page 5: ...EN POWER in Soquete de ligação do cabo de alimentação Receptor IV Soquete de montagem do sensor de controlo de receptor EN RF Ligue o cabo de antena RF LOOP através O sinal de antena para ligar outro receptor TV Scart Liga um receptor de televisor SCART Mini USB dispositivo de ligação USB ...

Page 6: ... OK 6 PAGINA ACIMA 7 CANAL 8 TV RADIO 9 INFO 10 AUDIO 11 LEGENDA 12 REPRODUZIR 13 PAUSAR 14 BOTAO VERMELHO FB 15 BOTAO VERDE AR 16 Alimentação 17 MUDO 18 REACTIVAR 19 SAIR 20 VOL OU DIREITA 21 PAGINA ABAIXO 22 FAV 23 EPG 24 TTX 25 GRAVAR 26 PARAR 27 BOTãO AZUL PVR 28 BOTAO AMARELO ...

Page 7: ...TV Antena 5 Ligação de sistema Ligar a TV Start Adaptador de alimentação Indicador de alimentação e IV ...

Page 8: ...ionado o botão Menu para entrar no menu principal que mostra conforme abaixo 1 Prima a tecla acima abaixo para seleccionar entre as páginas de menu Editar canal instalação configuração de sistema ferramentas jogo e REC 2 Prima a tecla OK ou direita para entrar no Editar canal Se o bloqueio do menu estiver Lig a caixa de diálogo solicita a palavra chave que é 0000 para predefinição 3 Prima a tecla ac...

Page 9: ...azer uma marca favorita no lado esquerdo do grupo de favorito seleccionado 3 Pressionar OK no grupo marcado de favorito para cancelar a marca favorita actual 4 Depois de marca pressionar sair para retornar para a TV Lista de canal há uma marca favorita ao lado do canal marcado 1 Prima a tecla Red para entrar no modo de bloqueio 2 Prima a tecla Acima Abaixo mover o destacado e prima a tecla OK para...

Page 10: ...ens de selecção pressionando Canal acima Canal abaixo para mover o destacado e prima a tecla OK para confirmar sua selecção 2 Os quatro tipos de abordagens de selecção são Nome A Z selecção na ordem descendente alfabética Nome Z A selecção na ordem ascendente alfabética bloqueio Recolha de todos os canais bloqueados e lista Sem fundo de lista de canal de TV Padrão retorne para a ordem de configuraçã...

Page 11: ... prima a tecla sair esta função será ignorada directamente sem guardar FAQ Q Se eliminar incorrectamente todos os canais o que devo fazer A Há duas formas de restauração Para pesquisar todos os canais na função de instalação Use a função Carreguar as Configuração de fábrica para restaurar todos os canais na função Ferramentas 6 instalação Quando entrar no menu instalação o menu será exibido conform...

Page 12: ...nto Quando entrar no meu Varrimento de canal um menu de varrimento de canal será mostrado conforme abaixo 1 Há duas escolhas de Modo de varrimento pode varrer canal por canal ou por frequência Se varrer por canal Varrer banda e Nº canal estão disponíveis para ajustar Se varrer por frequência Frequência e Banda larga estão disponíveis para ajustar 2 Há duas escolhas de Varrer banda pode escolher UH...

Page 13: ...rar no menu Ajuste de antena um menu será exibido conforme abaixo 1 utilizador pode verificar e ajustar a intensidade de sinal e qualidade de sinal de cada de canal 2 Alimentação de sintonizador Lig Des LCN Para alternar entre os modos LCN Lig Des 7 Configuração de sistema OPERAÇOES BASICA ...

Page 14: ...l tem o mesmo áudio como o Primeiro áudio definido o sistema reproduzirá este idioma de áudio como padrão Se o canal não tem idioma de áudio adequado então o sistema comparará automaticamente com o segundo idioma de áudio As selecções de idioma incluem inglês francês alemão russo arábico português turco espanhol italiano e grego 3 Segundo áudio Se o canal contiver a trilha de áudio correspondente c...

Page 15: ...necidas 4 3 PS 4 3 LB 16 9 Forneça o modo de caixa de pilar Um utilizador pode ver uma imagem cheia de4 3 na TV 16 9 Uma imagem ampla do ecrã será fornecida estreita e com os lados direito e esquerdo em preto Auto Auto significa que o sistema não trocará qualquer taxa de largura altura 3 Saída de vídeo para definir o modo de saída de vídeo de TV prima esquerda direita para seleccionar cada modo circ...

Page 16: ...o GMT variando de 11 30 12 00 com a unidade de incremento por meia hora 1 Região para seleccionar o país que o utilizador estiver pressione esquerda direita para seleccionar ca país circularmente 2 Uso de GMT pressionando esquerda direita s para mudar par lig des o uso de GMT 4 Horário de verão Apenas válido quando a configuração de Uso GMT for Lig Quando Horário de verão for Lig a hora actual será...

Page 17: ...ra o canal que deseja assistir e começará a reproduzir 7 Duração depois de configurar um temporizador para a Duração quando terminar o tempo o sistema mudará para o modo standby Se desejar usar esta função define a duração a ser 00 00 8 Move o destacado para o botão Guardar e prima a tecla OK para guardar o temporizador Seleccione Cancelar ou prima a tecla Sair para cancelar a operação 7 5 Parental ...

Page 18: ...e configuração de sistema a revisão foi concluída 5 Prima a tecla sair para retroceder do menu Bloqueio parental 7 6 OSD Configuração Quando entrar no menu Configuração OSD um ecrã será mostrado conforme abaixo 1 Limite de tempo do OSD para definir a duração de mostrar anúncio de programa que contiver algumas Informações sobre o canal e mostrar quando o canal mudar pressionando esquerda direita para d...

Page 19: ...as Quando entrar no menu Ferramentas um ecrã será mostrado conforme abaixo No Menu Ferramentas 1 Prima a tecla acima abaixo para seleccionar entre as páginas de menu Informações Configuração de fábrica actualizar com o RS232 S W actualizar com o OTA actualizar com o USB dispositivo USB 2 Prima a tecla OK ou direita para entrar em Ferramentas Se o bloqueio do menu for Lig reproduzirá a caixa de diál...

Page 20: ...s informações db de utilizador 2 Prima a tecla sair para retroceder do menu Ferramentas 8 2 Configuração de fábrica de carga Prima a tecla OK no item Configuração de fábrica de carga 1 Uma solicitação de aviso será mostrado com a mensagem Esta operação será o padrão de carga e eliminará todo os canais que o utilizador adicionou o sistema reiniciará continuar 2 Quando seleccionar a opção Sim todos os...

Page 21: ...e ser bin então prima a tecla OK para iniciar actualizar com USB ii Código principal o utilizador pode apenas actualizar parte do código principal Confirme o ficheiro de actualização formato é mcd bin que pode ser qualquer segmento que deve prefixar com mcd Retroceder rádio o utilizador pode actualizar o logo de background Confirme o nome de ficheiro associado ao ficheiro de actualização como m2v 8 6 Di...

Page 22: ...eccione o tipo de lista de reprodução será mostrada pressionando amarelo de pois que o utilizador pode reproduzir a imagem ou Música seleccionando os ficheiro s Se não houver nenhum ficheiro e directório abre uma janela de operação Este tipo de lista de reprodução não existe será mostrado Azul Para girar entre os 3 modos de repetição fornecidos conforme abaixo Pasta de repetição A pasta aleatória co...

Page 23: ... todos os ficheiros serão eliminados e a janela da lista de reprodução será fechada Menu de operação Prima a tecla Info para entrar no menu de configuração 1 Opção de configuração Prima a tecla acima abaixo para mover a barra de rolagem e a opção de troca com a esquerda direita todas as opções Consulte a tabela abaixo Item de opção padrão Mostra o tamanho da imagem Dispositivo cheia cheia de trás mos...

Page 24: ...emovido sem preocupação 9 Jogo 9 1 Otelo 9 2 Sudoku 10 REC Quando entrar no menu REC verá o ecrã conforme abaixo 1 Prima a tecla acima abaixo para seleccionar páginas de menu entre gerente de gravação informações DVR HDD Configuração de DVR 2 Prima a tecla OK ou direita para entrar no REC Se o bloqueio de menu estiver Lig reproduzirá uma caixa de diálogo de utilizador para palavra chave A palavra c...

Page 25: ...novo para cancelar a marca de eliminar 3 Quando sair do gerente de gravação menu todas as marcas de eliminar canal serão eliminadas directamente 10 1 3 Renomear 1 Prima a tecla Vermelho para renomear o programa destacado Mostrará a janela renomear 2 pode seleccionar a tecla Vermelho para trocar de maiúscula em minúscula 3 Prima a tecla Verde para eliminar o char no cursor 4 Prima a tecla amarelo p...

Page 26: ...de exceder a hora actual Prima OK para reproduzir o ponto onde o dispositivo está 5 pode também premir Pausar retrocesso rápido lento retroceder pode executar estas funcões Depois entrará no modo que reproduz o programa gravado no HDD como uma imagem abaixo Depois pode pausar avançar rápido retrocesso rápido avançar lento e retroceder Notas deslocamento de tempo somente estará disponível quando US...

Page 27: ...lume acima Volume abaixo No ecrã cheio prima VOL VOL para ajustar volume 11 4 Número 0 9 No ecrã cheio use número e prima OK no Remoto unidade de controlo para mudar canal 11 5 TV RADIO No modo TV prima TV RADIO pode trocar para o modo de rádio No modo de rádio prima a tecla TV RADIO para trocar para modo TV 11 6 Audio 1 No ecrã cheio prima a tecla AUDIO pode abrir a janela Audio no ecrã 2 Pode mo...

Page 28: ...er e destacar ao premir a tecla canal acima canal abaixo e prima a tecla OK para seleccionar grupo de favorito 3 Na janela de grupo de FAV X pode mover e destacar ao premir a tecla canal acima canal abaixo e prima a tecla OK para seleccionar canais favorito Pressionando página acima página abaixo pode implementar a página acima página abaixo função 4 Pode também pressionar a tecla Volume acima Vol...

Page 29: ...íveis opções de visualização O EPG fornece informações tal como Lista de canais e tempo de início e término para todos os canais disponíveis Prima a tecla EPG para exibir o ecrã EPG 2 Prima a tecla OK em cada itempode ver mais Informações de detalhe e prima a tecla Vermelho para cancelar 3 Prima a tecla Vermelho no menu EPG pode exibir o menu Barra de tempo No menu Barra de tempo pode premir esque...

Page 30: ...e teletexto mostrará Sem dados no ecrã 11 13 Menu 1 Prima a tecla MENU para abrir o menu sair do menu actual para último menu ou fechar a janela 11 14 Sair Prima a tecla SAIR pode sair do menu actual para último menu ou feche a janela 11 15 Informações 1 No ecrã cheio Prima a tecla INFO pode abrir Informações ecrã mostrará o anúncio de programa 2 No anúncio de programa prima a tecla INFO de novo a...

Page 31: ...a posição de activada 1 No modo de reprodução prima a tecla pausa a imagem será pausada mas o som do canal ainda continuará 2 Prima a tecla pausa de novo a imagem do ecrã saltará para a imagem actual reproduzida e o som do canal corresponderá 3 No modo de reprodução prima a tecla pausa a imagem será pausada mas o som do canal ainda continuará 4 Prima a tecla pausa de novo a imagem do ecrã saltará ...

Page 32: ...do Pilhas de controlo gastas Ligue o ficha de parede Direccione um controlo para o painel frontal Verifique obstruções Substitua as pilhas do controlo Esqueceu o código de bloqueio de canal Receptor desligado Handset não direccionado correctamente Painel frontal obstruído Pilhas do handset gastas Elimine o canal bloqueado e faça um varrimento dos canais de novo a n e t n a a d a t c e r i d o ã ç a ...

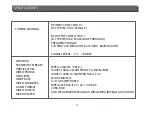
Page 33: ... CONECTOR DE ENTRADA RF X 1 TIPO D IEC169 2 FEMEA CONECTOR DE SAIDA RF X 1 TIPO D IEC 169 2 MACHO LOOPatravés FAIXA DE FREQUENCIA 174 MHZ 230 MHZ VHF 470 MHZ 862MHZ UHF NIVEL DE SINAL 20 1 70 DBM MPEG 2 ISO IEC 13818 1 ISO IEC 13818 2 PERFIL PRINCIPAL LIVEL PRINCIPAL MAX 15MBITS S 4 3 16 9 INTERCAMBIAVEL CAMADA MPEG I II 32 44 1 48 KHZ CVBS RGB GIFA JPEGA BMPA MP3A OGGA WMAA MPG MPEG2 A AVIA DATA ...

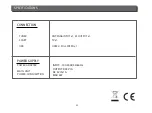
Page 34: ...NTONIZADOR SCART USB FONTE DE ALIMENTAÇAO ADAPTADOR DE ALIMENTAÇAO UNIDADE PRINCIPAL CONSUMO DE ALIMENTAÇAO ENTRADA ANTENA X 1 SAIDA X 1 TV X 1 USB 2 0 VELOCIDADE TOTAL X 1 ENTRADA 100 240V 50 60Hz SAIDA DC5V 1A EN 5V CD 1A MAX 5W ...

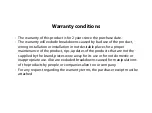
Page 35: ...conservação pancadas actualizações de software que não sejão os facilitados pela marca peças desgastadas pelo seu proprio uso ou por um uso não doméstico ou inadequado assim como por manipulação por pessoas ou oficinas de assistência tecnica alheios à nossa empresa Para que a garantía tenha validade deverá juntar a factura ou tícket de caixa que corrobore valide a aquisição e data de venda deste p...

Page 36: ...USER MANUAL DTB700PT ...

Page 37: ...RMATION 2 INTRODUCTION 3 SYSTEM CONNECTION BASIC OPERATIONS 4 WELCOME PAGE 5 EDIT CHANNEL 6 INSTALLATION 7 SYSTEM SETUP 8 TOOLS 9 GAME 10 REC 11 HOTKEY 1 2 4 5 6 6 9 9 11 11 16 17 22 22 22 25 25 29 12 TROUBLESHOOTING 30 13 SPECIFICATIONS 31 32 ...

Page 38: ...USING THE SET TOP BOX SAFETY INFORMATION 1 ...

Page 39: ...nit from the wall outlet if you don t use it long time please don t touch power line with wetness hand do not place it in a hot location and place it in ventilation location turn off the power before connect antenna Accessory Do not dispose batteries as normal rubbish Be environmentally friendly dispose batteries following the Government s regulation BE ENVIRONMENTALLY FRIENDLY Remote Control 1 Us...

Page 40: ...INTERFACE POWER in Power cord connection socket IR Receiver Receiver control sensor mount socket RF IN Connect the antenna cable RF LOOP through The antenna signal to connect another receiver TV Scart Connecting to a TV receiver SCART connector Mini USB USB device connection ...

Page 41: ...LLOW BUTTON 19 EXIT 20 VOL or RIGHT 21 PAGE DOWN 22 FAV 23 EPG 24 TTX 12 PLAY 1 NUMERIC ENTRY 14 RED BUTTON FB 15 GREEN BUTTON FF 3 CH 4 VOL or LEFT 5 OK 6 PAGE UP 7 CH 8 TV RADIO 9 INFO 10 AUDIO 11 SUB T 13 PAUSE 18 RECALL 2 MENU 4 INTRODUCTION REMOTE CONTROL ...

Page 42: ...SYSTEM CONNECTION Connect to TV Scart TV Antenna IR and Power indicator Power adapter 5 ...

Page 43: ...hannel When pressing the Menu key to enter the main menu which shows as below 1 Press Up Down key to select menu pages among Edit Channel Installation System Setup Tools Game and REC 2 Press OK or Right key to enter the Edit Channel If Menu Lock is On a dialogue inquires the password which is 0000 for default 3 Press Up down key to select menu items among TV Channel List Radio Channel List and Del...

Page 44: ...d press OK key to make a favorite mark in the left side of the selected Favorite group 3 Pressing OK key on the marked Favorite group to cancel the existing favorite mark 4 After marking pressing Exit key to go back to TV Channel List there will be a favorite mark beside the marked channel 5 1 2 Lock 1 Press Red key to enter the lock mode 2 Press Up Down key to move the highlight and press OK key ...

Page 45: ... can open the Sort window as above There are four kinds of sorting approaches By pressing Channel Up Channel Down key to move highlight and press OK key to confirm you selection 2 The four kinds of sorting approaches are Name A Z Sorting in Alphabetical descending Order Name Z A Sorting in Alphabetical ascending Order Lock Collecting all locked channels and list in the bottom of TV Channel List Def...

Page 46: ...els will be deleted 2 If the selection is No or press Exit key this function will be ignored directly without saving Frequently Asked Questions Q IF I recklessly delete all channels what should I do A There are two ways to restore To re search all channels in Installation functions Use load Factory setting function to restore all channels in Tools function 6 Installation When you enter the Install...

Page 47: ...ntering to Channel Scan menu a channel scan menu will be shown as below 1 There are two choices of Scan Mode You can scan channel by channel or by frequency If you scan by channel Scan Band and Ch No are available to adjust If you scan by frequency Frequency and Bandwidth are available to adjust 2 There are two choices of Scan Band You can choose UHF or VHF 3 There are 56 choices of CH No ranging ...

Page 48: ... 6 3 Aerial Adjustment When entering to Aerial Adjustment menu a menu will be displayed as below 1 The user can check and adjust the Signal Intensity and Signal Quality of every Ch No 6 4 LCN LCN To toggle the LCN mode On Off 7 System Setup 2 Tuner Power on off ...

Page 49: ...n a user can set the first audio for this channel If the playing channel has the same audio as the First Audio you set system will play this audio language as default If the channel hasn t the suited audio language then the system will compare automatically with the second audio language The selections of audio languages include English French German Russian Arabic Portuguese Turkish Spanish Polish...

Page 50: ...olution 2 Aspect Mode To switch the screen aspect ratio By pressing Left Right key to select each mode circularly The following options are provided 4 3 PS 4 3 LB 16 9 Provide the pillar box mode A user can see a 4 3 full display picture in a 16 9 TV Wide screen picture will be suppressed to be narrow and leave the left and right side to be black Auto Auto means system won t do any aspect ratio sw...

Page 51: ... pressing Left Right keys to moving highlight and the number keys for inpout 6 Press Exit key to draw back from Time menu 5 Press Exit key to draw back from TV System menu 3 GMT Offset Valid only when the setting of GMT Usage is On By pressing Left Right keys to switch GMT Offset values ranging from 11 30 12 00 with the increment unit by half an hour 4 Summer Time Valid only when the setting of GMT ...

Page 52: ...iable this function set the duration to be 00 00 8 Move the highlight to Save button and press OK key to 7 5 Parental Lock 1 By pressing OK key on Parental Lock item a dialogue will be pop up to ask for the password which is 0000 for default Once the user make the password correct a screen will be shown as above Pressing up down key to select a timer then press enter key to open timer menu 1 Curre...

Page 53: ...u the revising is completed 5 Press Exit key to draw back from the Parental Lock menu 7 6 OSD Setting When entering the OSD Setting menu a screen will be shown as below 1 OSD Timeout To set the duration of showing up for the program banner which contains some information about the channel and shows up once the channel is changed By pressing Left Right key to set the duration ranging from 1 second ...

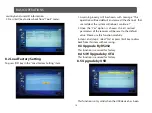
Page 54: ...or Right key to enter the Tools If Menu Lock is On it will display a dialogue for user to key in password The default Password is 0000 3 Press Up Down key to select menu items 4 Press Left key or Exit key to go back to main menu 8 1 Information 1 When entering the Information menu a screen will be shown as above It shows the version and date for the items such as boot loader main code radio back A...

Page 55: ... that user added the system will reboot continue 2 Once the Yes option is chosen the all revised parameters of the receiver will be reset to the default value Please use this function carefully In step 1 and step 2 select No or press Exit key to draw back from this item without saving 8 5 Upgrade by USB This function is only valid when the USB device has been 8 3 Upgrade By RS232 This function is ...

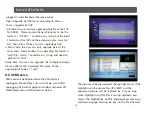
Page 56: ...e confirm the associated file name of the upgrading file to be as m2v 8 6 USB Device USB menu will be disabled when the USB device is unplugged Media Player List will not be saved after unplugging USB and or going to standby and power off Media player menu will be shown as below The picture can be previewed at the top right corner if the highlight is on the picture files JPG BMP and the previewed pictu...

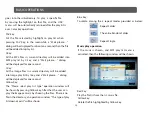
Page 57: ... All the Image files in current directory will be added into Image play list by 1key and a Wait please dialog will be displayed for one second Yellow Key The Please select play list type operation window will be shown by pressing Yellow key After that the user can play the image or music by choosing the files If here is no file in the directory an operation window This type of play list doesnot exist...

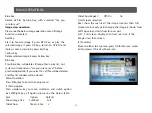
Page 58: ...ration if you select Yes all file will be deleted and Play list window will be closed Menu Operation Press Info key to enter the Setup menu 1 Setup option Press up down key to move scroll bar and switch option by Left Right key all option please see the below table Item Option Default Show Image Size Full Real Full Slide Show Time 0 9Sec 2 Slide Show Repeat Off On On Size Screen selection Real show ...

Page 59: ... without concern 9 Game 9 1 Othello 9 2 Sudoku 10 REC When you enter to REC menu you will see the screen like below 1 Press Up Down key to select menu pages among record manager Record manager DVR HDD Information DVR configuration 2 Press OK or Right key to enter the REC If Menu Lock is On it will display a dialogue for user to key in password The default Password is 0000 10 1 Record manager 3 Pres...

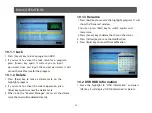
Page 60: ...el the delete operation press Blue key again to cancel the delete mark 3 When exit the Record Manager menu all the delete mark channel will be deleted directly 10 1 3 Rename 1 Press Red key to rename the highlight program It will show the Rename window 2 You can press Red key to switch capital and lowercase 3 Press Green key to delete the char on the cursor 4 Press Yellow key to save the modificati...

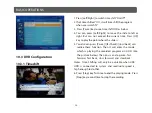
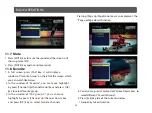
Page 61: ...me Press OK key to play the point where the slide is 5 You also can press Pause fast back slow back can realize these function Then it will enter the mode which is playing the recorded program on HDD like the picture below Then you can do pause fast forward fast back slow forward and slow back Notes Time Shifting will only be available when USB HDD is connected to system and read write speed is hi...

Page 62: ...lume Up Volume Down In full screen press VOL VOL to adjust volume 11 4 Number 0 9 In full screen use number key and press OK on the Remote Control Unit to change channel 11 5 TV RADIO In TV mode pressing TV RADIO key can switch to Radio mode In Radio mode press TV RADIO key to switch to TV mode 11 6 Audio 1 In full screen press AUDIO key can open the Audio window on the screen 2 You can modify the...

Page 63: ...n the window of Favorite you can move highlight by press Channel Up Channel Down key and press OK key to select favorite group 3 In the window of FAV group X you can move highlight by press Channel Up Channel Down key and press OK key to select favorite channels Pressing Page Up Page Down keys can implement the Page up Page down function 4 You also can press Volume Up Volume Down keys to select di...

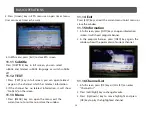
Page 64: ...uide EPG to help you navigate channels through all the possible viewing options The EPG supplies information such as channel listings and starting and ending times for all available channels Press EPG key to display EPG screen 2 Press OK key in each item can see more detail information and press Red key to cancel 3 Press Red key in EPG menu can display Time Bar Menu In Time Bar menu you can press ...

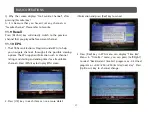
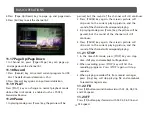
Page 65: ...how No Data on the screen 11 13 Menu 1 Press MENU key can open the menu exit the current menu to last menu or close the window 11 14 Exit Press EXIT key can exit the current menu to last menu or close the window 11 15 Information 1 In full screen press INFO key can open information screen it will shows program banner 2 In the program banner press INFO key again the window shows the parameters of c...

Page 66: ...in the screen s picture will skip over to the current playing picture and the sound of the channel will correspond playing 3 In playing mode press Pause key the picture will be paused but the sound of the channel will still continues 4 Press PAUSE key again the screen s picture will skip over to the current playing picture and the sound of the channel will correspond playing 11 21 STOP 1 In the ti...

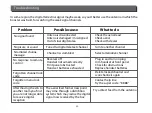
Page 67: ...ned Out of sinal digital area Tuned to digital teletext channel Channel is scrambled Receiver off Handset not aimed correctly Frint panel obstructed Hand set batteries exhausted The aerial feed former new point may cime through a distribtion system chich may redice the digital signal now received by the box Check the aerial lead Check aerial Check with dealer Turn to another channel Select alternat...

Page 68: ...D TYPE IEC 169 2 FEMALE RF OUTPUT CONECTOR X 1 D TYPE IEC169 2 MALE LOOPTHROUGH FREQUENCY RANGE 174 MHZ 230 MHZ VHF 470 MHZ 862MHZ UHF SIGNAL LEVERL 10 70 DBM MPEG 2 ISO IEC 13818 1 ISO IEC 13818 2 MAIN PROFILE MAIN LEVEL ISO IEC 14496 10 MAIN PROFILE L3 0 MAX 15MBITS S 4 3 16 9 SWITCHABLE MPEG LAYER I II 32 44 1 48 KHZ CVBS RGB GIFA JPEGA BMPA MP3A OGGA WMAA MPG MPEG2 A AVIA DATA ...

Page 69: ...PTER TUNER ANTENNA INPUT x1 RF OUTPUT x1 SCART TV x1 1 x D E E P S L L U F 0 2 B S U B S U MAIN UNIT POWER CONSUMPTION INPUT 100 240V 50 60Hz OUTPUT DC5V 1A DC 5V IN 1A MAX 5W SPECIFICATIONS CONNECTION POWER SUPPLY ...

Page 70: ...s for a proper maintenance of the product rips updates of the products that are not the supplied by the brand pieces wore away for its use or for not domestic or inappropriate use Also are excluded breakdowns caused for manipulations of the products by people or companies alien to our company For any request regarding the warranty terms the purchase receipt must be attached Warranty conditions ...

Reviews: