31
5.7) Adjustment of Trimming-related Parts
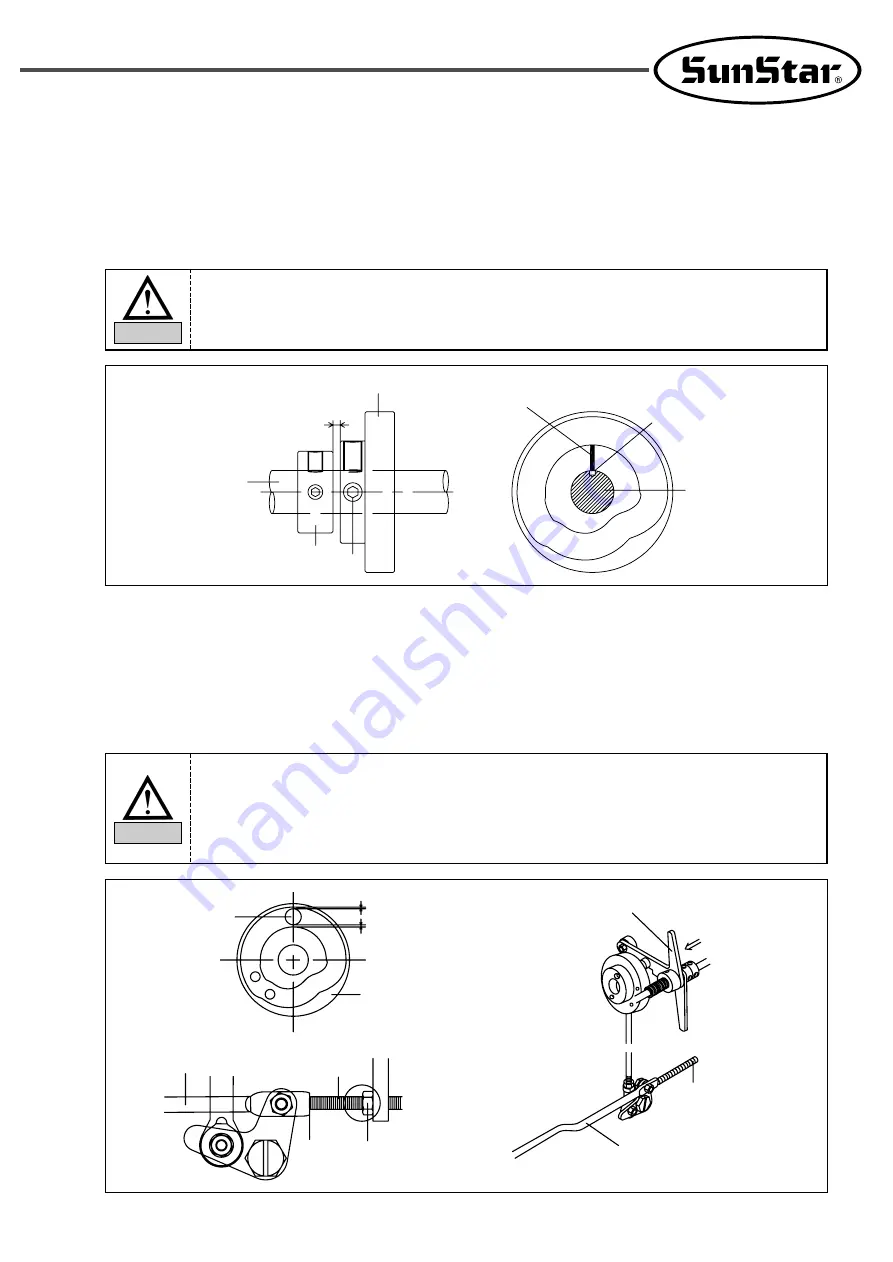
5.7.1) Trimmer Cam Position Setting
Set the distance between the upper shaft collar and the trimming cam at 1.7mm. Move the trimming cam to make the
carved line of the trimming cam touch the punched mark of the upper shaft and fasten the tightening screw.
5.7.2) Adjustment of Link Stopper Screw
1) With the needle bar at the lowest position, push the trimmer driving link toward the trimming cam around the moving
section of the trimmer cam to check whether there is space between the trimmer cam roller and the ends of the
trimmer cam.
2) While the trimmer cam roller is inserted into the moving section of the trimmer cam, adjust the end of the link stopper
screw to meet the section (A) of the trimmer connecting rod, and fasten the nut.
Trimmer Cam
1.7mm
①
Upper Shaft
Upper Shaft
Collar
Trimmer Drive
Cam Roller
Space
Space
Trimmer Cam
Trimmer Drive Link
Link Stopper Screw
Trimmer Connecting Rod
Link Stopper Screw
Nut
Trimmer
Connecting Rod
Carved Line
Punched Mark
Upper Shaft
If the trimming cam is not properly positioned, the trimmer is not properly operated nor the parts
might get stuck to each other.
Caution
1) If there is not enough space between the trimmer roller and the both ends of the trimmer cam,
the trimmer might not be properly operating or upon the beginning or end of sewing, parts might
get stuck with each other.
2) If the location of the link stopper screw is not proper, it takes longer time to return to the original
position after trimming and the first stitch
’
s sewing condition might not be good.
Caution


