


A
C
B
D
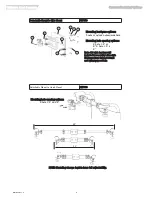
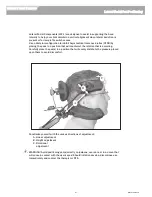
Fig. 2
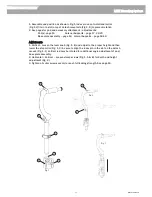
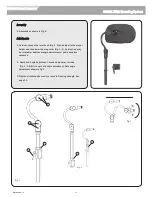
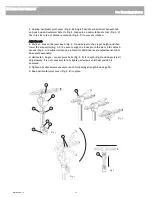
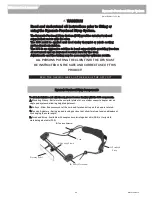
3-Pad Base Plate Assembly Attachment
(Fig. 1)
1. Remove vinyl cover (E) from collar (A). Slide over horizontal ball (C).
2. Loosen rotational bracket (A) collar bolts (B).
3. Clamp mounting system horizontal ball (C) between the rotational bracket collar
halves (A). Even though the knurled balls eliminate unwanted pad movement, the
collars must be evenly tightened to reach their full locking strength. See page 15.
4. Attach pads to screwballs (D).
5. Place vinyl cover (E) on to collar (A).
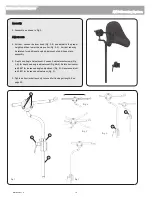
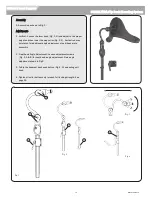
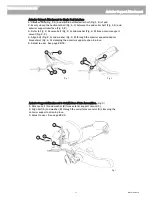
Single Sub-occipital Base Plate Assembly Attachment (Fig. 2)
1. Remove bolts (B) and discard bottom collar half (E) of single sub-occipital pad.
2. Clamp the horizontal ball (A) between the single sub-occipital pad top collar half (B)
and the base plate collar adaptor (C).
3. Attach occipital pad to screwball (D).
4. Even though the knurled balls eliminate unwanted pad movement, the collars must
be evenly tightened to reach their full locking strength. See page 15.
B
C
A
A
D
Fig. 1
E
E
Whitmyer Head Supports
Base Plate Assembly Attachment
MKT6100 Rev. C
16