EN
GLISH
28
Q100R-Q200R Configured Rev. A
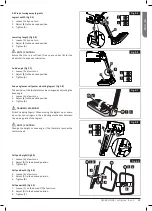
7.7 Crutch Holder, (Fig.7.8):
WARNING!
• Ensure that the crutch is securely fastened to the crutch
holder.
• Ensure that the crutch is not interfering with the mechanisms
of the chair.
• Ensure that the crutch does not protrude from the chair.
• Do not attempt to remove the crutch whilst the chair is in
motion.
• Always come to a complete stop and turn off the power to
the controls before attempting to remove the crutch. This
will avoid accidentally operating the chair.
Fig. 7.8
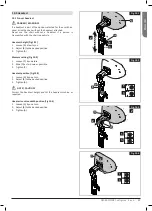
7.8 Lights and indicators, (Fig.7.9-7.10):
Where fitted, ensure that the lights and indicators are
functioning correctly and lens are clean before going outdoors
at night.
Lights assemblies can become very hot - Care must be taken if
removing them for repair.
NOTE:
Please contact your local Sunrise medical approved
servicing agent for any warranty, service or repair work
required.
Fig. 7.9
Fig. 7.10
Rear drive wheel (Fig.7.7):
• Loosen the 3 studs with a 17mm socket.
• Elevate the wheel using blocks.
• Remove the studs & damaged wheel.
• When it has been repaired, follow the reverse procedure to
refit.
• Tighten the 3 studs to a torque of 40-45Nm
Note:
The rear wheels are designed as separate rims and can
be disassembled to simplify changing the tube or tyre.
Fig. 7.7


