


EN
GLISH
Q100R-Q200R Configured Rev. A
27
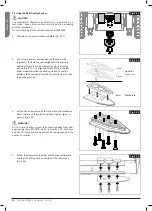
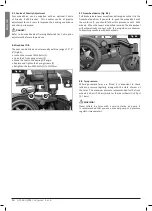
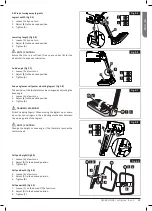
7.4. Kerb climber (Fig. 7.4):
• The Q100R and Q200R are available with a kerb climber
option, this can be fitted by your powerwheel chair supplier.
• Fitting the kerb climber
• Remove the plastic cover at the front of the wheelchair by
removing the 4 mounting screws.
• Remove the two thin push out pieces from the plastic cover.
• Mount the two side plates of the kerb climber through the
provided holes of the front tube and tighten to 20-25Nm.
• Reassemble the plastic front cover – carefully guiding this
over the two side plates of the kerb climber. Replace the 4
screws and tighten to 1-2Nm.
• Mount the kerb climbing wheel through the provided hole
and tighten assembly to 10-15Nm.
• Check assembly is fully tightened before use.
Fig. 7.4
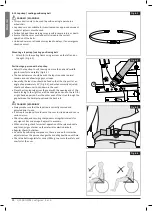
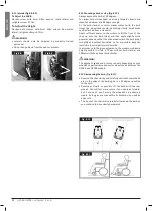
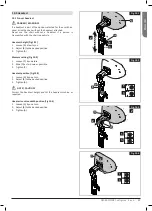
7.5. Batteries (Fig.7.5):
For removal of batteries see section 13.0 for details
To disconnect the batteries.
• Remove the front Battery cover by lifting upwards at the
handle provided at the front of the cover.
• Undo the two GREY plugs that connects the two batteries
together.
Fig. 7.5
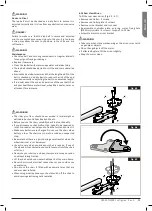
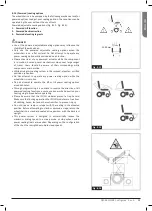
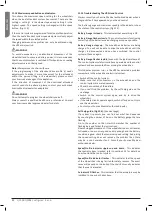
7.6. Wheels (Fig.7.6 & 7.7):
If it is necessary to remove the wheels, to repair a damaged
tyre for example, proceed as follows:
WARNING!
All wheels are safety critical items. If you are unsure about
performing these tasks, please contact your approved Sunrise
Medical dealer.
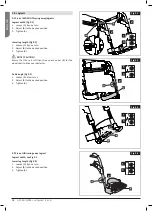
Front castor wheel:
Q100 (Fig. 7.6.1)
• Use a 6 mm. Allen wrench & 13.0mm spanner to remove the
wheel axle from the fork.
• Remove the damaged wheel.
• When the wheel has been repaired, follow the reverse
procedure to refit.
• Tighten the axle to a torque of 13-17 Nm.
Q200 (Fig. 7.6.2)
• Use a 5 mm. Allen wrench & 13.0mm spanner to remove the
wheel axle from the fork.
• Remove the damaged wheel.
• When the wheel has been repaired, follow the reverse
procedure to refit.
• Tighten the axle to a torque of 13-17 Nm.
Q100R
Q200R
Fig. 7.6.1
Fig. 7.6.2


