


SunMaxx Solar |5098 NY 206 Bainbridge NY 13733 | 1.877.786.6299 1.877.270.7875 fax | www.sunmaxxsolar.com
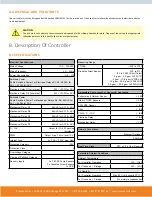
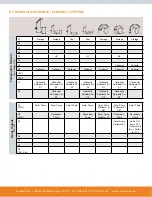
Other Specifications And Dimensions
Housing Design
3-Part, ABS Plastic
Installation Methods
Wall installation, optionally panel installation
Overall Dimensions
8.98 x 7.09 x 2.09 in
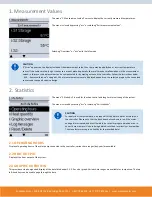
Display
Full graphics display; 128 x 128px
Light Diode
2: 1x red, 1x green
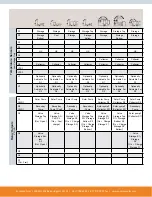
B.2 TEMPERATURE RESISTANCE TABLE FOR PT1000 SENSORS
F
32
50
68
86
104
122
140
158
176
194
212
Ω
1000
1039
1077
1116
1155
1194
1232
1270
1308
1347
1385
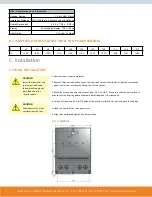
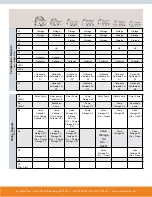
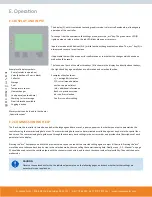
C.1 WALL INSTALLATION
C. Installation
CAUTION
Install the controller only
in dry areas and under
the ambient conditions
described under B.1
“Specifications”.
CAUTION
Controller must be inac-
cessible from the rear.
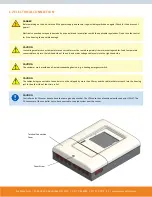
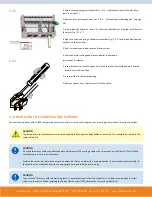
1. Unscrew cover screw completely.
2. Remove Terminal connection cover. Unscrew the 2 small screws left and right and remove the
upper part of the controller by lifting it out of the socket.
3. Mark the 3 mounting holes on the wall (see „C.1.1. Socket“). Make sure that the wall surface is
even so that the housing does not become distorted when it is screwed on.
4. Using a drill and size 6 bit, drill 3 holes at the points marked on the wall and push in the plugs.
5. Hang the controller on the upper screw.
6. Align the housing and tighten the lower screws.
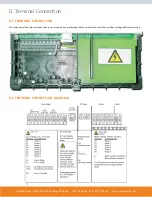
C.1.1 Socket


