12
m
IMPORTANT!
NEVER USE:
•
Bleach, chlorine products, and other corrosive chemicals
•
Liquids containing solvents (e.g. paint thinners, gasoline,
oils)
•
Tri-sodium phosphate products
•
Ammonia products
•
Acid-based products
These chemicals will harm the unit and will damage
the cleaning surface.
Shutting down
1. Turn the switch to the OFF (0) position and unplug the
power cord from the outlet.
2.
Turn off the water source.
3. Hold the trigger to release water pressure.
4. Disconnect the garden hose from the water inlet on
the unit.
5. Disconnect the high-pressure hose connection on the
trigger gun handle.
6. Release the trigger and engage the gun safety lock.
m
WARNING!
Turn off the water supply and squeeze the
trigger to depressurize the unit. Failure to do so could result in
personal injury due to discharge of high-pressure water.
Taking a break
If you are taking a break of five minutes or more between
cleaning tasks:
1. Engage the gun safety lock (Fig. 13).
2. Turn the switch to the OFF (0) position.
3. Unplug the power cord from the outlet.
Using the Wet/Dry Vacuum
m
WARNING!
This equipment incorporates parts such
as switches, motors or the like that tend to produce arcs or
sparks that can cause an explosion. Do not pick up flammable,
combustible, or hot materials. Do not use around explosive
liquids or vapors, as electrical devices produce arcs or sparks
which can cause a fire or explosion – do not use at filling
stations or anywhere gasoline is stored or dispensed.
1.
Make sure the filter is installed before starting.
2. Make sure the dust compartment and the vacuum hose
are installed properly and locked securely.
3. Install the desired cleaning accessory onto the end of the
hose. Use the extension tubes if needed.
4. Check that the electrical supply voltage and frequency
(Volt/Hz) correspond to those specified on the
rating plate.
If the power supply is correct, you may now plug the
vacuum into the power outlet (Fig. 12).
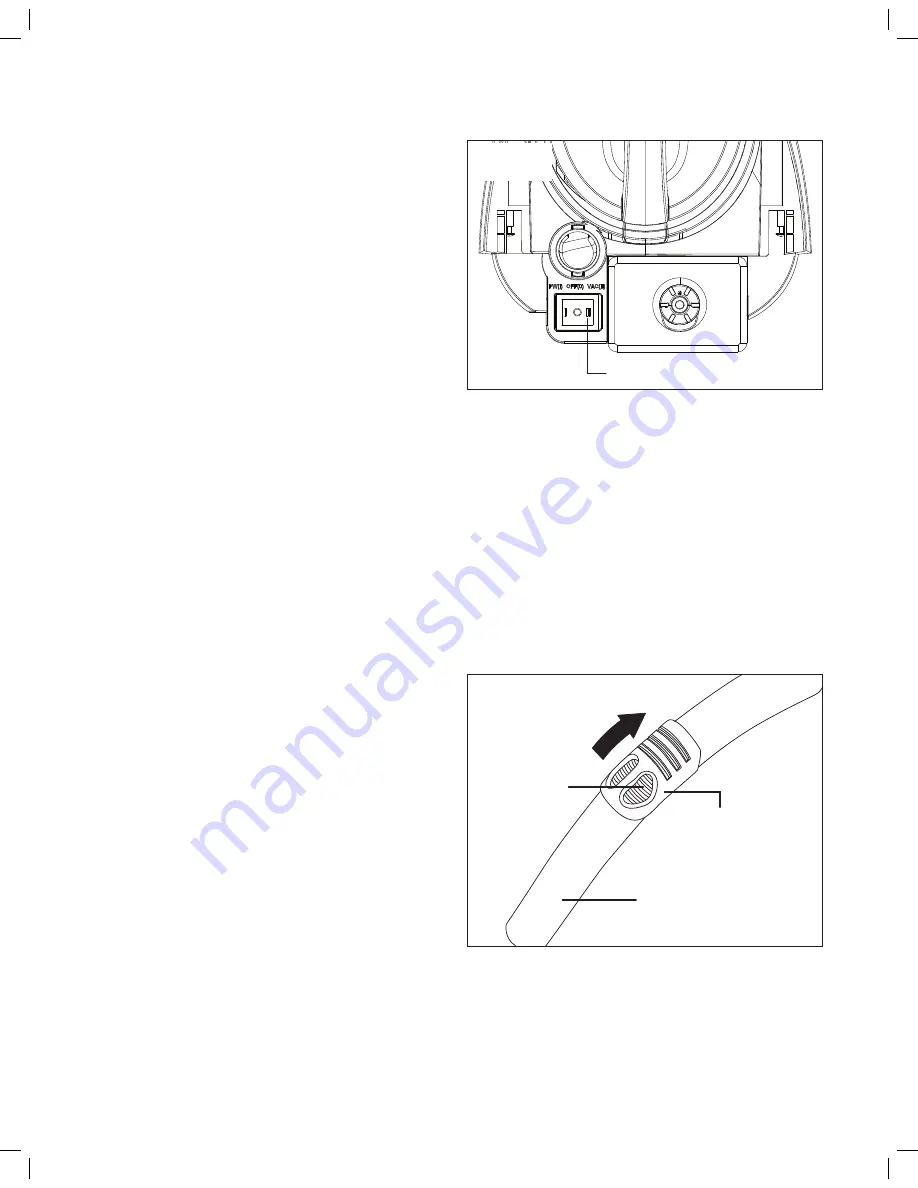
5. Push the VAC(II) side of the ON/OFF switch (Fig. 20).
6. After the vacuum job is done, push the OFF(O) position of
the switch, unplug the power cord. Disassemble and store
all the vacuum accessories.
Adjust the Air Flow
The air flow of the unit is adjustable through the air block
located on the end of the vacuum hose. To adjust the air flow,
following the instruction below.
1. Remove the extension tube from the vacuum hose to
expose the air block.
2.
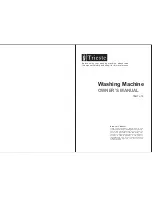
To reduce the air flow, slide up the air block to expose the
air vent on the vacuum hose, the suction power will be
reduced. To increase the air flow, slide down the air block
to cover the air vent, the suction power will be increased
(Fig. 21).
3. Reassemble the extension tubes and selected accessory
and resume working.
Fig. 20
Vacuum switch
Fig. 21
Vacuum hose
Air block
Air vents
Summary of Contents for SPX7000E
Page 18: ...NOTES 18 ...


