background image

4940A 

3 03/18/19

OWNER'S MANUAL

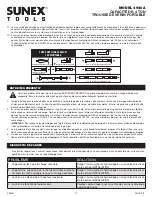
PORTABLE HYDRAULIC POWER KIT SETUP INSTRUCTIONS

This is the Safety Alert Symbol used for the SETUP INSTRUCTIONS section of this manual to alert you to potential 

personal injury hazards. Obey all instructions to avoid possible injury or death.

SETUP

PLEASE REFER TO THE EXPLODED VIEW DRAWING IN THIS MANUAL IN ORDER TO IDENTIFY PARTS.

1.   Refer to the exploded view parts drawing in this manual to identify parts mentioned in this setup procedure.
2.  

Install the ram at the end of the hose and secure the quick disconnect fittings together by hand tightening the threaded sleeve on 
the ram fitting.

3.   Insert the pump handle in the pump linkage receiver and rotate the handle clockwise until tight. 

Before operating the pump, turn the 

reservoir vent screw in a counterclockwise direction until it stops.

4.   During shipping or handling air may have become trapped in the hydraulic system. If the pump is not providing a full incremental pump 

stroke or the ram feels spongy, it will be necessary to purge the air out of the hydraulic system:

      a.   Before operating the pump, turn the reservoir vent screw in a counterclockwise direction until it stops. 

b.   Place the pump horizontally on a table. Position the hose and ram over the edge of the table, lower than the pump with the ram  
 

piston pointing down.

      c.   Close the pump’s release valve and pump the ram to its complete or its furthest extension. Open the pump’s release valve to  


retract the ram all the way. Conduct this procedure several times without a load. 

d.   Repeat steps “b” and “c” until all air is purged from the system.

OPERATING INSTRUCTIONS

This is the Safety Alert Symbol used for the OPERATING INSTRUCTIONS section of this manual to alert you to potential 

personal injury hazards. Obey all instructions to avoid possible injury or death.

1.   Study the work to be done in order to determine the type ram and other attachments you will be using. 

Consult the enclosed 

chart titled “Applicable force for component set ups” in order to determine the maximum allowable force to be used in your 
specific setup.

 All rams have female hose disconnects attached to them, and the end of the hose has the male quick disconnect 

attached to it. Insert the male quick disconnect at the end of the hose all the way in to the ram’s female quick disconnect. Slide the 
female connector’s threaded sleeve on to the threads of the male connector and hand tighten. Never use any tools to tighten this 
connection.

2.   Consult this Owner’s Manual section titled APPLICABLE FORCE FOR COMPONENT SET UPS for typical attachment and extension 

tube setups and pay very close attention to the corresponding load ratings of certain attachment connections. The use of extension 
tubes, ram or plunger toes greatly reduces the hydraulic system’s capacity. When using extension tubes, put the shortest tubes on 
the ends of the setup.

3.   The pump may be operated in the horizontal or vertical position but the pump must point down when used in the vertical position.
4.   Make sure all hydraulic and attachment connections are fully engaged and tight so ram force is straight in order to avoid off-center 

load conditions.

5.   During setup, make sure the hose routing avoids kinks, twists, curls or bends that will impede hydraulic fluid flow. Do not use the 

hose as a means to carry the kit components. Do not subject the hose to any hazards such as fire, extreme heat or cold, sharp 
surfaces, or heavy impact. IF A HOSE RUPTURES, BURSTS, OR NEEDS TO BE DISCONNECTED, IMMEDIATELY SHUT THE PUMP 
OFF AND OPEN THE RELEASE VALVE TO RELEASE HYDRAULIC PRESSURE. NEVER GRASP A LEAKING PRESSURIZED HOSE, 
FITTING OR COMPONENT WITH YOUR HANDS OR SUFFER SERIOUS INJURY.

6.   Always use the force gauge to make sure you are within the required force range when operating the system.
7.   In order to pump the ram, it will be necessary to turn the release valve knob in a clockwise direction until tight. Tighten by hand only.
8.   Pumping the handle up and down transfers the hydraulic fluid from the pump’s reservoir, through the hose, in to the cylinder and 

extends the ram with each incremental pump stroke.

9.   To release the pressure and return the ram back in to its cylinder, turn the release valve knob in a counterclockwise direction very 

slowly. Turning the release valve knob slowly will determine the speed in which the ram will retract back into its cylinder.


IMPORTANT:

 The pump includes an overload valve that will activate at the pump’s rated capacity only. If the setup requires a re-

duced rating, the operator is responsible for using the gauge to determine when to stop pumping since the overload valve is set to a 
higher rating.

10.  Make sure the ram is completely retracted inside its cylinder before disconnecting the hose from the cylinder.
11.  The air and hydraulic quick disconnect fittings are repeatedly disconnected and exposed to shop or work place floors that are cov-

ered with dirt and debris. It is important to use the dust caps provided to prevent contaminants from entering the air and hydraulic 
systems.

12.  Based on continuous engagement and disengagement of the hose from the cylinder, eventually it will become necessary to add 

hydraulic fluid to the pump’s reservoir. Completely retract the ram before adding hydraulic fluid. Do not overfill in order to avoid 
personal injury and hydraulic malfunction. Use only hydraulic jack oil, 

Chevron Hydraulic Oil AW ISO 32 or its equivalent Unocal Unax 

AW 150

. Other fluids will cause damage to the hydraulic seals.

MODEL 4940A

CAPACITY: 4 TON 

PORTABLE RAM KIT

Summary of Contents for 4940A

Page 1: ... lbs OWNER S MANUAL CONTENTS Page 1 Specifications 2 Warning Information 3 Setup Operating Instructions 4 Preventative Maintenance Troubleshooting Owner User Responsibilities 5 Warranty Information 6 8 Exploded View Drawings and Replacement Parts Copyright 2019 Sunex Tools SPECIFICATIONS MODEL 4940A CAPACITY 4 TON PORTABLE RAM KIT ...

Page 2: ...andards Wear eye protection that meets ANSI Z87 1 and OSHA standards users and bystanders Do not exceed the rated capacity When attachments and adapters are used with the kit the rated capacity of the kit shall be no greater than the rated capacity of the lowest rated component or combination of components that makes up the kit Please refer to the Owner s Manual section titled APPLYING FORCE for t...

Page 3: ...f certain attachment connections The use of extension tubes ram or plunger toes greatly reduces the hydraulic system s capacity When using extension tubes put the shortest tubes on the ends of the setup 3 The pump may be operated in the horizontal or vertical position but the pump must point down when used in the vertical position 4 Make sure all hydraulic and attachment connections are fully enga...

Page 4: ...t Unocal Unax AW 150 Other fluids will cause damage to the hydraulic seals IMPORTANT In order to prevent seal damage and kit failure never use alcohol hydraulic brake fluid or transmission oil in the pump 3 Every kit owner is responsible for keeping the kit labels clean and readable Use a mild soap solution to wash external surfaces of the kit components but not any moving hydraulic components 4 D...

Page 5: ...rs The foregoing obligation is Sunex Tools sole liability under this or any implied warranty and under no circumstances shall we be liable for any incidental or consequential damages NOTE Some states do not allow the exclusion or limitation of incidental or consequential damages so the above limitation or exclusion may not apply to you Return equipment or parts to an authorized service center tran...

Page 6: ... 02 2 RS4T02 2 5 04 128mm Extension 1 02 3 RS4T02 3 8 50 216mm Extension 1 02 4 RS4T02 4 16 54 420mm Extension 1 02 5 RS4T02 5 19 49 495mm Extension 1 Item Part Description Quantity 03 RS4T03 Flat Base 1 04 RS4T04A Ram Toe 1 05 RS4T05 Plunger Toe 1 06 RS4T06 Wedge Head 1 07 RS4T07 V Base 1 08 RS4T08 Male Connector 1 09 RS4T09 Serrated Saddle 1 10 RS4T10 Rubber Head 1 11 RSPG Pressure Gauge 1 MODEL...

Page 7: ... Hose Dust Cover 1 P19 Ball 1 P20 Ball Cap 1 P21 Spring 1 P22 Screw 1 P23 O Ring 1 P24 Screw 1 P25 Screw Protector 1 P26 Nylon Ring 1 P27 Valve Base 1 P28 Valve Cover 1 Item Part Description Quantity P29 Washer 1 P30 Seal 1 P31 O Ring 1 P32 Washer 1 P33 Screw 1 P34 O Ring 1 P35 Washer 1 P36 Piston 1 P37 Pin 1 P38 Retaining Ring 2 P39 Pin 1 P40 Handle Socket 1 P41 RS4TP41 Handle Incl 42 1 P42 Handl...

Page 8: ...eparately Item Part Description Quantity S1 Pin 1 S2 Circlip 2 S3 Movable Jaw 1 S4 Spring 1 S5 Fixed Jaw 1 S6 Piston 1 S7 Cup Seal 1 S8 O Ring 1 S9 End Cap 1 RSCPRA Coupler 1 Includes S10 S11 P11 S12 S13 Includes S10 S11 P11 S12 S13 RS4TR RAM PARTS BREAKDOWN Item Part Description Quantity R01 RS4TR01 Cover 1 R02 Circlip 1 R03 Piston Rod 1 R04 Circlip 1 R05 Bushing 1 R06 Nylon Ring 1 R07 Sealing Ri...

Page 9: ...1 Recorrido 120mm 4 72 Capacidad fluida 10 5 oz Peso neto 43 libras MANUAL DE OPERATIÓN CONTENIDO Página 9 Especificaciones 10 Información de advertencia 11 12 Ensamble operación y mantenimiento 13 Diagnóstico de averías e información de garantía MODEL 4940A CAPACIDAD 4 TON EQUIPO PORTÁTIL DE PISTONES ...

Page 10: ...go Consulte por favor la sección del Manual del Propietario titulada APLICACIÓN DE PRESIÓN para las aplicaciones típicas y las capacidades de carga correspondientes USE EL CALIBRADOR DE POTENCIA INCLUIDO CON ESTE EQUIPO PARA MONITOREAR LAS CAPACIDADES CORRECTAS DE CARGA Los pistones de cuña están clasificados a una capacidad de 1 tonelada Los cabezales de hule están clasificados a una capacidad de...

Page 11: ... use en la posición vertical 4 Asegúrese que todas las conexiones hidráulicas y de los accesorios estén completamente encajadas y apretadas para que la poten cia del pistón esté recta con el fin de evitar condiciones de cargas no centradas 5 Durante el montaje asegúrese que la ruta de la manguera evite curvas retorcimientos espirales y dobladuras los que impiden el flujo del líquido hidráulico No ...

Page 12: ...dos ocasionarán daños a los sellos hidráulicos IMPORTANTE Con el fin de prevenir daños de sello o fallas del equipo nunca use alcohol líquido hidráulico de freno ni aceite para transmisiones en la bomba 3 Cada propietario del equipo será responsable por mantener limpias y legibles las etiquetas del equipo Use una solución de jabón suave para limpiar las superficies externas de los componentes del ...

Page 13: ...repondrá a nuestra opción cualquier parte o unidad la cual demuestra ser defectuosa en cuanto a material o mano de obra Otra importante información de la garantía Esta garantía no cubre daños a equipo o herramientas debido a modificaciones abuso mal uso o daños y no cubre ninguna reparación o sustitución hecha por ninguna persona que no sea Sunex Tools o alguno de sus centros de servicio de garant...

Page 14: ...tallation opération et entretien préventif 18 Dépannage information de garantie et entretien SPÉCIFICATIONS Charge nominale 4 Tonnes 7 250 lb po2 Hauteur minimale du vérin 267mm 10 51 po Course 120mm 4 72 po Capacité en fluide 10 5 oz Poids net 43 livres MODEL 4940A CAPACITÉ DE 4 TON TROUSSE DE VÉRIN PORTABLE ...

Page 15: ...ucune fuite Ne pas trop les serrer car cela pourrait causer un bris prématuré des filets ou un fendillement des raccords à pression Serrer tous les raccords de boyau à débranchement rapide à la main seulement Ne pas soumettre le boyau à la chaleur ou au froid extrême le faire entrer en contact avec des surfaces coupantes ou abrasives Ne pas le cogner l emmêler le tordre l entortiller le plier ou l...

Page 16: ...loyer le vérin il sera nécessaire de tourner le bouton de la soupape de relâchement dans le sens horaire jusqu à ce qu il soit bien serré Serrer à la main seulement 8 Le fait de lever et d abaisser le manche fait circuler le liquide hydraulique dans le boyau du réservoir de la pompe jusqu au cylindre et allonge le vérin à chaque mouvement de levée uniforme 9 Pour libérer la pression et abaisser le...

Page 17: ...rectives pour éviter des blessures potentiellement graves ou mortelles 1 Toujours entreposer le produit dans un endroit où il sera protégé des intempéries des vapeurs corrosives de la poussière abrasive et des autres éléments nocifs La trousse doit être exempte d eau de neige de sable de saletés d huile de graisse ou de tout autre matériau étranger avant l utilisation 2 En raison du branchement et...

Page 18: ...lez adresser par écrit toutes vos questions sur le service de garantie à Sunex Tools Cette garantie donne à l acheteur des droits juridiques spécifiques ainsi que certains autres droits qui peuvent varier selon la juridiction Après échéance de la garantie de remplacement direct d un an certaines pièces de service seront disponibles à l achat par l entremise des options de services normaux de Sunex...

Reviews: