5
Remote Control Battery Installation:
• Remove the battery door from back of the
remote control.
• Insert one 9 volt alkaline battery. (
fig. 4)
• Replace battery door on the back of the remote control.
• To test the unit, turn on by pressing and holding
the on/off button for 2 seconds. The power
indicator light will illuminate gREEN. (
fig. 5)
COLLAR FITTING
Proper fit of the Sunbeam® Advanced Remote
Trainer is essential to establish a good training
foundation and optimal performance.
Note:
Batteries should be installed properly
and collar should be in the OFF position before
proceeding with fitting the collar to your dog.
STEP 1:
Ensure dog is in a relaxed position.
STEP 2:
With the collar clasp open loosen
the adjustment buckle such that it can reach
completely around your dog’s neck. (
fig. 6)
When buckled, the collar should rest directly
behind the dog’s ears (the highest part of the
neck). (
fig. 7)
STEP 3:
Close and lock clasp. (
fig. 8)
STEP 4:
Adjust for proper fit by pulling on strap
until you can fit two fingers in between your
dog’s neck and the collar. (
fig. 9)
STEP 5:
Let your dog wear the product for
sufficient time confirming that they are moving
around normally. This step is to ensure that
under daily activity the collar will remain secure
and not become loose.
STEP 6:
Reattach collar to your dog. Check the
fit of the collar several times per day.
Reminder:
If you choose to use a 2nd collar,
leash or harness system make sure it does not
interfere with the operation of the Sunbeam®
Advanced Remote Trainer.
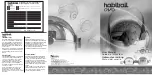
figure 6
figure 4
figure 7
figure 5
figure 8
figure 9