


Maintenance
37
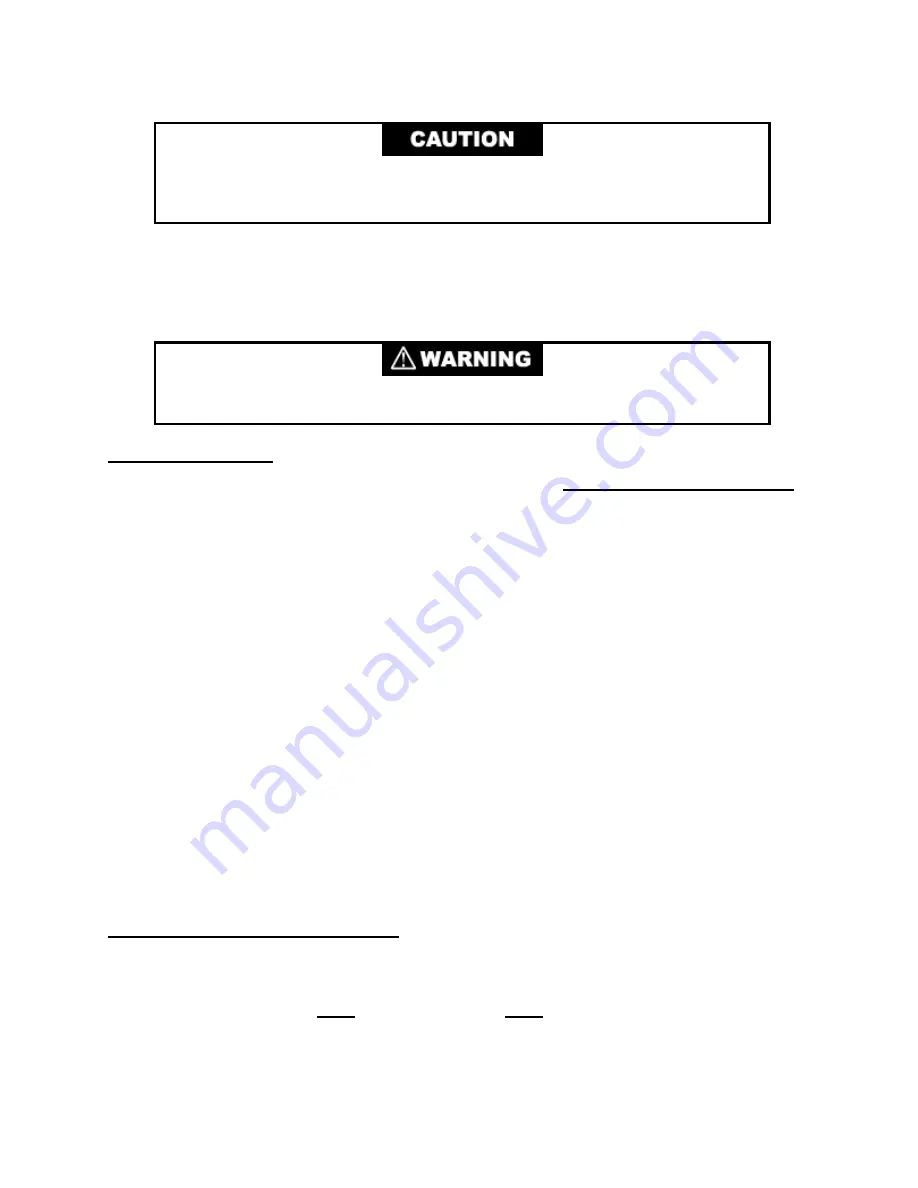
AVOID EQUIPMENT FAILURE, CONTAMINATION OR A NUISANCE
SHUTDOWN
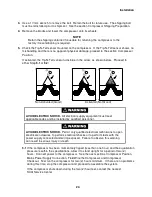
. Do not tip the compressor greater than 5 degrees from horizontal
to avoid flowing oil into unwanted places and causing a nuisance shutdown.
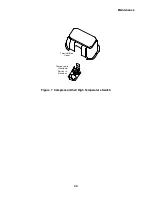
6.
Remove the lock nut on the supply coupling on the front panel.
7.
Pull the adsorber back until the supply coupling clears the front panel. Remove the
adsorber. Remove the lock washer from the Aeroquip supply coupling. Retain all hardware
to use with the new adsorber.
AVOID INJURY.
The adsorber is charged with helium gas. Follow the adsorber
venting procedure for safe disposal of the used adsorber.
Adsorber Installation
1.
Remove the caps from the gas lines of the new adsorber.
Do not vent the new adsorber.
2.
Insert the supply coupling through the front panel and position the adsorber on the base
within the traced outline. Be sure the lock washer is installed on the coupling prior to
inserting it through the front panel.
3.
Apply Loctite 242 to the threads of the bolt used to secure the adsorber to the base. Install
and tighten this bolt and lock washer. Lower the elevated compressor to the floor.
4.
Install the nylon washer and the locknut on the supply coupling. Torque the locknut to
5.5 kgf m (40 ft. lbs.).
5.
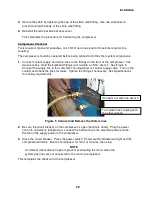
Connect the adsorber’s self-sealing coupling on its inlet side to the oil separator’s outlet
coupling. With wrenches, torque the Aeroquip coupling to 4.85 ± 0.7 kgf m (35 ± 5 ft. lbs.).
6.
Reconnect the supply gas line to the supply coupling on the compressor. Torque the
coupling to 4.85 ± 0.7 kgf m (35 ± 5 ft. lbs.)
7.
Leak check all Aeroquip couplings just completed.
8.
Check the equalization pressure. See Specifications.
9.
Reinstall the top and side panels.
This completes the procedure for replacing an adsorber.
Used Adsorber Venting and Disposal
For safe disposal of the used adsorber:
1.
A venting adapter fitting is included with the new adsorber. Attach it to one of the self-
sealing couplings on the
used
adsorber. Vent the
used
adsorber to atmospheric pressure.
2.
Discard the used adsorber and the adapter fitting.
Summary of Contents for HC-4E1
Page 2: ......
Page 8: ...4 This page is intentionally blank...
Page 10: ...6 This page is intentionally blank...
Page 12: ...8 This page is intentionally blank...
Page 20: ...16 This page is intentionally blank...
Page 26: ...22 This page is intentionally blank...
Page 38: ...34 This page is intentionally blank...
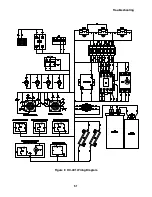
Page 55: ...Troubleshooting 51 Figure 9 HC 4E1 Wiring Diagram...
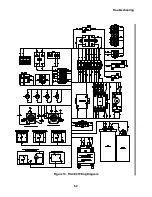
Page 56: ...Troubleshooting 52 Figure 10 HC 4E2 Wiring Diagram...
Page 57: ...Troubleshooting 53 Figure 11 HC 4E1 Electrical Schematic...
Page 58: ...Troubleshooting 54 Figure 12 HC 4E2 Electrical Schematic...
Page 61: ...Parts 57 Figure 13 Parts Identification 18 21 19 13 14 20 16...


