VMK88-MANUAL________________________________
BUTTONS
________________________________________14________________________________________
SCREEN
CHANGE
Edit
Press or Move
Any Controls
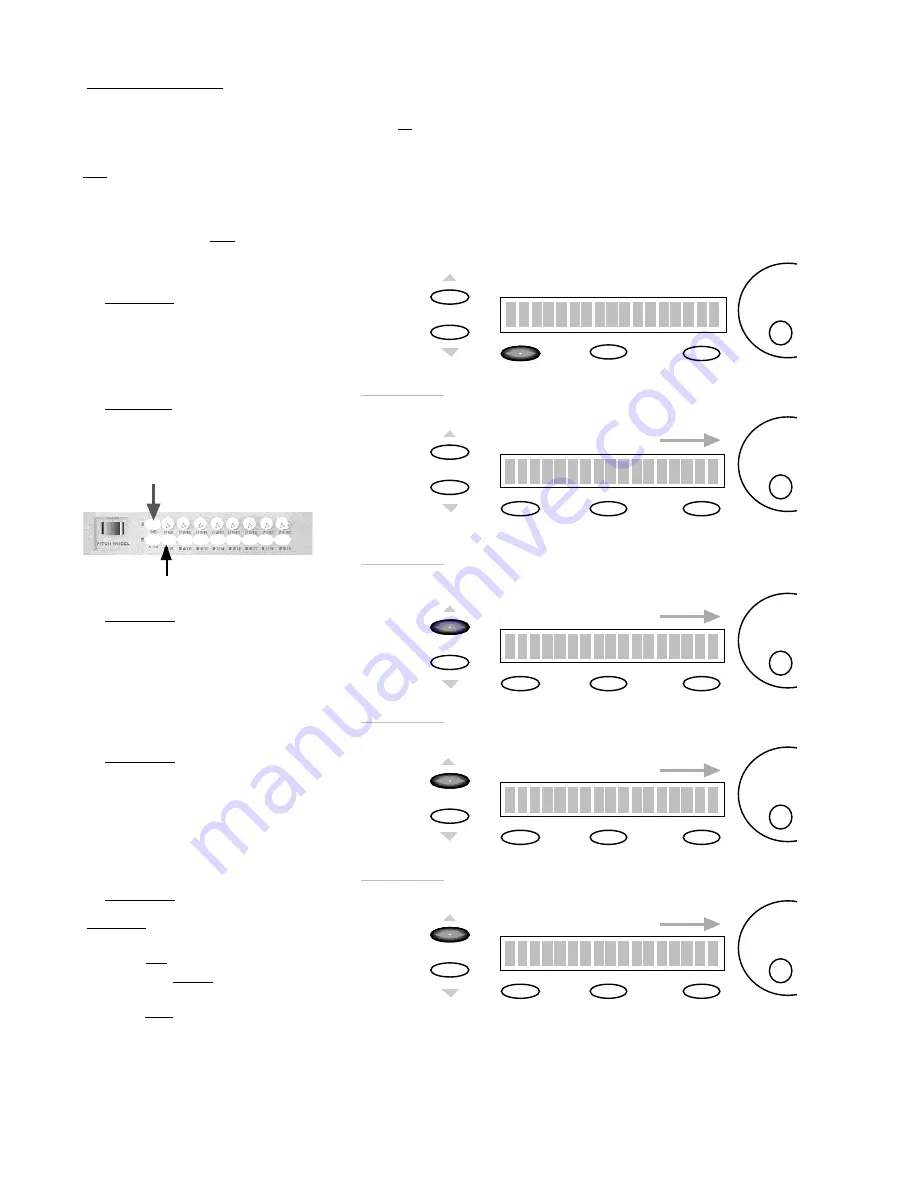
1)
PRESS
EDIT
SCREEN
CHANGE
To adjust the
Midi Channel
use the
DE
dial.
Edit Button: B1
Midi Channel : 1
Edit
2)
PRESS
BUTTON
In this example, PRESS
BUTTON 1
with
Bank A
Selected.
Set to Midi
Channel
1
SCREEN
CHANGE
CTRL Change
:
OFF
Edit
To adjust the
CTRL Change
value use the
DE
dial
3)
PRESS
PAGE UP
In this example, we’ll set
CTRL Change
to
O F F
You may adjust this to any
CTRL number you desire.
SCREEN
CHANGE
Edit
To adjust the
Key Note.
use the
DE
dial
4)
PRESS
PAGE UP
Set the
Key Note
to 60.
Key range is 0-127
Storage
Enter
Key Note: 60
SCREEN
CHANGE
Key Mode: SWITCH
Edit
To adjust the
Key Mode .
use the
DE
dial
5)
PRESS
PAGE UP
SWITCH:
Press button once,
a
NOTE ON
Message will transmit.
Switch is ON.
Press button again, a
NOTE OFF
Message will transmit.
Switch is OFF.
We will set up a
BUTTON
to behave like a simple ON/OFF switch, or Latch Switch. Press the
BUTTON
once and the
Switch
will
be on. Press the
BUTTON
again and the
Switch
will be off.
Programing
Transport
BUTTONS
follows the exact same procedure.
TIP:
This can be very useful to control the Mutes on your Audio/Sequencing program. Most Pro and Semi Pro Audio/Sequencing
programs will allow you the option to control various functions of the program from an external controller, in this example,
controlling the Mutes on your virtual mixer. (See your Program’s manual for details.) Each
BUTTON
can behave like a
Latch,
used in this
Mute
example
(SWITCH MODE),
or like a
Momentary (PUSH MODE)
switch. A
Momentary switch
will only function
when the
BUTTON
is held down. This is very useful for the
Fwd BUTTON
and
Rew BUTTON
in the
Transport
section.
PROCEDURE: BUTTON PROGRAMMING
Storage
Enter
Storage
Enter
Storage
Enter
Storage
Enter
Remember
:
keep track of your
BANKS
when programing!
PRESS
BUTTON
(1)
Edit Button: B1
Edit Button: B1
Edit Button: B1


