


VMK88-MANUAL__________________________
_
SLIDERS / KNOBS
________________________________________12________________________________________
SCREEN
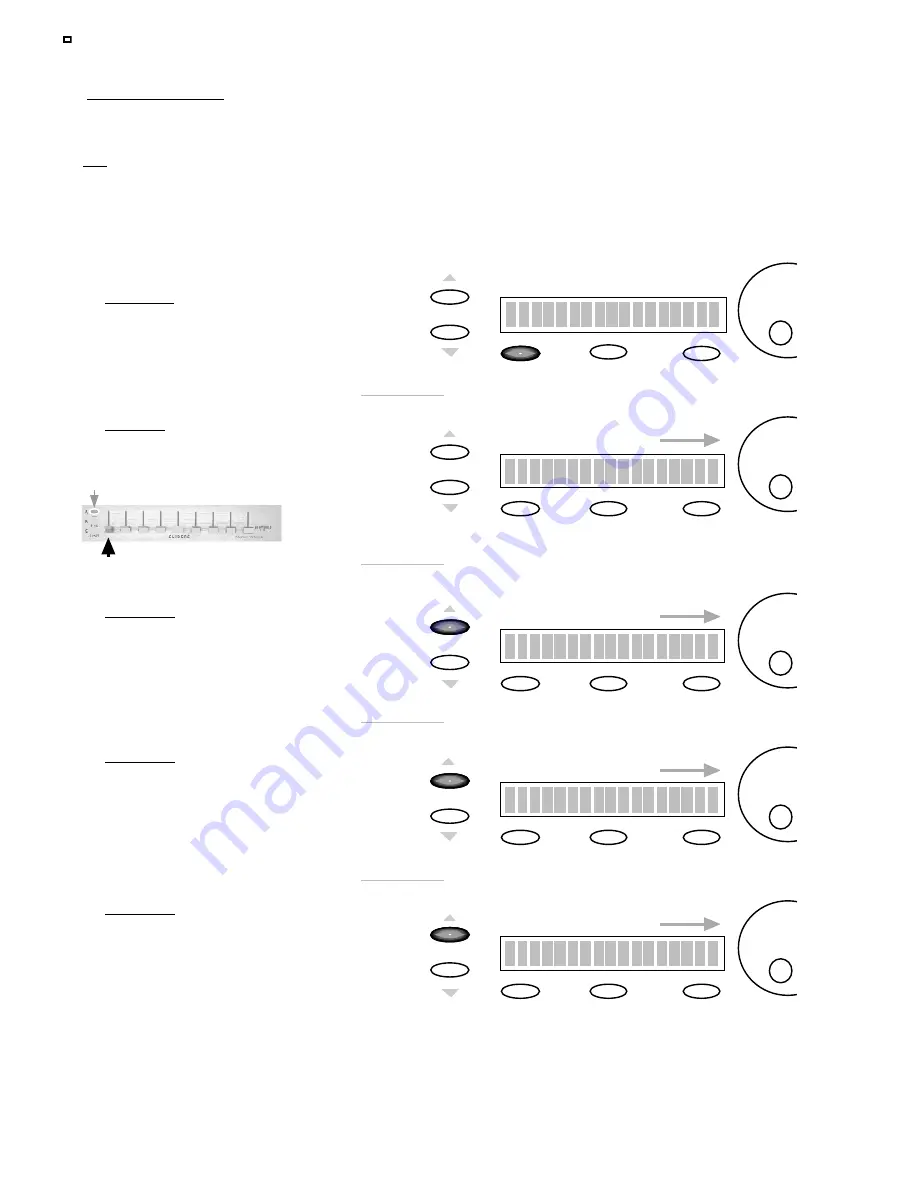
CHANGE
Edit
Press or Move
Any Controls
1)
PRESS
EDIT
SCREEN
CHANGE
To adjust the
Midi Channel
use the
DE
dial.
Edit Slider : S1
Midi Channel : OFF
Edit
SCREEN
CHANGE
Edit Slider : S1
CTRL Change 10
Edit
To adjust the
CTRL Change
value use the
DE
dial
3)
PRESS
PAGE UP
In this example we’ll use
CTRL Change
number 10.
You may adjust this to any
CTRL number you desire.
SCREEN
CHANGE
Edit
To adjust the
Value Min.
use the
DE
dial
4)
PRESS
PAGE UP
Set the
Value Min.
to 0
Storage
Enter
Edit Slider : S1
Value Min. : 0
SCREEN
CHANGE
Edit Slider : S1
Value Max. : 127
Edit
To adjust the
Value Max .
use the
DE
dial
5)
PRESS
PAGE UP
In this example when the Slider
is pushed UP it will increase to
the Maximum allowed
W
e will set up a
SLIDER
to behave like an analog mixer fader. Fader Down>min. volume. Fader Up>Max. Vol.
Programing
KNOBS
follows the
Exact
same procedure.
TIP:
Unlike an analog mixer you might not want your minimum volume to be 0 (no sound). You may just want a track to “sit” in
the mix. Therefore you should choose a value greater than 0. For example, you may want to “ride” a guitar part and not want its
volume to dip below a certain level in the mix. In that case set the
Min.
to a value that sounds good. Then when you pull the
fader down you’ll still hear the guitar without having to worry about fader position.
You can reverse this example for
Max
Values also.
PROCEDURE: SLIDER / KNOB PROGRAMMING
Set the
Value Max.
to 127
Remember
: keep track of
your
BANKS
when programing!
Move
SLIDER
(1)
Storage
Enter
Storage
Enter
Storage
Enter
2)
MOVE
SLIDER (KNOB)
In this example Move
SLIDER 1
w/
Bank A
Selected


