BELT TENSIONING &
REPLACEMENT PROCEDURE
The #1361 Belt drives the MH8000’s attachment
pump. Over time the belt will wear and/or stretch,
which will result in decreased power to the
attachments and/or a squealing noise under high
loads to the attachments. Applying belt dressing
using the manufacturer’s instructions will help with
squealing also. The belt should be inspected and
adjusted/replaced upon such behavior. The belt
should be regularly inspected according to the
service guidelines in this manual.
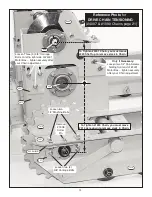
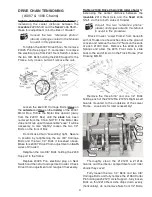
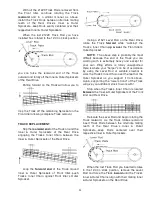
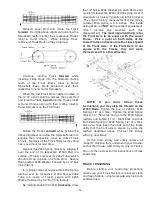
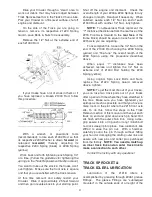
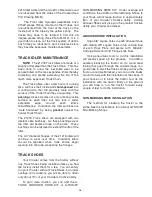
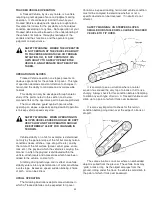
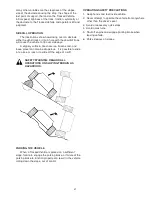
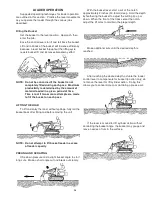
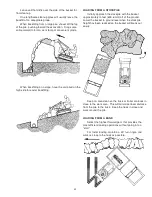
Consult the photos to the right and Part
Photo MH-10 to assist in this procedure.
To inspect / replace the belt:
1) Shut off tractor, apply parking brake, lower
attachments to ground, and remove key.
2) Remove #4040 Hood (rubber latches) and
#4042 Grill (four 5/16” self-tapping Bolts).
Remove #1383 Cover by removing the two
bolts securing it to the #1382 Pump Mount.
NOTE
: Spacer Tubes are located over these two
bolts between the #1383 Cover and
#1382 Pump Mount. Take care not to lose
these Spacer Tubes during removal.
4) Loosen, but not remove, the four 3/8” Bolts
securing the #1382 Pump Mount to the
Engine.
5) To replace the #1361 Belt, slide the #1382
Pump Mount to the left until belt tension is
relieved enough to allow removal. Replace the
Belt.
6) To Tension the Belt, using hand pressure only,
slide the #1382 Pump Mount to the right until
the #1361 Belt is drawn tight. Tighten the four
bolts securing the #1382 Pump Mount to the
Engine while maintaining belt tension.
NOTE
: Do not use a pry bar or leverage
device to tighten the Belt as over-tightening
could result in bearing damage to the Pump
and/or Engine.
7) Replace the #1383 Cover making sure to
install the spacer tubes over the bolts between
the #1383 Cover and the #1382 Pump Mount.
8) Replace the #1380 Grill.
29
1383
1359
1361
1382
1360

