background image


9


=


TECHNICAL PASSPORT, INSTALLATION AND MAINTENANCE INSTRUCTION


TRANSPORTATION AND STORAGE  


Loose  boilers  are  allowed  to  be  transported  only  in  horizontal  position.  During  good 

weather seasons the boilers can be transported by open transport, otherwise the products 
need to be covered. When transporting in vertical position additional safety measures have 
to  be  taken  in  account  to  prevent  turning  or  scratching.  The  boilers  are  allowed  to  be 
stored in dry areas, which do not contain chemically active substance vapor. 


BOILER INSTALLATION  

 
Boiler must be installed in premises that meet the governmental requirements. Boiler 

installation area has to be at least 215 cm high and must have concrete flooring (at least in 
the place where boiler is installed). The room must be isolated from heated living rooms 
and have a vertical ventilation channel and a window or an opening in outer wall, so that 
air from the outside could easily get into boiler or ventilation channel. 

The  flue  must  be  clean.  It  must  not  have  openings  into  hollow  layers  or  nearby 

enclosures.  The  flue  has  to  be  inspected  to  make  sure  that  it  has  no  openings  on  the 
outside,  which  would  allow  parasitic  air  inside,  which  would  cool  the  flue  and  reduce  its 
traction.  All  cracks,  openings  and  boiler  connection  point  to  the  chimney  flue  must  be 
sealed. In the case of inner openings of flue to the layers or to nearby shafts which cannot 
be sealed, oval or cylindrical liner of stainless steel will have to be used (Rectangular liners 
are  not  as  reliable  because  openings  caused  by  temperature  changes  appear  at  the 
connections). 


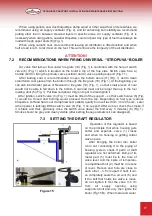
      Boiler is placed directly on concrete floor. When carrying the boiler, some parts may 
experience  deformation,  therefore  after  installing  the  boiler  in  the  flue  and  closing  all  the 
doors,  check  if 

top  valve’s  uniformly  fits  with  air  intake  surface  and  if  the  door  is  tight 

enough by using candle flame or matches. 


5.1 

FIRE PREVENTION REQUIREMENTS  


Boiler must be placed on non-flammable surface. Boiler metal connection near the 

chimney must be made out of metal that is no thinner than 1,5 mm and covered with heat 
insulation. Condition of flue must be checked once a month (by visually inspecting it with a 
mirror through the cleaning opening), it must be cleaned if need be, because accumulated 
resins and soot can catch fire in flue, releasing sparks, causing fire hazard, overheating 
and damaging the liner. When using branded flues (made of stainless steel and ceramic) 
user instructions must be understood well and requirements met, especially for periodic 
maintenance. After cleaning the flue, horizontal flue pipe, which is between boiler and flue, 
must be cleaned as well. 


5.2 

FLUE REQUIREMENTS  


Diameter  of  flue  opening  can  be  10  percent  smaller  as  shown  in  main  technical 

specifications,  but  not  larger.  The  boiler  needs  a  separate  flue  -  no  other  device  can  be 
connected to it. Flue pipe from boiler to the flue must be horizontal, not longer than 1,5 m 
and not shorter than 0,20 m, it must be well sealed at connection areas and covered with 
heat insulation. Flue pipe and flue must be cleaned periodically. 

Summary of Contents for BIO S10 U

Page 1: ...STROPUVA TECHNICAL PASSPORT INSTALLATION AND MAINTENANCE INSTRUCTION Solid fuel boiler for central heating...

Page 2: ...ther boiler water heater and floor heating 13 6 3 Connection diagram of Stropuva boiler to another boiler water heater radiator floor heating 14 6 4 Connection diagram of Stropuva boiler to another bo...

Page 3: ...m2 1 1 MAIN TECHNICAL SPECIFICATIONS Fuel used firewood wood residue sawdust briquettes peat briquettes coal pellets Recommended fuel moisture up to 30 Model of boiler S7 S10 S12 S20 S30 S40 S7 BIO S1...

Page 4: ...ound and the chimney mm 991 1413 5 1302 1550 1285 1549 991 1413 5 1302 1550 1285 1549 1494 1302 1673 5 1285 1664 Dimensions mm 1900 1900 1900 1900 1900 1900 h d 1330 450 1900 450 1700 550 2100 550 170...

Page 5: ...arger diameter steel cylinder which provides thermal insulation Heated water resides between these two cylinders There is a draft regulator on the front side of the boiler 2 see 7 3 The construction h...

Page 6: ...rpose is to correctly distribute air in generation zones located below and next to air distributor as well as in combustion zones located near and above the distributor Air distributor 9 Fig 1 rests u...

Page 7: ...at the bottom of the boiler inside the lower doors 11 Fig 1 Fire grates 19 Fig 1 Fig 7 can be found by opening the ash removal doors 11 Fig 1 This part is attached in U boiler for additional air to go...

Page 8: ...boilers from overheating When water pressure reaches critical levels the valve opens up releasing the heated water into the sewerage at the same time adding cold water through the automatic system Va...

Page 9: ...nless steel will have to be used Rectangular liners are not as reliable because openings caused by temperature changes appear at the connections Boiler is placed directly on concrete floor When carryi...

Page 10: ...ple and proven diagrams We don t recommend building accumulative heat tanks because our boiler is more efficient while working in preservation mode than while charging accumulative tank in maximum pow...

Page 11: ...11 TECHNICAL PASSPORT INSTALLATION AND MAINTENANCE INSTRUCTION 6 HEATING SYSTEM DIAGRAM Figure 10 Stropuva...

Page 12: ...warmer than selected value Thanks to this pump P water loudly circulates through coil pipes F of floor heating also flows to boiler through distribution valve T 3 20 50 which when water from radiator...

Page 13: ...atic valve 1 pcs 7 Circulation pump installation kit D25 1 pcs 23 Valve 1 5 bar 1 pcs 8 Separable connection D25 V i 2 pcs F to out of floor heating 9 Automatic bleeding device 1 pcs B to out of water...

Page 14: ...cs 21 Adapter D32 x D25 2 pcs 7 Circulation pump installation kit D25 1 pcs 22 Thermostatic valve 1 pcs 8 Separable connection D25 V i 2 pcs 23 Valve 1 5 bar 1 pcs 9 Automatic bleeding device 1 pcs F...

Page 15: ...lbow D25 x D15 3 pcs 18 Filling valve i i 1 2 1 pcs 7 Circulation pump installation kit D25 8 Separable connection D25 V i 1 pcs 2 pcs 19 Release valve 1 2 20 Brass disc valve V V 1 21 Adapter D32 x D...

Page 16: ...ets and sawdust briquettes immediately ignite so that the load of fuel would not be ignited by leftover ember Before igniting the boiler carefully read the instruction of traction regulator see sectio...

Page 17: ...all down to the bottom Coal load must not be larger than up to the fuel loading door 8 Fig 1 Put firewood about 2 kg on top of coal and ignite it After ignition switch valve 6 Fig 1 must be lifted of...

Page 18: ...disappears see Fig 10 c If fuel is burning well but temperature increases very slowly and there is condensation leaking out of flue it means that the flow of heated water going through boiler is exces...

Page 19: ...ll stick deeper into fuel its lifespan will be reduced significantly Most common installation mistakes Consequences Troubleshooting 1 Installed using other boiler manufacturer diagrams 1 High flow coo...

Page 20: ...diagrams According to Figure 10 we recommend connecting gravity controlled radiator a radiator without thermos valve Hot water goes through balance tap bk1 Fig 10 to the nearest radiator which can wor...

Page 21: ...ts No need to move the boiler and repeatedly connect to the chimney or heating system Usually no need to make changes in the heating system This solutions allows a complete automatization of firing pr...

Page 22: ...fuel boiler STROPUVA 1 pcs Safety pressure valve 1 5 bar 1 pcs Thermometer 1 pcs Deflectors 2 pcs Air injection collector 1 pcs Air distributor 1 pcs Fire grate 1 pcs Technical passport 1 pcs PACKAGE...

Page 23: ...c procedures inspection of boiler and control elements at least once a year To preserve warranty agreement and its entries We recommend that the installation assessment the first start up adjustment o...

Page 24: ...aris Trak distr LT 25144 Lithuania tel 370 525 51763 Boiler model Product number Date of sale Signature Stamp SELLER Date of sale Signature Stamp PERSON RESPONSIBLE FOR INSTALLATION Installation addre...

Page 25: ...e Surname Signature The boiler has a year warranty If the heat exchanger is broken seller has to fix the boiler on its own expense but if other components are broken not due to the fault of the end us...

Page 26: ...JSC Stropuva ir ko company code 300149972 K stu io g 1A Lentvaris Trak distr LT 25144 Tel 370 5 255 17 63 mob 370 656 08961 www stropuva lt info stropuva lt...

Reviews: