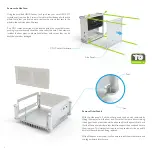
Fit the I/O Shield and DC Jack
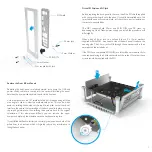
Before replacing the back panel to the case, install the I/O shield supplied
with your motherboard onto the panel. It should be installed onto the
recessed side and will snap into place, just check the correct orientation as
there are two possibilities.
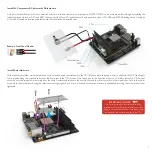
The DB1 supports both 5.5mm and 4PIN DIN type DC jacks, so
depending on which Nano power supply you install, the procedure will
differ slightly.
When using a 5.5mm jack, you will need to use 2 x 14mm washers
supplied with the DB1, one on each side of the back panel to reduce the
opening size. The 5.5mm jack will fit through those washers and is then
secured with the included nut.
If the PSU has a compatible 4PIN DIN jack, this will be secured directly to
the back panel using the 2 holes either side of the socket. Note that these
screws should be supplied with the PSU.
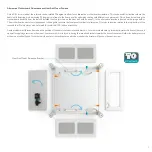
Replace the Front & Back Panels
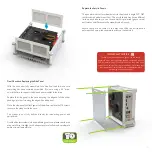
Replacing the front panel is relatively simple, just ensure the USB and
power switch cables are routed into the case whilst sliding the panel
between the bumper tabs and into the slot in the heat sink.
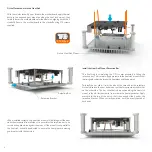
As the rear panel has the I/O shield installed, it will require being installed
at an angle in order to clear the motherboard ports. This can be made
easier by rotating the bumper at the top of each pillar so that tabs don't
interfere, then once the lower edge of the back panel is in place, moving
the top edge into place, then rotating the bumpers back to the original
orientation. If this also proves difficult, you can remove the upper
bumpers completely, then replace once the back panel is in place.
If you still find it difficult to install, you can simply remove one or both of the
pillars from the heat sink which will greatly reduce any interference in
fitting the back panel.
9
I/O Shield
5.5mm Jack
14mm Washer
4PIN DIN
14mm Washer
Nut supplied with Jack


