background image

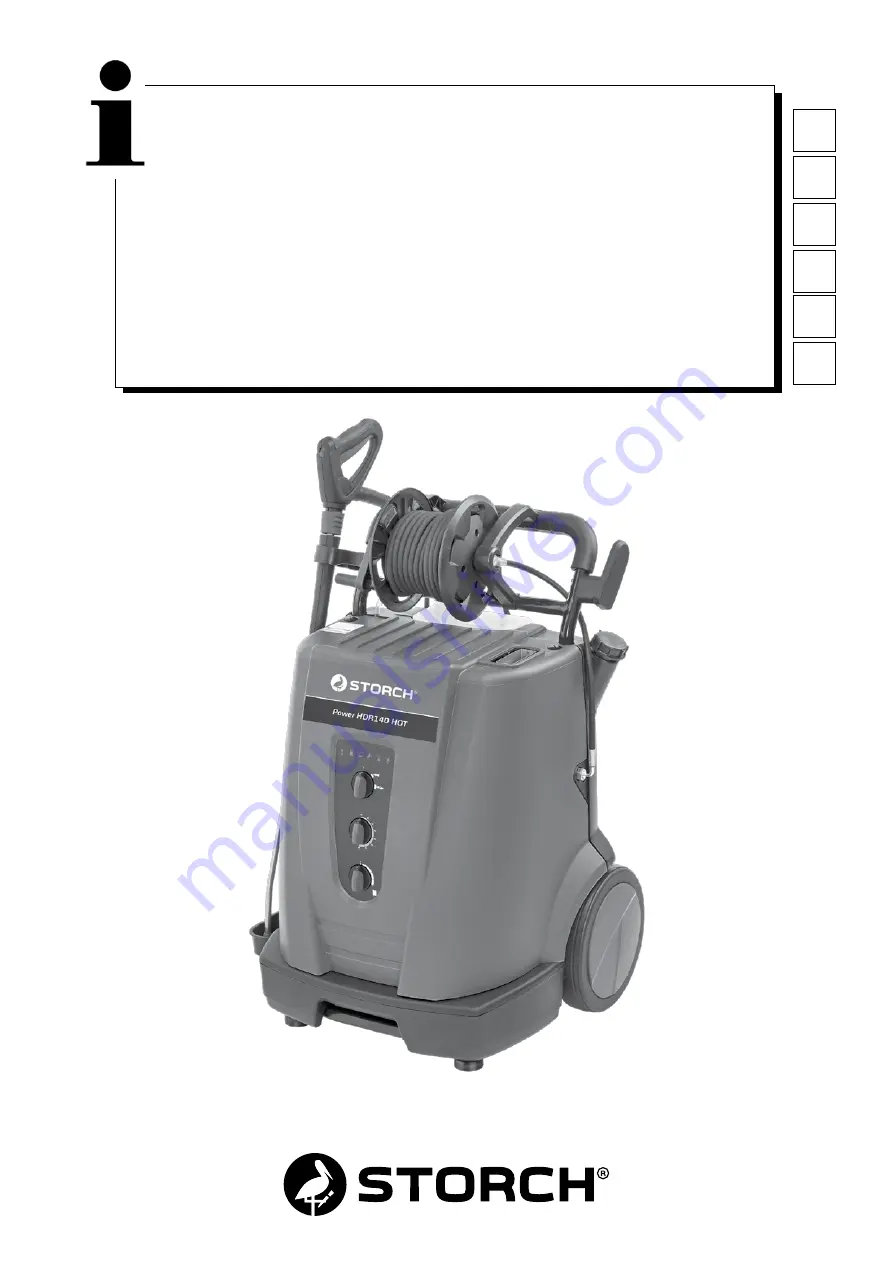
Power-Hochdruckreiniger 140 HOT 

Power-hogedrukreiniger 140 HOT

Nettoyeur haute pression performant 140 HOT

Performante idropulitrice ad alta pressione 140 HOT

Power high pressure cleaner 140 HOT 

Vysokotlaké čistící zařízení Power 140 HOT

DE

NL

FR

IT

GB

CZ

Summary of Contents for 140 HOT

Page 1: ... HOT Power hogedrukreiniger 140 HOT Nettoyeur haute pression performant 140 HOT Performante idropulitrice ad alta pressione 140 HOT Power high pressure cleaner 140 HOT Vysokotlaké čistící zařízení Power 140 HOT DE NL FR IT GB CZ ...

Page 2: ...echnische Daten 3 1 3 Wichtige Sicherheitshinweise 3 5 2 1 Verwendungszweck 6 2 2 Bedienelemente 6 3 1 Aufstellung 7 3 2 Vor Gebrauch 7 3 3 Reinigungsmitteltank füllen 7 3 4 Brennstofftank füllen 7 8 3 6 Wasserschlauch anschließen 8 3 8 Frostschutzmittel auffangen 8 4 1 Gerät einschalten 8 4 2 Anschlüsse 8 9 4 4 Verwendung von Reinigungsmitteln 9 5 1 Arbeitstechniken 10 6 1 Gerät ausschalten und V...

Page 3: ...e die das Arbeiten erleichtern und für einen sicheren Betrieb sorgen Dieses Symbol finden Sie bei Sicherheitshin weisen deren Nichtbeachtung Gefahren für das Gerät und dessen Funktion hervorrufen kann Zu Ihrer eigenen Sicherheit Das Gerät darf nur von Personen benutzt werden die in der Handhabung unterwiesen und ausdrücklich mit der Bedienung beauf tragt sind nur unter Aufsicht betrieben werden ni...

Page 4: ...nstallateur ausgeführt worden sein und IEC 60364 und den länderspezifischen Vorschriften entsprechen Es wird empfohlen dass in den elektrischen Anschluss zu diesem Gerät entweder ein Fehlerstrom Schutzschalter der die Netzspannung unterbricht wenn der Fehlerstrom während 30 ms 30 mA übersteigt oder ein Erdungsprüfer aufgenommen wird Das zu reinigende Objekt ist zu prüfen ob beim Reinigen von diese...

Page 5: ...on der vom Her steller angegebenen Ausführung abweichen und nur von einer Elektrofachkraft gewechselt werden Für weiter gehende Wartungs bzw Reparaturarbeiten wenden Sie sich bitte an die kostenlose STORCH Service Hotline 08 00 7 86 72 47 nur innerhalb Deutschlands Prüfung Der Hochdruckreiniger entspricht den deutschen Richtlini en für Flüssigkeitsstrahler Der Hochdruckreiniger ist nach der UVV Ar...

Page 6: ...lage 8 Schlauchbügel 9 Einfüllstutzen für Brennstoff 10 Hochdruck Schlauchan schluss bei Geräten ohne Schlauchtrommel 11 Bedienfeld 12 Bereitschaftsanzeige 13 Brennstoff nachfüllen 15 Wartung durch STORCH Ser vice fällig 16 Boiler überhitzt 17 Flammenfühler verschmutzt 18 Hauptschalter 19 Temperaturregler 20 Reinigungsmittel Dosierung In Kapitel 5 wird die Verwendung des Hochdruckreinigers für unt...

Page 7: ...iem Zustand in Betrieb nehmen 3 Der Aufstellungsort des Hochdruckreinigers darf in keine Richtung eine Neigung von über 10o aufweisen 3 3 Reinigungsmitteltank füllen 1 Reinigungsmitteltank mit freigegebenem Reinigungsmit tel füllen Füllmenge siehe Kapitel Technische Daten 3 4 Brennstofftank füllen HINWEIS Bei Temperaturen unter 8 C beginnt das Heizöl zu sto cken Paraffinausscheidung Dadurch kann e...

Page 8: ...ei von Verunreinigungen sein Füllmenge siehe Technische Daten Achten Sie darauf den Filter des Brennstofftanks nicht zu beschädigen um das Eindringen von Schmutz in den Tank zu vermeiden Bedienung Betrieb 4 1 Gerät einschalten 1 Hauptschalter in Stellung Kaltwasser A bringen Die Steuerelektronik führt einen Selbsttest durch alle LEDs leuchten einmal auf Der Motor startet leuchtet 2 Die Maschine du...

Page 9: ... und betätigen Der Brenner schaltet ein Bei Arbeitsunterbrechungen Sicherungsriegel auch bei kurzzeitigen Arbeitsunterbre chungen einlegen 4 4 Verwendung von Reinigungsmitteln ACHTUNG Reinigungsmittel dürfen nicht antrocknen Die zu reini gende Oberfläche könnte sonst beschädigt werden Für spezielle Anwendungen z B Desinfektion ist die angesaugte Reinigungsmittelmenge durch auslitern zu ermitteln W...

Page 10: ...d bei höheren Temperaturen verstärkt Insbesondere Fette und Öle können leichter und schneller gelöst werden Proteine können bei Tempera turen um 60 C am besten gelöst werden Öle und Fette bei 70 C bis 90 C 5 1 4 Mechanische Einwirkung Um starke Schmutzschichten aufzulösen wird zusätzliche mechanische Einwirkung notwendig Spezielle Sprührohre und rotierende Waschbürsten bieten den besten Effekt um ...

Page 11: ...ng aus der Spritzpistole austritt 9 Sicherungsriegel an der Spritzpistole einlegen 10 Den Deckel schließen 11 Gerät ausschalten Schalterstellung OFF 12 Um jedes Risiko zu vermeiden lagern Sie das Gerät vorü bergehend aufrechtstehend in einem beheizten Raum 13 Bei der nächsten Inbetriebnahme die Frostschutzmittellö sung zur Wiederverwendung auffangen 6 5 Den Reiniger transportieren Das Gerät kann s...

Page 12: ...ntieren 7 2 2 Wartung des Brennstofffilters 1 Schlauchclips öffnen 2 Den Brennstofffilter ersetzen 3 Schlauchclips schließen 4 Defekten Filter ordnungsgemäß entsorgen 7 2 3 Den Brennstofftank entleeren 1 Den Deckel abschrauben 2 Das Sieb entfernen 3 Die Maschine in waagerechte Position bringen 4 Den Brennstoff in einen leeren Behälter laufen lassen 7 2 4 Flammensensor 1 Den Sensor herausnehmen und...

Page 13: ... ver ständigen Service Intervall abge laufen STORCH Service ver ständigen Blinkt STORCH Service ver ständigen Service Intervall Service in 20 Stunden fällig Gerät abschalten STORCH Service ver ständigen Fehler des Mikroprozes sors Leuchtet dauernd Gerät schaltet ab Betrieb mit kaltem Was ser ist möglich Kessel überhitzt Wasserzufluss überprü fen Auspuffsensor EXT H hat Brennstoffzufluss abgeschalt...

Page 14: ...er ständigen Blinkt Betrieb mit kaltem Was ser ist möglich Fehler des Temperatur Sensors B1 Kabel zum Tempera tur Sensor B1 überprü fen STORCH Service ver ständigen Blinkt Betrieb mit kaltem Was ser ist möglich Fehler im Fluss Sensor STORCH Service ver ständigen Blinkt Betrieb mit kaltem Was ser ist möglich Überhitzungsgefahr STORCH Service ver ständigen Visueller Leuchtentest Beim Anschalten leuc...

Page 15: ...gungsmittelbehälter leer Reinigungsmittelbehälter auffüllen Reinigungsmittelbehälter verschlammt Reinigungsmittelbehälter reinigen Filter im Reinigungsmittelbehälter ver schmutzt Filter ausbauen und reinigen Brenner verrußt Brennstoff verunreinigt STORCH Service verständigen Brenner verschmutzt oder nicht korrekt ein gestellt 9 1 Gerät der Wiederverwertung zuführen Das ausgediente Gerät sofort unb...

Page 16: ...Stoßdämpfer Schürze vorne 1 7 65 64 46 Lanzenhalter Set 1 8 65 64 47 Schlauchhalter 1 Pos Art Nr Bezeichnung Stck 2 65 64 48 Rad 2 3 65 64 49 Klemmscheibe Rad 2 4 65 64 51 Radkappe 2 5 65 64 52 Schraube M 8 2 6 65 64 53 Stütze 2 7 65 64 54 Mutter 2 9 65 64 56 Wassereingangsfilter 1 Übersetzung der Originalanleitung ...

Page 17: ...Sieb Ventil Komplettset 1 3 65 64 58 Schlauchklemme 1 7 65 64 59 Tankdeckel 1 8 65 64 61 Tankeinfüllsieb 1 Pos Art Nr Bezeichnung Stck 3 65 64 62 Schwimmerventil 1 4 65 64 63 Filter 1 5 65 64 64 Membrane 1 6 65 64 66 Schwimmer 1 7 65 64 67 Auslassschauch Kit 1 Übersetzung der Originalanleitung ...

Page 18: ...65 64 72 Ventil 1 7 65 64 73 Dichtungssatz 1 8 65 64 74 Ventilsitz 1 11 65 64 76 Satz Ventile 1 12 65 64 77 Dichtungssatz Kolben 1 24 65 64 78 Mikroschalter Set 1 25 65 64 79 Rückschlagvebtil 1 26 65 64 81 Dichtungssatz 1 37 65 64 82 Satz Kolben 1 39 65 64 83 Taumelscheibe 1 47 65 64 84 Dichtungssatz 1 Übersetzung der Originalanleitung ...

Page 19: ...1 18 65 64 91 Schütz 1 19 65 64 92 Kondensator 80 µF 1 22 65 64 93 Begrenzungsschlater 1 24 65 64 94 Transformator 230 V 400 V 1 27 65 64 96 Platine 1 42 65 64 97 Start Relay 1 Pos Art Nr Bezeichnung Stck 8 65 64 98 Spule mit Mutter und Scheibe 1 9 65 64 99 Kabel Magnetspule 1 14 65 65 01 Filter 1 18 65 65 02 Ölpumpe mit Anschlussnippel 1 Übersetzung der Originalanleitung ...

Page 20: ...41 Isolation Kit 1 11 65 65 42 Heizschlange 1 Ersatzteilliste Verteiler Pos Art Nr Bezeichnung Stck 8 65 65 03 O Ring 1 9 65 65 04 Magnetspule 1 11 65 65 06 Reedkontakt 1 12 65 65 07 Torx 2 13 65 65 08 O Ring 1 14 65 65 09 Dichtung 1 Übersetzung der Originalanleitung ...

Page 21: ...om 1 2 65 65 52 O Ring Kit 1 6 65 65 53 Kurbel 1 8 65 65 57 Scheibe 1 9 65 65 58 Bügel 2 10 65 65 66 Anschlussstück 1 11 65 65 67 O Ring 1 12 65 65 69 HD Schlauch 1 Pos Art Nr Bezeichnung Stck 4 65 65 43 Zündkabel 1 10 65 65 44 Sensor Kit 1 15 65 65 46 Elektrode 1 18 65 65 47 Öldüse 1 19 65 65 48 Luftverteiler 1 Übersetzung der Originalanleitung ...

Page 22: ... STORCH Service Hotline 08 00 7 86 72 47 zu kontaktieren Gewährleistungs bzw Garantieanspruch Ansprüche bestehen ausschließlich an Werkstoff oder Fertigungsfehler sowie ausschließlich bei bestimmungsgemäßer Verwendung des Geräts Verschleißteile fallen nicht unter die Garantieansprüche Sämtliche Ansprüche erlöschen durch den Einbau von Teilen fremder Herkunft bei unsachgemäßer Handhabung und Lageru...

Page 23: ... Erklärung ihre Gültigkeit Bezeichnung des Gerätes Power Hochdruckreiniger 140 HOT Geräte Typ Hochdruckreiniger Artikel Nummer 65 61 40 Angewandte Richtlinien Maschinen Richtlinie 2006 42 EG EG Richtlinie Elektromagnetische Verträglichkeit 2014 30 EU EU RoHS Richtlinie 2011 65 EG Angewendete harmonisierte Normen EN 60335 2 79 EN 55014 1 EN 55014 2 EN 61000 3 2 Angewendete nationale Normen und tech...

Page 24: ...es 25 27 2 1 Toepassing 28 2 2 Bedieningselementen 28 3 1 Opstelling 29 3 2 Voor het gebruik 29 3 3 Reinigingsmiddeltank vullen 29 3 4 Brandstoftank vullen 29 30 3 6 Waterslang aansluiten 30 3 8 Vorstbeschermmiddel opvangen 30 4 1 Apparaat inschakelen 30 4 2 Aansluitingen 30 31 4 4 Gebruik van reinigingsmiddelen 31 5 1 Arbeidstechnieken 32 6 1 Apparaat uitschakelen en voorzieningsleidingen loskopp...

Page 25: ...en veilig bedrijf zorgen Dit symbool vindt u bij veiligheidsinstructies waarvan het niet naleven gevaar voor het toestel en het functioneren ervan kan veroorzaken Voor uw eigen veiligheid Het toestel mag alleen door personen gebruikt worden die qua hantering geinstrueerd zijn en uitdrukkelijk de opdracht gekregen hebben het toestel te bedienen alleen onder toezicht bedreven worden niet door kinder...

Page 26: ...elektrische aansluiting voor dit toestel moet door een elektromonteur uitgevoerd zijn en aan IEC 60364 en de nationale voorschriften voldoen Er wordt aanbevolen dat in de elektrische aansluiting voor dit toestel ofwel een aardlekschakelaar die de netspanning onderbreekt als de foutstrooom gedurende 30 ms hoger dan 30 mA is of een aardingcontroleapparaat opgenomen wordt Controleer of van het te rei...

Page 27: ...goedgekeurde hogedrukonderdelen Bij gebruik van een verlengkabel mag alleen de door de fabrikant aangegeven uitvoering of een hoogwaardigere uitvoering worden gebruikt Voor verdergaande onderhoudsresp reparatiewerkzaam heden gelieve u zich te richten tot de Gratis service hot line 08 00 7 86 72 47 alleen binnen Duitsland Controle De hogedrukreiniger voldoet aan de Duitse Richtlijnen voor Vloeistof...

Page 28: ...6 Wateraansluiting 7 Spuitlansoplegdeel 8 Haak voor slang 9 Invulinrichting voor brandstof 10 Hochdrukslangaansluiting bij machines zonder slanghaspel 11 Bedieningspaneel 12 Gereedheidsdisplay 13 Brandstof bijvullen 15 Onderhoud door STORCH ser vice noodzakelijk 16 Boiler oververhit 17 Brandsensor is vet geworden 18 Hoofdschakelaars 19 Temperatuurregelaar 20 Reinigingsmiddeldosering niger voor div...

Page 29: ...stellen 3 De helling waarin de hogedrukreiniger geplaatst wordt mag in iedere richting niet hoger zijn dan 100 3 3 Reinigingsmiddeltank vullen 1 Reinigingsmiddeltank met vrijgegeven reinigingsmiddel vullen Vulhoeveelheid Zie hoofdstuk Technische gegevens 3 4 Brandstoftank vullen AANWIJZING Bij temperaturen onder 8 C begint de brandstofolie te stollen parafineafscheiding Daardoor kunnen moeilijkhe ...

Page 30: ...ngen De brandstof moet vrij van vuil zijn Vulhoeveelheid Zie Technische gegevens Let op dat u de brandstoftankfilter niet beschadigt om te voorkomen dat er vuil in de tank geraakt Bediening Bedrijf 4 1 Toestel inschakelen 1 De hoofdschakelaar in de positie koud water A brengen De besturingselektronica voert een automatische controle door alle LED s schijnen één keer De motor start schijnt 2 Ventil...

Page 31: ...dt ingeschakeld Bij werkonderbrekingen De veiligheidsgrendel ook bij korte werkonderbrekingen inleggen 4 4 Gebruik van reinigingsmiddelen WAARSCHUWING De reinigingsmiddelen mogen niet opdrogen Het te rei nigen oppervlak zou anders beschadigd kunnen worden Voor speciale toepassingen b v desinfectie moet de aangezogen reinigingsmiddelhoeveelheid bepaald worden door een controle van de uitstroomhoeve...

Page 32: ... van 60 C het best worden losgemaakt oliën en vetten bij 70 C tot 90 C 5 1 4 Mechanische inwerking Om sterke lagen vuil los te maken wordt bovendien een mechanische inwerking noodzakelijk Speciale spuitlansen en roterende wasborstels bieden het beste effect om de laag vuil los te maken 5 1 5 Grote watercapaciteit en hoge druk Grote watercapaciteit en hoge druk Hoge druk is niet altijd de beste opl...

Page 33: ...antivriesmiddeloplossing uit de spuitpistool stroomt 9 De veiligheidsgrendel aan de spuitpistool inleggen 10 Sluit de afdekking 11 Het toestel uitschakelen schakelstand OFF 12 Om elk risico te vermijden moet het toestel voor de herin bedrijfstelling in een verwarmde ruimte worden opgesla gen 13 Bij de volgende inbedrijfstelling de antivriesmiddeloplos sing voor hergebruik opvangen 6 5 De reiniger ...

Page 34: ... en reinig hem 3 Plaats de filter en de snelkoppeling weer 7 2 2 Onderhoud van de brandstoffilter 1 Open de slangklemmen 2 Vervang de brandstoffilter 3 Sluit de slangklemmen 4 De defecte filter volgens de voorschriften verwijderen 7 2 3 De brandstoftank legen 1 Draai de kap los 2 Haal de spanning eraf 3 Plaats de machine in een horizontale positie 4 Laat de benzine in een lege bak lopen 7 2 4 Vlam...

Page 35: ...vice Onderhoudsinterval is verlopen Neem contact op met STORCH Service Knipperend licht Neem contact op met STORCH Service Onderhoudsinterval over 20 uur Schakel de machine uit neem contact op met STORCH Service Fout microprocessor Het licht brandt constant Machine wordt uitge schakeld Het is mogelijk koud water te gebruiken Kessel überhitzt Wasserzufluss überprü fen Uitlaatdruksensor EXT H heeft ...

Page 36: ...lijk koud water te gebruiken Defecte temperatu ursensor B1 Controleer de draad naar de temperatuursensor B1 Neem contact op met STORCH Service Knipperend licht Het is mogelijk koud water te gebruiken Fout in stroomsensor Neem contact op met STORCH Service Knipperend licht Het is mogelijk koud water te gebruiken Er is een oververhit tingsfout opgetreden Neem contact op met STORCH Service Visuele te...

Page 37: ...servoir leeg Reinigingsmiddelreservoir opvullen Reinigingsmiddelreservoir dichtgeslibt Reinigingsmiddelreservoir reinigen Zuigklep aan de reinigingsmiddel aanzuigslang vervuild Zuigklep demonteren en reinigen Brander is vet geworden Brandstof verontreinigd De STORCH service informeren Brander vervuild of niet correct ingesteld 9 1 Machine voor recycling beschikbaar maken Het uitgediende toestel on...

Page 38: ...dekkap 1 4 65 64 44 Stootdemper schoot voor 1 7 65 64 46 Lanshouder set 1 8 65 64 47 Slanghouder 1 Pos Art nr Benaming Stuks 2 65 64 48 Wiel 2 3 65 64 49 Klemschijf wiel 2 4 65 64 51 Wielkap 2 5 65 64 52 Schroef M 8 2 6 65 64 53 Steun 2 7 65 64 54 Moer 2 9 65 64 56 Water ingangsfilter 1 Vertaling van de originele handleiding ...

Page 39: ...ming Stuks 2 65 64 57 Zeef klep complete set 1 3 65 64 58 Slangklem 1 7 65 64 59 Tankdeksel 1 8 65 64 61 Tankvulzeef 1 Pos Art nr Benaming Stuks 3 65 64 62 Vlotterklep 1 4 65 64 63 Filter 1 5 65 64 64 Membraan 1 6 65 64 66 Vlotter 1 7 65 64 67 Uitlaatslang kit 1 Vertaling van de originele handleiding ...

Page 40: ...ng 1 6 65 64 72 Ventiel 1 7 65 64 73 Dichtingset 1 8 65 64 74 Klepzitting 1 11 65 64 76 Set kleppen 1 12 65 64 77 Dichtingset zuiger 1 24 65 64 78 Microschakelaar set 1 25 65 64 79 Terugslagklep 1 26 65 64 81 Dichtingset 1 37 65 64 82 Set zuiger 1 39 65 64 83 Tuimelschijf 1 47 65 64 84 Dichtingset 1 Vertaling van de originele handleiding ...

Page 41: ...laar 1 18 65 64 91 Bescherming 1 19 65 64 92 Condensator 80 µF 1 22 65 64 93 Begrenzingsschakelaar 1 24 65 64 94 Transformator 230 V 400 V 1 27 65 64 96 Printkaart 1 42 65 64 97 Start relay 1 Pos Art nr Benaming Stuks 8 65 64 98 Spoel met moeren en schijven 1 9 65 64 99 Kabel magneetspoel 1 14 65 65 01 Filter 1 18 65 65 02 Oliepomp met aansluitnippel 1 Vertaling van de originele handleiding ...

Page 42: ...41 Isolatiekit 1 11 65 65 42 Verwarmingsslang 1 Lijst met vervangende onderdelen verdeler Pos Art nr Benaming Stuks 8 65 65 03 O ring 1 9 65 65 04 Magneetspoel 1 11 65 65 06 Reedcontact 1 12 65 65 07 Torx 2 13 65 65 08 O ring 1 14 65 65 09 Dichting 1 Vertaling van de originele handleiding ...

Page 43: ...N 6 15 m trommel 1 2 65 65 52 O ring kit 1 6 65 65 53 Kruk 1 8 65 65 57 Schijf 1 9 65 65 58 Beugel 2 10 65 65 66 Aansluitstuk 1 11 65 65 67 O ring 1 12 65 65 69 HD slang 1 Pos Art nr Benaming Stuks 4 65 65 43 Ontstekingskabel 1 10 65 65 44 Sensorkit 1 15 65 65 46 Elektrode 1 18 65 65 47 Oliesproeier 1 19 65 65 48 Luchtverdeler 1 Vertaling van de originele handleiding ...

Page 44: ...toriseerd servicestation te verzenden Neem eerst contact op met de STORCH Service Hotline hiervoor worden kosten in rekening gebracht 49 0 202 49 20 110 Garantieclaims Claims uitsluitend met betrekking tot materiaal of productiefouten en uitsluitend bij gebruik van het apparaat conform de voorschriften Voor slijtdelen gelden deze aanspraken niet Alle claims vervallen bij inbouw van onderdelen van ...

Page 45: ...ing niet langer geldig Aanduiding van het apparaat Power hogedrukreiniger 140 HOT Apparaattype Hogedrukreiniger Artikelnummer 65 61 40 Toegepaste richtlijnen Machinerichtlijn 2006 42 EG EG richtlijn Elektromagnetische compatibiliteit 2014 30 EU EU RoHS richtlijn 2011 65 EG Toegepaste geharmoniseerde normen EN 60335 2 79 EN 55014 1 EN 55014 2 EN 61000 3 2 Toegepaste nationale normen en technische s...

Page 46: ...sécurité importantes 47 49 2 1 Affectation 50 2 2 Éléments de commande 50 3 1 Mise en place 51 3 2 Avant l utilisation 51 3 3 Remplir le réservoir de détergent 51 3 4 Remplir le réservoir de combustible 51 52 3 6 Raccorder le tuyau d eau 52 3 8 Collecter l antigel 52 4 1 Mettre l appareil en marche 52 4 2 Raccords 52 53 4 4 Utilisation de détergents 53 5 1 Techniques de travail 54 6 1 Mettre l app...

Page 47: ...la sécurité de foncti onnement figurent ici Vous trouverez ce symbole en face des con signes de sécurité dont l inobservation peut engendrer des risques pour l appareil et son fonctionnement Pour votre propre sécurité L appareil ne doit être utilisé que par des personnes qui ont été initiées à son maniement et expressément chargées de son utilisation être exploité que sous surveillance pas être ut...

Page 48: ... être exé cutée par un électricien et répondre à la norme CEI 60364 et aux prescriptions nationales Il est recommandé de doter la connexion électrique de cet appareil soit d un disjoncteur à courant de défaut qui coupe la tension dès que le courant de défaut dépasse 30 mA pendant 30 ms soit d un contrôleur de terre Lors du nettoyage de l objet vérifier si des matières dan gereuses ne se détachent ...

Page 49: ...sez uniquement le modèle indiqué par le fab ricant ou un modèle supérieur Pour les travaux de maintenance ou de réparation non men tionnés dans cette ces instructions techniques se mettre en rapport avec la Station Service ligne d assistance SAV gratuite 49 800 7 86 72 47 uniquement en Allema gne Contrôle Le nettoyeur haute pression est conforme aux Directives pour les appareils à jet de liquide e...

Page 50: ...emplissage ducombustible 10 Connexion du flexible haute pression pour appareils sans tambour de flexible 11 Tableau de commande 12 Affichage de la disponibilité 13 Appoint de combustible 15 Èchéance de maintenance par le service STORCH 16 Chaudière en surchauffe 17 Le détecteur de flamme est calaminé 18 Interrupteur principal 19 Thermorégulateur 20 Dosage de détergent Le chapitre 5 décrit l utilis...

Page 51: ...r à haute pression ne doit pas dépasse les 10º et ce dans n importe quelle direction 1 Remplir le réservoir de détergent avec du détergent homologué Voyez la quantité de remplissage dans le chapitre Caractéristiques techniques 3 4 Remplissage du réservoir de combustible NOTE Le gazole commence à se figer à des températures inféri eures à 8 C trouble de la paraffine ce qui peut provo quer des diffi...

Page 52: ...e qui s écoule tout d abord env 5 l pour le réutiliser Commande Service 4 1 Mise en marche de l appareil 1 Régler l interrupteur principal en position Eau froide A L électronique de commande effectue un auto test tou tes les DEL brillent une fois Le moteur démarre brille 2 Éliminez l air de la machine en actionnant le pistolet pul vérisateur 3 Une fois le débit d eau régularisé continuez avec les ...

Page 53: ...tolet de pulvérisation Le brûleur se met en service En cas d interruptions du travail Mettre le verrou de sûreté même en cas d interruptions brèves cf ill au chapitre 6 1 4 4 Emploi de détergents AVERTISSEMENT Les détergents ne doivent pas sécher sinon la surface à nettoyer pourrait être endommagée Pour des usages particuliers désinfection p ex il faut déterminer la quantité de détergent aspiré pa...

Page 54: ...us vite et plus facilement Les protéines se dissolvent le mieux à des températures autour de 60 C les huiles et les graisses entre 70 C et 90 C 5 1 4 Action mécanique La dissolution de couches de saleté épaisses nécessite en plus une action mécanique Des lances spéciales et des brosses de lavage rotatives produisent le meilleur effet pour détacher la couche de saleté 5 1 5 Grand débit d eau et hau...

Page 55: ...égé contre le gel lorsque la solution d antigel s écoule du pistolet 9 Mettez le cran de sûreté sur le pistolet 10 Fermer le couvercle 11 Arrêtez l appareil position OFF du commutateur 12 Pour éviter tout risque stocker temporairement le netto yeur dans une pièce chauffée en position verticale 13 Lors de la prochaine mise en service recueillez la solution d antigel pour la réutiliser 6 5 Transport...

Page 56: ...yer 3 Remonter le filtre et la fixation rapide 7 2 2 Maintenance du filtre à carburant 1 Ouvrir les attaches du flexible 2 Remplacer le filtre à carburant 3 Fermer les attaches du flexible 4 Eliminez dans les règles le filtre défectueux 7 2 3 Vider le réservoir à carburant 1 Dévisser le bouchon 2 Retirer la tension 3 Basculer la machine en position horizontale 4 Laisser le carburant se vider dans ...

Page 57: ...valle de main tenance expirée Contactez la maintenan ce STORCH Témoin clignotant Contactez la maintenan ce STORCH Intervalle de main tenance dans 20 heures Arrêt de la machine Contactez la maintenan ce STORCH Erreur du microproces seur Le témoin est constant Gerät schaltet ab Le fonctionnement à eau froide est possible Chaudière en surch auffe Vérifi er l alimentation en eau Capteur d échappement ...

Page 58: ...t à eau froide est possible Capteur de tempéra ture en panne B1 Vérifi er le câblage du capteur de température B1 Contactez la maintenan ce STORCH Témoin clignotant Le fonctionnement à eau froide est possible Panne du capteur de flux Contactez la maintenan ce STORCH Témoin clignotant Le fonctionnement à eau froide est possible Erreur de surchauffe Contactez la maintenan ce STORCH Tests visuels des...

Page 59: ...s n arrivent pas Réservoirs de détergent vides Remplir les réservoirs de détergent Réservoirs de détergent emboués Nettoyer les réservoirs de détergent Vanne du flexible d aspiration de détergent encrassée Démonter la vanne d aspiration et la nettoyer Brenner verrußt Combustible souillé Contactez la maintenance STORCH Brûleur encrassé ou mal réglé 9 1 Affectation de la machine au recyclage Rendez ...

Page 60: ...4 65 64 44 Tablier d amortisseur avant 1 7 65 64 46 Jeu de supports de lance 1 8 65 64 47 Support de flexible 1 Pos Réf art Désignation Qté 2 65 64 48 Roue 2 3 65 64 49 Disque de serrage roue 2 4 65 64 51 Enjoliveur de roue 2 5 65 64 52 Vis M8 2 6 65 64 53 Support 2 7 65 64 54 Écrou 2 9 65 64 56 Filtre d entrée d eau 1 Traduction des instructions d origine ...

Page 61: ...omplet filtre vanne 1 3 65 64 58 Collier de tuyau 1 7 65 64 59 Couvercle du réservoir 1 8 65 64 61 Filtre de remplissage du réservoir 1 Pos Réf art Désignation Qté 3 65 64 62 Vanne de flotteur 1 4 65 64 63 Filtre 1 5 65 64 64 Membrane 1 6 65 64 66 Flotteur 1 7 65 64 67 Kit de flexible d écoulement 1 Traduction des instructions d origine ...

Page 62: ...65 64 72 Vanne 1 7 65 64 73 Jeu de garnitures 1 8 65 64 74 Siège de soupape 1 11 65 64 76 Jeu de vannes 1 12 65 64 77 Jeu de garnitures piston 1 24 65 64 78 Jeu de microrupteurs 1 25 65 64 79 Vanne anti retour 1 26 65 64 81 Jeu de garnitures 1 37 65 64 82 Jeu de pistons 1 39 65 64 83 Plateau oscillant 1 47 65 64 84 Jeu de garnitures 1 Traduction des instructions d origine ...

Page 63: ...65 64 89 Interrupteur 1 18 65 64 91 Contacteur 1 19 65 64 92 Condensateur 80 µF 1 22 65 64 93 Commutateur de périmètre 1 24 65 64 94 Transformateur 230 V 400 V 1 27 65 64 96 Platine 1 42 65 64 97 Relais de démarrage 1 Pos Réf art Désignation Qté 8 65 64 98 Bobine avec écrou et rondelle 1 9 65 64 99 Câble bobine magnétique 1 14 65 65 01 Filtre 1 18 65 65 02 Pompe à huile avec raccord 1 Traduction d...

Page 64: ...1 11 65 65 42 Serpentin chauffant 1 Nomenclature de pièces de rechange distributeur Pos Réf art Désignation Qté 8 65 65 03 Joint torique 1 9 65 65 04 Bobine magnétique 1 11 65 65 06 Contact reed 1 12 65 65 07 Torx 2 13 65 65 08 Joint torique 1 14 65 65 09 Joint d étanchéité 1 Traduction des instructions d origine ...

Page 65: ...5 m 1 2 65 65 52 Kit de joint torique 1 6 65 65 53 Manivelle 1 8 65 65 57 Rondelle 1 9 65 65 58 Étrier 2 10 65 65 66 Pièce de raccordement 1 11 65 65 67 Joint torique 1 12 65 65 69 Flexible HP 1 Pos Réf art Désignation Qté 4 65 65 43 Câble d allumage 1 10 65 65 44 Kit de capteur 1 15 65 65 46 Électrode 1 18 65 65 47 Buse d huile 1 19 65 65 48 Distributeur d air 1 Traduction des instructions d orig...

Page 66: ...éée par nous Veuillez contacter préalablement l assistance téléphonique payante de la société STORCH 49 0 202 49 20 110 Demande de prise en garantie Les demandes couvrent exclusivement les défauts de matériau ou d ouvrage et ne couvrent qu une utilisation conforme à la destination de l appareil Les pièces d usure ne sont pas prises en charge par la garantie Tout droit à garantie est rendu caduque ...

Page 67: ...alidité Désignation de l appareil Nettoyeur haute pression performant 140 HOT Type d appareil Nettoyeurs haute pression Référence article 65 61 40 Directives appliquées Directive sur les machines 2006 42 EG Directive européenne sur la compatibilité électromagnétique 2014 30 EU Directive UE RoHS 2011 65 CE Normes harmonisées appliquées EN 60335 2 79 EN 55014 1 EN 55014 2 EN 61000 3 2 Spécifications...

Page 68: ...toio del detergente 73 3 4 Riempire il serbatoio del combustibile 73 74 3 6 Collegare il tubo flessibile dell acqua 74 3 8 Raccogliere l antigelo 74 4 1 Accendere l apparecchio 74 4 2 Raccordi 74 75 4 4 Impiego di detergenti 75 5 1 Tecniche di lavoro 76 6 1 Spegnere l attrezzo e scollegare le linee di alimentazione 76 6 2 Avvolgimento della linea di collegamento e del tubo flessibile per l alta pr...

Page 69: ... a portata di mano Qui si trovano consigli o indicazioni in grado di facilitare i lavori garantendo un funziona mento sicuro Questo simbolo lo si trova nelle indicazioni di sicurezza la cui mancata osservanza può comportare pericoli per l apparecchio e suo funzionamento Per la vostra propria sicurezza L apparecchio può venir usato solo da persone addestrate al suo funzionamento e che siano state e...

Page 70: ...he nel collegamento elettrico di questo apparecchio vi venga sistemato o un interruttore di corrente di guasto il quale interrompa la tensione di rete quando la corrente di guasto superi per 30 ms i 30 mA oppure un controllo di messa a terra L oggetto da pulirsi va esaminato se nel lavaggio non ven gano disciolte da questo sostanze pericolose che vadano ad inquinare l ambiente per es amianto olio ...

Page 71: ...ituzione del fi lo di collegamento alla rete è permesso impiegare solo l esecuzione indicata dal costruttore oppure un esecuzione superiore Per maggiori lavori di manutenzione e di riparazione si pre ga di rivolgersi al servizio di assistenza della STORCH op pure alle officine del ramo autorizzate Collaudo L apparecchio di lavaggio ad alta pressione corrisponde alle direttive tedesche per apparecc...

Page 72: ...o 9 Bocchettone per il riempimen to del combustibile 10 Attacco del tubo ad alta pressione per apparecchi senza tamburo 11 Quadro comandi 12 Indicazione di pronto all uso 13 Aggiunta di combustibile 15 Scadenza per manutenzione dell STORCH 16 Caldaia surriscaldata 17 Il sensore di fiamma è sporco 18 Interruttore principale 19 Regolatore di temperatura 20 Dosaggio prodotto detergente per vari lavor...

Page 73: ...erare i 10 in ogni direzione 3 3 Riempire il serbatoio del detergente1 1 Riempire il serbatoio del detergente con detergente approvato Per quantità di riempimento vedi capitolo Data tecnici 3 4 Riempire il serbatoio del combustibile AVVERTENZA Con temperature sotto gli 8 C il cherosene da riscalda mento inizia ad indensirsi secrezione di paraffina Perciò si possono verificare difficoltà di avviame...

Page 74: ...o ca 5 l va raccolto in un recipiente per il suo reimpiego Comandi Funzionamento 4 1 Accendere l apparecchio 1 Mettere l interruttore principale sulla posizione acqua fredda A I dispositivi elettronici di comando eseguono un autotest tutti LED s illuminano di colpo Il motore si avvia s illumina 2 Sfiatare la macchina attivando la pistola a spruzzo 3 Quando il livello dell acqua è uniforme proceder...

Page 75: ... 80 C 2 Sbloccare e azionare la pistola a spruzzo Si accende il bruciatore Ad interruzioni di lavoro inserire la sicura di blocco anche a brevi interruzioni di lavoro 4 4 Impiego di prodotti detergenti ATTENZIONE I prodotti detergenti non devono asciugarsi Altrimenti potrebbe venirne danneggiata la superficie da lavarsi Per impieghi speciali per es disinfezione la quantità di detergente aspirata v...

Page 76: ...ssono venir disciolte meglio le proteine men tre gli oli e i grassi dai 70 ai 90 C 5 1 4 Azione meccanica Per dissogliere forti strati di sporco è necessaria un azi one meccanica supplementare Speciali canne da getto e spazzole per lavaggio rotanti offrono il migliore effetto per disciogliere lo strato di sporco 5 1 5 Maggiore volume d acqua e maggiore pressione La pressione alta non è sempre la s...

Page 77: ...hio sarà protetto dal gelo quando uscirà la soluzione di antigelo dalla pistola da spruzzo 9 Inserire la sicura di blocco della pistola da spruzzo 10 Chiudere il coperchio 11 Spegnere l apparecchio posizione dell interruttore OFF 12 Onde vitare qualsiasi rischio Riporre provvisoriamente l idropulitrice in posizione verticale in un ambiente riscal dato 13 Alla conseguente rimessa in funzione raccog...

Page 78: ...are il fi ltro e l attacco rapido 7 2 2 Effettuare la manutenzione del filtro del car burante 1 Aprire la fascetta stringitubo 2 Sostituire il fi ltro del carburante 3 Chiudere la fascetta stringitubo 4 Smaltire filtro difettoso in modo adeguato 7 2 3 Svuotamento del serbatoio del combustibile 1 Svitare il tappo 2 Rimuovere il fi ltro 3 Inclinare la macchina fi no a metterla in posizione orizzon t...

Page 79: ...ntattare il servizio di assistenza STORCH Spia lampeggiante Contattare il servizio di assistenza STORCH Intervallo di manutenzi one scadenza fra 20 ore Gerät abschalten Con tattare il servizio di assi stenza STORCH Errore del micro proces sore Spia fissa Spegnimenti dell appa recchio L apparecchio può essere utilizzato con acqua fredda Caldaia surriscaldata Controllare l alimentazi one dell acqua ...

Page 80: ... acqua fredda Sensore di temperatura difettoso B1 Controllare il fi lo del sen sore di temperatura B1 Contattare il servizio di assistenza STORCH Spia lampeggiante L apparecchio può essere utilizzato con acqua fredda Guasto del sensore di flusso Contattare il servizio di assistenza STORCH Spia lampeggiante L apparecchio può essere utilizzato con acqua fredda Si è verifi cato un errore di surriscal...

Page 81: ...fanno vedere Serbatoio del prodotto detergente vuoto Riempire il serbatoio del prodotto deter gente Serbatoio del prodotto detergente impan tanato Ripulire il serbatoio del prodotto detrgente Valvola di aspirazione sul tubo di aspirazi one del prodotto detergente sporca Smonatre la valvola di aspirazione e ripulirla Il bruciatore è sporco Combustibile inquinato Contattare il servizio di assistenza...

Page 82: ...5 64 44 Carter per ammortizzatore posizione anteriore 1 7 65 64 46 Set porta lance 1 8 65 64 47 Sostegno per flessibile 1 Pos N art Descrizione Pz 2 65 64 48 Girante 2 3 65 64 49 Disco di bloccaggio ruota 2 4 65 64 51 Coprimozzo 2 5 65 64 52 Vite M 8 2 6 65 64 53 Supporto 2 7 65 64 54 Dado 2 9 65 64 56 Filtro ingresso acqua 1 Traduzione delle istruzioni originali ...

Page 83: ...ompleto di setaccio e valvola 1 3 65 64 58 Morsetto per tubo 1 7 65 64 59 Coperchio del serbatoio 1 8 65 64 61 Setaccio riempimento ser batoio 1 Pos N art Descrizione Pz 3 65 64 62 Valvola del galleggiante 1 4 65 64 63 Filtro 1 5 65 64 64 Membrana 1 6 65 64 66 Galleggiante 1 7 65 64 67 Kit tubo flessibile di scarico 1 Traduzione delle istruzioni originali ...

Page 84: ... 1 7 65 64 73 Completo di guarnizioni 1 8 65 64 74 Sede valvola 1 11 65 64 76 Kit di valvole 1 12 65 64 77 Completo di guarnizioni pistone 1 24 65 64 78 Set di microinterruttori 1 25 65 64 79 Valvola antiritorno 1 26 65 64 81 Completo di guarnizioni 1 37 65 64 82 Kit stantuffo 1 39 65 64 83 Disco obliquo 1 47 65 64 84 Completo di guarnizioni 1 Traduzione delle istruzioni originali ...

Page 85: ...5 64 89 Interruttore 1 18 65 64 91 Contattore 1 19 65 64 92 Condensatore 80 µF 1 22 65 64 93 Interruttore di soglia 1 24 65 64 94 Trasformatore 230 V 400 V 1 27 65 64 96 Scheda 1 42 65 64 97 Relè di avviamento 1 Pos N art Descrizione Pz 8 65 64 98 Bobina con dado e rosetta 1 9 65 64 99 Cavo bobina magnetica 1 14 65 65 01 Filtro 1 18 65 65 02 Pompa dell olio con nipplo di collegamento 1 Traduzione ...

Page 86: ...to 1 11 65 65 42 Serpentino 1 Elenco dei pezzi di ricambio relativi al distributore Pos N art Descrizione Pz 8 65 65 03 Guarnizione circolare 1 9 65 65 04 Bobina magnetica 1 11 65 65 06 Contatto Reed 1 12 65 65 07 Torx 2 13 65 65 08 Guarnizione circolare 1 14 65 65 09 Guarnizione 1 Traduzione delle istruzioni originali ...

Page 87: ...gitubo 1 2 65 65 52 Kit guarnizione circolare 1 6 65 65 53 Manovella 1 8 65 65 57 Rosetta 1 9 65 65 58 Staffa 2 10 65 65 66 Raccordo 1 11 65 65 67 Guarnizione circolare 1 12 65 65 69 Tubo flessibile HD 1 Pos N art Descrizione Pz 4 65 65 43 Cavo di accensione 1 10 65 65 44 Kit sensore 1 15 65 65 46 Elettrodo 1 18 65 65 47 Ugello dell olio 1 19 65 65 48 Distributore aria 1 Traduzione delle istruzion...

Page 88: ...ure ad una service station da noi autorizzata Si prega di consultare prima la Hotline di servizio STORCH a pagamento 02 66 22 77 15 Diritto alla garanzia Il diritti si possono far valere solo per errori di materiale o di produzione nonché esclusivamente in caso di utilizzo appropriato del dispositivo Pezzi soggetti all usura non sono soggetti a diritti di garanzia Decadranno tutti i diritti di gar...

Page 89: ...uesta dichiarazione perde ogni sua validità Denominazione dell apparecchio Performante idropulitrice ad alta pressione 140 HOT Tipo di utensile Idropulitrice ad alta pressione Numero articolo 65 61 40 Direttive applicate Direttiva macchine 2006 42 EG Direttiva CE sulla Compatibilità elettromagnetica 2014 30 EU Direttiva CE RoHS 2011 65 CE Norme armonizzate applicate EN 60335 2 79 EN 55014 1 EN 550...

Page 90: ...ant safety instructions 91 93 2 1 Intended use 94 2 2 Control elements 94 3 1 Installation 95 3 2 Before use 95 3 3 Filling the cleaning agent tank 95 3 4 Filling the fuel tank 95 96 3 6 Connecting the water hose 96 3 8 Collecting anti freeze 96 4 1 Switching on the device 96 4 2 Connections 96 97 4 4 Using cleaning agents 97 5 1 Methods 98 6 1 Switching off the device and disconnecting supply lin...

Page 91: ...ates tips and instructions to simplify work and to ensure safe operation This symbol is used to mark safety instruc tions that must be observed to prevent dama ge to the machine and its performance For your own safety The appliance must only be used by persons who have been instructed in its correct usage and explicitly commissioned with the task of operating it only be operated under supervision ...

Page 92: ...eing washed off the object to be cle aned and harming the environment Do not clean delicate parts made of rubber fabric etc with the 0 jet Keep some distance between high pressure nozzle and surface in order to prevent the surface from damage Do not use the high pressure hose for lifting loads The maximum permissible working pressure and temperature are printed on the highpressure hose Store the c...

Page 93: ...cleaner conforms to the German Guidelines for Liquid Spray Jet Devices The high pressure cleaner must be subjected to a safety examination in accordance with the Accident Prevention Regulations for Working with Liquid Spray Jet Devices BGV D15 as required but at least every 12 months by an authorised inspector After all repairs or modifications to electrical equipment the protective conductor resi...

Page 94: ...t 4 Cable hook 5 Spray lance 6 Supply water connection 7 Spray lance storage 8 Hose hook 9 Tank filler for fuel 10 High pressure hose connection for machines without hose reel 11 Control panel 12 Power ON 13 Fuel low 15 Service interval due expired 16 Boiler overheated 17 Flame sensor is sooted 18 Main switch 19 Temperature controller 20 Detergent metering knob Always use the cleaner as described ...

Page 95: ...tergent tank 1 Fill the cleaning agent tank with approved cleaning agent Capacity see chapter Technical Data 3 4 Fill up fuel tank NOTE At temperatures below 8 C the fuel oil begins to soli dify paraffin precipitation This can lead to difficulties in starting the burner Before the winter period either add a solidification point flow improver available from the fuel oil trade to the fuel or use win...

Page 96: ...ing at first approx 5 l for re use in a container Control Operation 4 1 Switching on the cleaner 1 Move the main switch into position Cold Water A The control electronics system performs a self test all the LEDs light up once The motor starts lights up 2 Ventilate the machine by activating the spray gun 3 When the water flow is even continue with the following steps 4 2 Connections 4 2 1 Connectin...

Page 97: ...ctuate it The burner switches on In case of interruptions in work Also be sure to insert the safety catch even during short interruptions in work see Fig in section 6 1 4 4 Using cleaning agents WARNING Never allow cleaning agent to dry on the surface to be cleaned The surface may be damaged For special applications e g disinfection the exact deter gent concentration has to be determined by measur...

Page 98: ... let it dry on the surface being cleaned 5 1 3 Temperature Detergents are more effective at higher temperatures Greases oils and fats can be broken down more easily at higher temperatures also Proteins can be cleaned at tem peratures of around 60 C Oils traffi c fi lm around 70 C and grease can be cleaned at 80 C 90 C 5 1 4 Mechanical Effect In order to break down tough layers of dirt additional m...

Page 99: ...5 litres into the water tank 7 During suction operate the spray gun two or three times 8 The machine is protected against frost when antifreeze solution emerges from the spray gun 9 Lock the safety catch on the spray gun 10 Close the cover 11 Switch off the cleaner 12 To avoid any risks store the cleaner temporarily in a heated room in upright position 13 When the machine is put into service again...

Page 100: ...t the fi lter and quick coupling 7 2 2 Maintenance of fuel filter 1 Open hose clips 2 Replace fuel filter 3 Close hose clips 4 Dispose the damaged filter in accordance wit 7 2 3 Emptying the fuel tank 1 Unscrew the cap 2 Remove the strain 3 Tilt the machine to a horizontal position 4 Let the fuel pour into an empty container 7 2 4 Flame sensor 1 Dismount the sensor and clean with a soft cloth 2 En...

Page 101: ...onstant light Contact STORCH Ser vice Service interval has expired Contact STORCH Ser vice Flashing light Contact STORCH Ser vice Service interval due in 20 hours Machine shutdown Microprocessor error Constant light Machine shuts down Cold water operation is possible Boiler overheated Check water supply Exhaust sensor EXT H has cut off fuel supply Contact STORCH Ser vice Insuffi cient water fl ow ...

Page 102: ... STORCH Ser vice Flashing light Cold water operation is possible Faulty temperature sensor B1 Check wire to tempera ture sensor B1 Contact STORCH Ser vice Flashing light Cold water operation is possible Flow sensor fault Contact STORCH Ser vice Flashing light Cold water operation is possible Overheat error has occurred Contact STORCH Ser vice Visual test of lamps When switching on all LEDs light u...

Page 103: ...d from the system and the pump once again runs smoothly No detergent drawn in Detergent tank empty Top up detergent tank Dirt in detergent tank Clean detergent tank Suction valve at cleaning agent inlet soiled Remove suction valve and clean or replace Burner soots up fuel contamination Contact STORCH Service Burner sooted or adjustment incorrect 9 1 Recycling the cleaner If the cleaner is discarde...

Page 104: ... 1 4 65 64 44 Damper front skirt 1 7 65 64 46 Lance holder set 1 8 65 64 47 Hose clamps 1 Pos Art no Designation Pcs 2 65 64 48 Wheel 2 3 65 64 49 Wheel brake disc 2 4 65 64 51 Wheel cap 2 5 65 64 52 Screw M 8 2 6 65 64 53 Support 2 7 65 64 54 Nut 2 9 65 64 56 Water inlet filter 1 Original instruction ...

Page 105: ...s 2 65 64 57 Screen valve complete set 1 3 65 64 58 Hose clamp 1 7 65 64 59 Tank cap 1 8 65 64 61 Tank filling screen 1 Pos Art no Designation Pcs 3 65 64 62 Floatation valve 1 4 65 64 63 Filter 1 5 65 64 64 Membranes 1 6 65 64 66 Float 1 7 65 64 67 Drain hose kit 1 Original instruction ...

Page 106: ...ar valve seat 1 6 65 64 72 Valve 1 7 65 64 73 Sealing set 1 8 65 64 74 Valve seat 1 11 65 64 76 Set of valves 1 12 65 64 77 Set of seals piston 1 24 65 64 78 Micro switch set 1 25 65 64 79 Non return valve 1 26 65 64 81 Sealing set 1 37 65 64 82 Piston set 1 39 65 64 83 Swash plate 1 47 65 64 84 Sealing set 1 Original instruction ...

Page 107: ... 65 64 89 Switch 1 18 65 64 91 Contactor 1 19 65 64 92 Capacitor 80 µF 1 22 65 64 93 Limiter switch 1 24 65 64 94 Transformer 230 V 400 V 1 27 65 64 96 PCB 1 42 65 64 97 Start relay 1 Pos Art no Designation Pcs 8 65 64 98 Coil with nut and washer 1 9 65 64 99 Cable magnetic coil 1 14 65 65 01 Filter 1 18 65 65 02 Oil pump with connecting nipple 1 Original instruction ...

Page 108: ...7 65 65 41 Insulation kit 1 11 65 65 42 Heating coil 1 List of spare parts distributor Pos Art no Designation Pcs 8 65 65 03 O ring 1 9 65 65 04 Magnetic coil 1 11 65 65 06 Reed contact 1 12 65 65 07 Torx 2 13 65 65 08 O ring 1 14 65 65 09 Seal 1 Original instruction ...

Page 109: ... 6 15 m reel 1 2 65 65 52 O ring kit 1 6 65 65 53 Crank 1 8 65 65 57 Pane 1 9 65 65 58 Bar 2 10 65 65 66 Adaptor Fitting 1 11 65 65 67 O ring 1 12 65 65 69 HP hose 1 Pos Art no Designation Pcs 4 65 65 43 Ignition cable 1 10 65 65 44 Sensor kit 1 15 65 65 46 Electrode 1 18 65 65 47 Oil nozzle 1 19 65 65 48 Air distributor 1 Original instruction ...

Page 110: ...id or send it to one of our authorised service centres Please contact the chargeable STORCH service hotline first 49 0 202 49 20 110 Your rights under our warranty or guarantee Claims can only be accepted for material defects or manufacturing errors and only assuming intended use of the appli ance Wear parts are not covered by such claims All claims shall become void in the event of installation o...

Page 111: ...tool Designation of the machine Power high pressure cleaner 140 HOT Machine Type High pressure cleaner Item number 65 61 40 Applicable Directives Machinery Directive 2006 42 EG EC Electromagnetic Compatibility Directive 2014 30 EU EU RoHS Directive 2011 65 EC Applied harmonised standards EN 60335 2 79 EN 55014 1 EN 55014 2 EN 61000 3 2 Applied national standards and technical specifications IEC 60...

Page 112: ...stní pokyny 113 115 2 1 Účel použití 116 2 2 Ovládací prvky 116 3 1 Umístění 117 3 2 Před použitím 117 3 3 Naplnění nádrže na čistící prostředky 117 3 4 Naplnění palivové nádrže 117 118 3 6 Připojení vodovodní hadice 118 3 8 Zachycování prostředků proti mrazu 118 4 1 Zapnutí přístroje 118 4 2 Připojení 118 119 4 4 Používání čistících prostředků 119 5 1 Pracovní techniky 120 6 1 Vypnutí přístroje a...

Page 113: ...dobu Na takvém místě jsou uvedené rady nebo pokyny pro usnadnění práce s přístrojem a zajištění bezpečného provozu Tento symbol najdete u takových pokynů a uVÝSTRAHAnění týkajících se bezpečnosti při jejichž nedodržení může dojít ke vzniku nebezpečí poškození přístroje a narušení jeho funkčnosti Pro Vaši bezpečnost Přístroj smí používat pouze osoby které jsou co se týče manipulace s ním instruovan...

Page 114: ...napětí jakmile svodový proud na 30ms překročí 30 mA nebo měřič odporu uzemnění Překontrolujte objekt zda se při jeho čistění nebudou uvolňovat a do ovzduší rozptylovat nebezpečné látky např azbest olej Proudem kruhového průřezu nečistěte citlivé díly z pryže látky apod Při čištění dbejte na dostatečný odstup vyso kotlaké trysky od povrchu jinak by se čištěný povrch mohl poškodit Vysokotlakou hadic...

Page 115: ...ze výrobek v provedení uvedeném výrobcem nebo v pro vedení kvalitnějším než předepisuje tento údaj S dalšími údržbovými popř opravnými pracemi se prosím obraťte na servisní službu STORCH nebo autorizovaný od borný závod Zkoušky Vysokotlaký čistič vyhovuje předpisům německých Směr nic pro kapalinové tryskací přístroje V souladu s předpi sy o úrazové prevenci Práce s kapalinovými tryskacími přístroj...

Page 116: ... hadici 9 Hrdlo pro plnění paliva 10 Přípojka pro vysokotlakou ha dici u strojů bez bubnu s hadicí 11 Ovládací pole 12 Indikace pohotovosti 13 Doplňování paliva 15 Nutná údržba servisem STORCH 16 Přehřátí ohřívače 17 Čidlo plamene je zaneseno 18 Hlavní vypínač 19 Regulátorem teploty 20 Dávkování čistícího prostředku Kapitola 5 popisuje použití vysokotlakého čisticího zaří zení pro různé čisticí pr...

Page 117: ...nění nádrže na čistící prostředek schváleným čistícím prostředkem Velikost náplně viz kapitola Technické údaje 3 4 Naplnění palivové nádrže UVÝSTRAHANĚNÍ Při teplotách nižších než 8 C začíná topný olej tuhnout odštěpuje se parafín Toto může vést ke vzniku potíží při spouštění hořáku Proto před začátkem zimního období do topného oleje přimíchejte prostředek pro zlepšení bodu tuhnutí a kapalných vla...

Page 118: ... vytékající kapalinu prvních cca 5 l zachyťte za účelem opětovného použití do vhodné nádoby Obsluha Provoz 4 1 Zapojení přístroje 1 Hlavní vypínač uveďte do polohy studená voda A Řídící elektronika provede samočinný test všechny LED diody se krátce rozsvítí Spouští se motor Svítí 2 Ventilujte stroj vzduchem aktivací stříkací pistole 3 Když je průtok vody stabilní pokračujte následujícími kroky 4 2...

Page 119: ...kujte stříkací pistoli a stiskněte spoušť Zapne se hořák Při přerušení práce Pojistnou západku aretujte i při krátkodobých přerušeních práce viz obr v kapitole 6 1 4 4 Použití čistících prostředků VÝSTRAHA Čistící prostředky nesmí vyschnout Jinak by mohlo dojít k poškození čištěného povrchu Při speciálních aplikacích např dezinfekce je nutno nasávané množství čistícího prostředku zjistit vylitro v...

Page 120: ...ddělují od povrchu snadněji a rychleji Proteiny se od povrchu oddělují nejlépe při teplotách okolo 60 C oleje a tuky při 70 C až 90 C 5 1 4 Mechanické působení Pro rozpouštění silných vrstev nečistot je zapotřebí doplň kového mechanického působení Speciální rozprašovací trubky a rotující mycí kartáče jsou při oddělování vrstvy nečistot od povrchu nejefektivnější 5 1 5 Velký výkon vody a vysoký tla...

Page 121: ...je zajištěný proti mrazu okamžikem kdy ze stří kací pistole začne vycházet nemrznoucí směs 9 Stříkací pistoli zajistěte bezpečnostní západkou 10 Zavřete kryt 11 Přístroj vypněte poloha vypínače OFF 12 Za účelem eliminace všech možných rizik je nutno přístroj Uložte čistič dočasně ve vzpřímené poloze ve vytápěné místnosti 13 Při dalším uvedení do provozu roztok nemrznoucí smě si zachyťte do vhodné ...

Page 122: ...j 3 Nasaďte filtr a rychlospojku zpět 7 2 2 Vyčištění olejového filtru 1 Rozepněte hadicové spony 2 Vyměňte palivový filtr 3 Zapněte hadicové spony 4 Použitou kapalinu defektní filtr je nutno zlikvidovat řád ným způsobem 7 2 3 Vyprázdnění palivové nádrže 1 Odšroubujte zátku 2 Vyjměte sítko 3 Nakloňte zařízení do vodorovné polohy 4 Nechejte palivo vytéct do prázdné nádoby 7 2 4 Senzor plamene 1 Dem...

Page 123: ...í oddělení STORCH Uplynul servisní inter val Kontaktujte servisní oddělení STORCH Kontrolka bliká Kontaktujte servisní oddělení STORCH Za 20 hodin uplyne servisní interval Zastavení zařízení Kontaktujte servisní oddělení STORCH Chyba mikroprocesoru Kontrolka trvalé svítí Gerät schaltet ab Pro voz se studenou vodou je možný Přehřátí ohřívače Zkontrolujte přívod vody Výfukové čidlo EXT H zcela přeru...

Page 124: ...ontrolka bliká Provoz se studenou vodou je možný Vadné teplotní čidlo B1 Zkontrolujte vodič k teplotnímu čidlu B1 Kontaktujte servisní oddělení STORCH Kontrolka bliká Provoz se studenou vodou je možný Chyba průtokového čidla Kontaktujte servisní oddělení STORCH Kontrolka bliká Provoz se studenou vodou je možný Došlo k chybě kvůli přehřátí Kontaktujte servisní oddělení STORCH Vizuální test kontrole...

Page 125: ...dek je prázdná naplňte nádrž na čistící prostředek nádrž na čistící prostředek je zakalená vyčistěte nádrž na čistící prostředek sací ventil hadice pro nasávání čistícího pro středku je znečistěný vymontujte a vyčistěte sací ventil Zanesení hořáku palivo je znečistěné Kontaktujte servisní oddělení STORCH hořák je znečistěný nebo nesprávně nasta vený 9 1 Umožnit recyklaci stroje Přístroj který dosl...

Page 126: ...4 Tlumič nárazů clona vpředu 1 7 65 64 46 Držák trysek sada 1 8 65 64 47 Držák hadice 1 Pol Obj č Označení Kusy 2 65 64 48 Kolečko 2 3 65 64 49 Svěrný kotouč kolečko 2 4 65 64 51 Kryt kolečka 2 5 65 64 52 Šroub M8 2 6 65 64 53 Opěra 2 7 65 64 54 Matice 2 9 65 64 56 Filtr u přívodu vody 1 Překlad originálu návodu ...

Page 127: ... 64 57 Sítko ventil kompletní sada 1 3 65 64 58 Hadicová spona 1 7 65 64 59 Víčko nádrže 1 8 65 64 61 Plnící sítko nádrže 1 Pol Obj č Označení Kusy 3 65 64 62 Plovákový ventil 1 4 65 64 63 Filtr 1 5 65 64 64 Membrána 1 6 65 64 66 Plovák 1 7 65 64 67 Vypouštěcí hadice sada 1 Překlad originálu návodu ...

Page 128: ...a ventilu 1 6 65 64 72 Ventil 1 7 65 64 73 Sada těsnění 1 8 65 64 74 Sedlo ventilu 1 11 65 64 76 Sada ventily 1 12 65 64 77 Sada těsnění píst 1 24 65 64 78 Mikrospínač sada 1 25 65 64 79 Zpětný vebtil 1 26 65 64 81 Sada těsnění 1 37 65 64 82 Sada píst 1 39 65 64 83 Chvějivý kotouč 1 47 65 64 84 Sada těsnění 1 Překlad originálu návodu ...

Page 129: ... 65 64 89 Spínač 1 18 65 64 91 Stykač 1 19 65 64 92 Kondenzátor 80 µF 1 22 65 64 93 Omezovací spínač 1 24 65 64 94 Transformátor 230 V 400 V 1 27 65 64 96 Deska 1 42 65 64 97 Start relé 1 Pol Obj č Označení Kusy 8 65 64 98 Cívka s maticí a podložkou 1 9 65 64 99 Kabel magnetová cívka 1 14 65 65 01 Filtr 1 18 65 65 02 Olejové čerpadlo s přípojnou vsuvkou 1 Překlad originálu návodu ...

Page 130: ... Izolace sada 1 11 65 65 42 Topná spirála 1 Seznam náhradních dílů rozdělovač Pol Obj č Označení Kusy 8 65 65 03 O kroužek 1 9 65 65 04 Magnetová cívka 1 11 65 65 06 Jazýčkový kontakt 1 12 65 65 07 Torx 2 13 65 65 08 O kroužek 1 14 65 65 09 Těsnění 1 Překlad originálu návodu ...

Page 131: ...buben 1 2 65 65 52 O kroužek sada 1 6 65 65 53 Klika 1 8 65 65 57 Podložka 1 9 65 65 58 Ramínko 2 10 65 65 66 Připojovací díl 1 11 65 65 67 O kroužek 1 12 65 65 69 Vysokotlaká hadice 1 Pol Obj č Označení Kusy 4 65 65 43 Zapalovací kabel 1 10 65 65 44 Senzor sada 1 15 65 65 46 Elektroda 1 18 65 65 47 Olejová tryska 1 19 65 65 48 Rozdělovač vzduchu 1 Překlad originálu návodu ...

Page 132: ...ebo do námi autorizované servisní stanice Kontaktujte prosím nejdříve placený hotline servis firmy STORCH 49 0 202 49 20 110 Nárok na záruku příp garanci Nároky na záruku existují výhradně u materiálu nebo výrobní vady a také výhradně při používání přístroje v souladu s určeným účelem Díly podléhající opotřebení nespadají do nároků na záruku Veškeré nároky zanikají zamontováním dílů cizího původu ...

Page 133: ...ácí toto prohlášení svou platnost Označení zařízení Vysokotlaké čistící zařízení Power 140 HOT Typ nářadí Vysokotlaký čistič Výrobek číslo 65 61 40 Použité směrnice Směrnice o strojích 2006 42 EG Směrnice ES Elektromagnetická slučitelnost 2014 30 EU Směrnice RoHS 2011 65 ES Použité harmonizované normy EN 60335 2 79 EN 55014 1 EN 55014 2 EN 61000 3 2 Použité národní normy a technické specifikace IE...

Page 134: ...134 ...

Page 135: ...135 ...

Page 136: ...N art Denominazione 65 61 40 Performante idropulitrice ad alta pressione 140 HOT 65 61 10 Prolunga di 15 m per tubo flessibile per alta pressione Art no Description 65 61 40 Power high pressure cleaner 140 HOT 65 61 10 High pressure extension hose 15 m Výr č Označení 65 61 40 Vysokotlaké čistící zařízení Power 140 HOT 65 61 10 Prodlužovací vysokotlaká hadice 15 m Malerwerkzeuge Profigeräte GmbH Pl...

Reviews: