Page 17
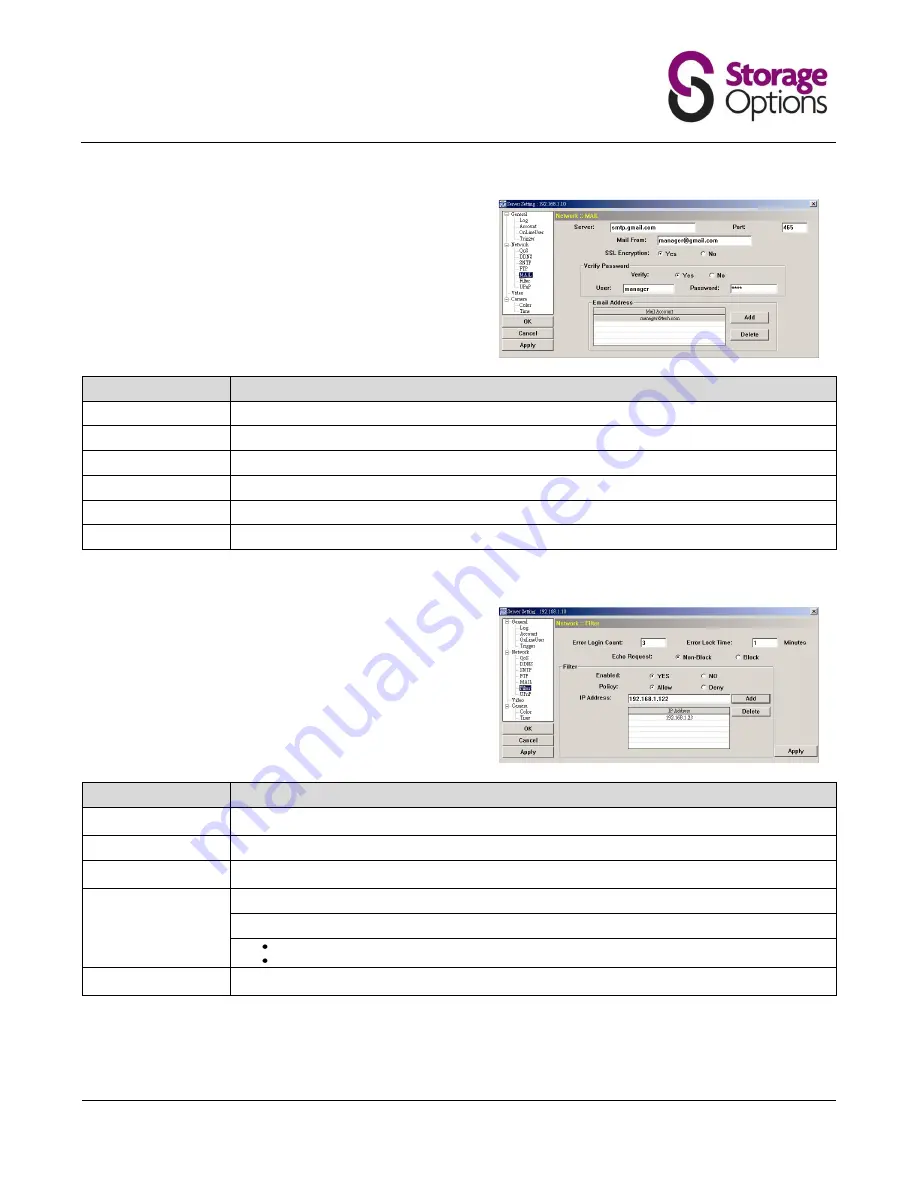
Mail:
Enter the details of an e-mail account you wish to use for
notifications and click “Apply” to confirm. The information
you set here will be applied when “Email” is selected in
“General” → "Trigger".
Function
Description
Server:
Enter the SMTP server address provided from your e-mail system supplier.
Port:
Enter the port number provided from your e-mail system supplier. If this is left blank, the e-mail server will default to port 25.
Mail From:
Enter the entire mail address to ensure e-mails will not be blocked by SMTP.
SSL Encryption:
Select “Yes” if your e-mail server is using SSL encryption to protect your e-mail content from unauthorized access.
Verify Password:
Some mail servers are required to verify the password. Please enter the “user name” and “password”.
E-Mail Address:
Add the e-mail address(s) of the assigned recipient(s).
Filter:
Choose to permit or block the IP address(es) which can
access this camera.
Function
Description
Error Login Count:
Set the maximum count for login failure. When the maximum count is reached, the IP address trying to access the network
camera will be locked.
Error Lock Time:
Set the lock time in minutes when the maximum count of error login for an IP address is reached.
Echo Request:
Select “Non-Block” to allow other users to use the ping command to detect the IP address of your network camera, or “Block” to
deny the ping command request.
Filter:
Choose to enable (YES) or disable (NO) the filter function.
If “YES” is selected, choose whether you want to permit (Allow) or block (Deny) the IP address list below.
To add an item to the IP address list, key in the IP address in “IP Address”, and click “Add”.
To remove an existing item in the IP address list, click the item you want to remove, and click “Delete”.
Apply:
Click “Apply” on the bottom right corner when any change is made in this menu, or the change will not be recorded in the
system.
Summary of Contents for Ip camera Pro
Page 28: ...Page 28...


