background image


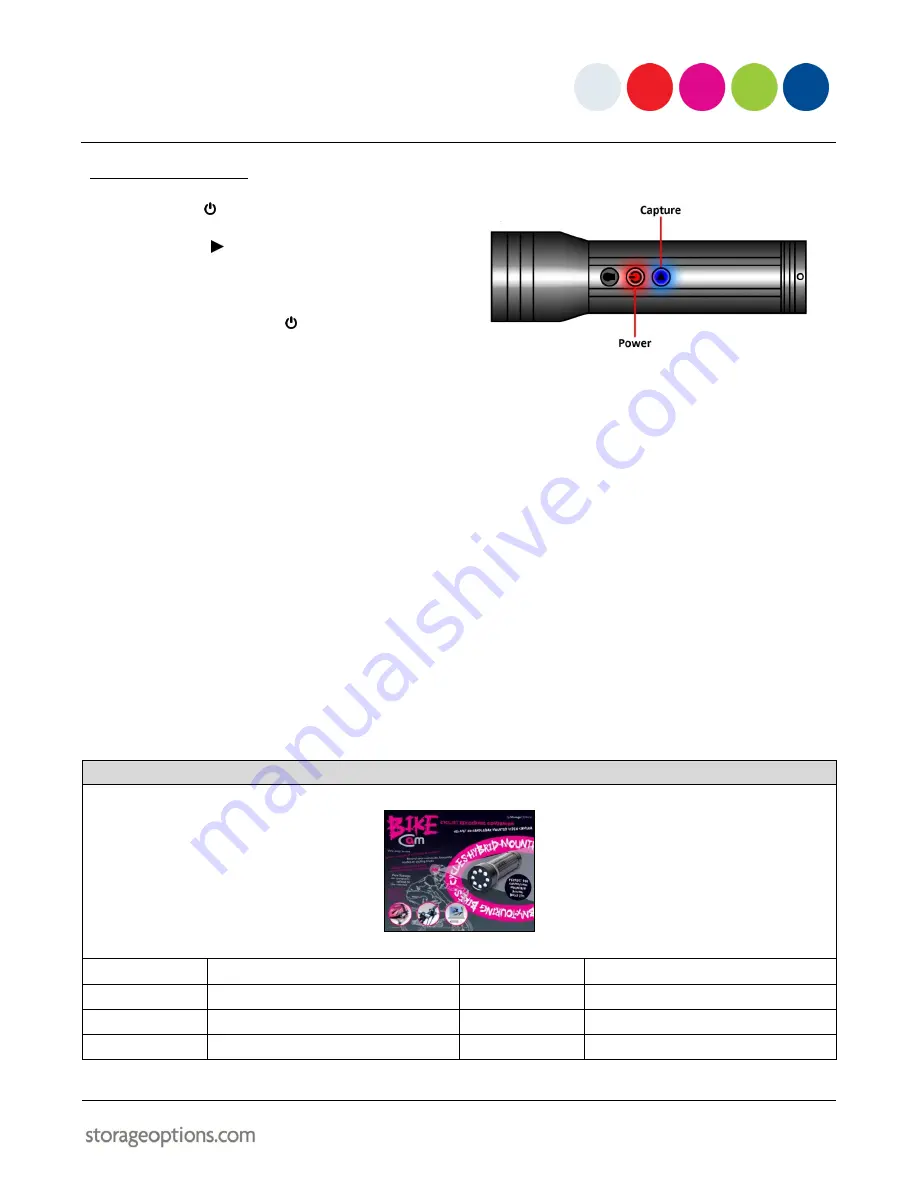
4.5 – CAPTURE A PHOTO 


1.


Press the   button to turn the camera on. 


2.


Press  the 

  button  to  capture  a  photograph.  

Each time this button is pressed, another photo 
will be captured. 
 

3.


Press  and  hold  the 

  button  to  switch  the 

camera off. 


CONNECTING TO A COMPUTER


If your computer has a built-in Micro SD card reader, you can simply remove the Micro SD card from the Bike Cam 
and insert it into the reader.  The video and photo files will be available from within “My Computer” as usual. 
 
If you do not have a built-in Micro SD card reader, you can actually use the Bike Cam as a card reader by connecting 
it to your computer, using the supplied USB cable. 
 

1.


Unscrew the Port Cover (anti-clockwise). 


2.


Connect the mini USB plug to the mini USB socket under the Port Cover. 
 

3.


Connect the full-size USB plug into a spare USB socket on your computer.  The camera will appear as a new 
drive letter in “My Computer”.  Browse this drive to view your recorded video and photographs. 


APPENDIX – PRODUCT SPECIFICATION


Bike Cam 


Sensor: 

¼ inch CMOS 

Night Vision: 

Up to 8 feet using flashlight 

Power: 

Built-in lithium-ion battery (800mAh) 

Power Adapter: 

AC 110 – 240V 

Memory: 

Up to 16GB SD Card 

PC Connection: 

Mini USB port 

Recording Resolution: 

Video: 720 x 480 @ 30fps, Photo: 1280 x 1024 

OS Support: 

Windows XP / Vista / 7, Linux 


Summary of Contents for bike Cam

Page 1: ......

Page 2: ...ulated dangerous voltage within the product s enclosure that may be of sufficient magnitude to constitute a risk of electric shock The exclamation point within an equilateral triangle is intended to alert the user to the presence of important operating and maintenance servicing instructions in the literature accompanying the appliance WARNING TO PREVENT FIRE OR SHOCK HAZARD DO NOT EXPOSE THIS UNIT...

Page 3: ...ed by a 12 month warranty in the unlikely event of something going wrong More information and warranty registration is available at www storageoptions com warranty Support www storageoptions com support Warranty www storageoptions com warranty TABLE OF CONTENTS OVERVIEW 4 PACKAGE CONTENTS 4 CHARGE THE BATTERY 5 SYSTEM OPERATION 5 4 1 Functionality Overview 4 2 Insert A Micro SD Card 4 3 Use The To...

Page 4: ...ou leave your bike unattended A quick release mechanism also ensures that BikeCam can quickly and easily be removed and reattached Very easy to use capture a record of accidents and incidents Incorporates bright LED lights suitable for night time riding 4GB Micro SD Card included 1 hour of footage Built in rechargeable battery up to 5 hours video 10 hours light Lightweight 3ozs 85g with quick rele...

Page 5: ...h red When charging is complete the LED will stay solid red NOTE Charging the battery via computer USB port will take much longer than charging from a mains outlet SYSTEM OPERATION The Bike Camera has three key functions Video camera Photo camera LED Torch VIDEO PHOTO RESOLUTION 720 x 480 30FPS 1280 x 1024 FORMAT AVI JPEG 4 1 FUNCTIONALITY OVERVIEW It is important to become familiar with the Bike ...

Page 6: ...torch on Press the button To turn the LED torch off Press the button again NOTE If the torch does not switch on the battery needs charging Please refer to section Charge The Battery page 5 for instructions on how to recharge 4 4 RECORD VIDEO To record video using the built in camera 1 Press the button to turn the camera on 2 Press the button again The button will flash slowly to indicate recording...

Page 7: ...ually use the Bike Cam as a card reader by connecting it to your computer using the supplied USB cable 1 Unscrew the Port Cover anti clockwise 2 Connect the mini USB plug to the mini USB socket under the Port Cover 3 Connect the full size USB plug into a spare USB socket on your computer The camera will appear as a new drive letter in My Computer Browse this drive to view your recorded video and p...

Page 8: ...8 ...

Reviews: