


Configuring the Appliance
23
Configuring Routing
To configure routing
1.
In the SSL VPN Web Console, under the
Networking
category in
the menu on the left, select
Network Configuration
.
2.
On the right, click
Routing and Gateways
. The Routing page
opens.
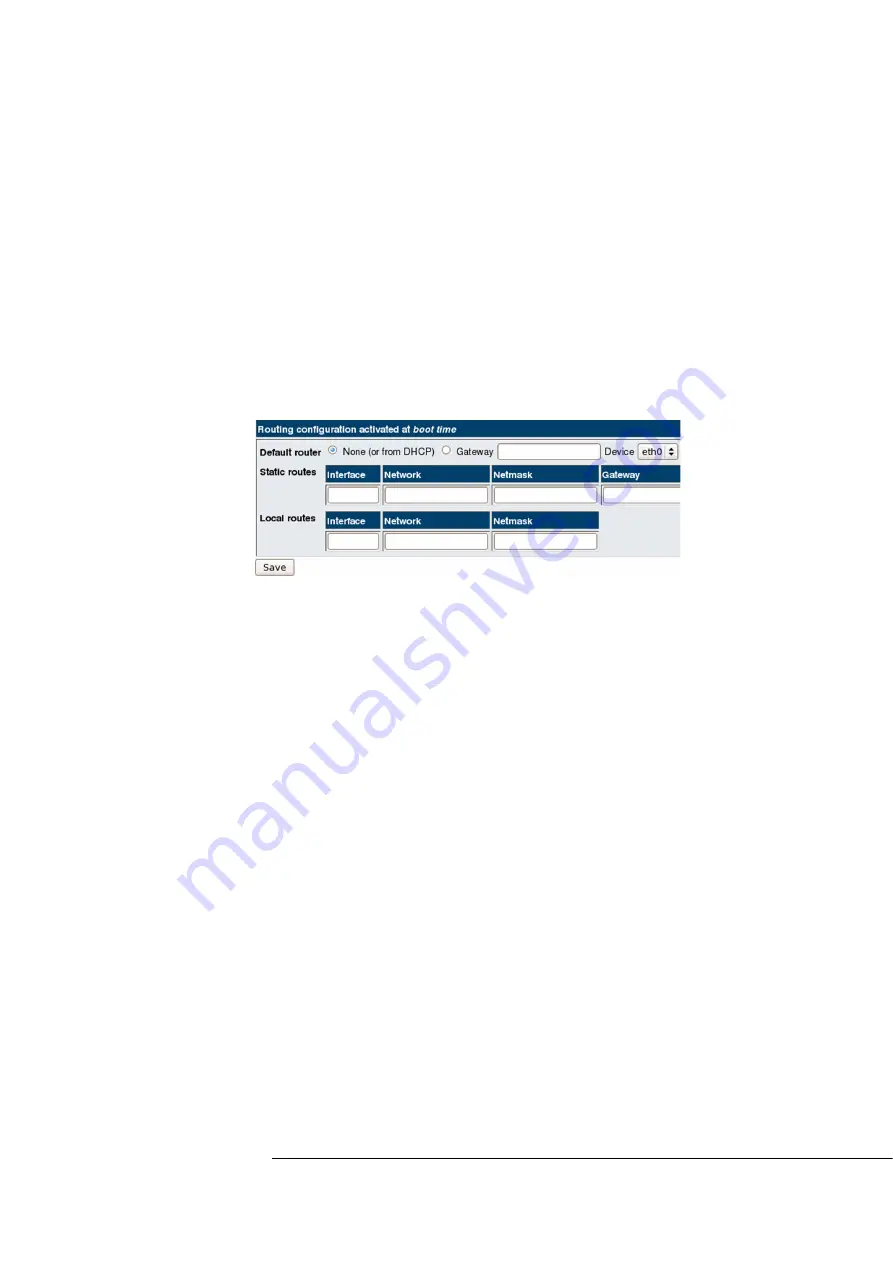
3.
Define the
Default Router
in one of the following ways:
•
Select
None (or from DHCP)
if the IP address of the default
gateway is dynamically assigned.
•
Select
Gateway
and enter the IP address of your gateway.
4.
Select the interface through which the gateway
Device
is reached.
5.
(
Optional
) Configure the following settings to define
Static Routes
through a next-hop gateway (such as a router), and/or
Local Routes
to devices that are connected directly (such as through a hub or
directly through a crossover cable):
•
Interface
: Enter the name of the interface used by the route.
•
Network
: Enter the IP address of the network to which the route
belongs.
•
Netmask
: Enter the Netmask.
•
Gateway
: (
Static Routes only
) Enter the IP address of the next-
hop gateway through which outgoing traffic is routed.
6.
Click
Save
.
7.
Click
Return to Network Configuration
. You are returned to the
Network Configuration page.
8.
Click
Apply Configuration
. The routes added in the
Routing
configuration activated at boot time
section are activated.


