© 2007 Stevens AeroModel.
Page 26 of 35
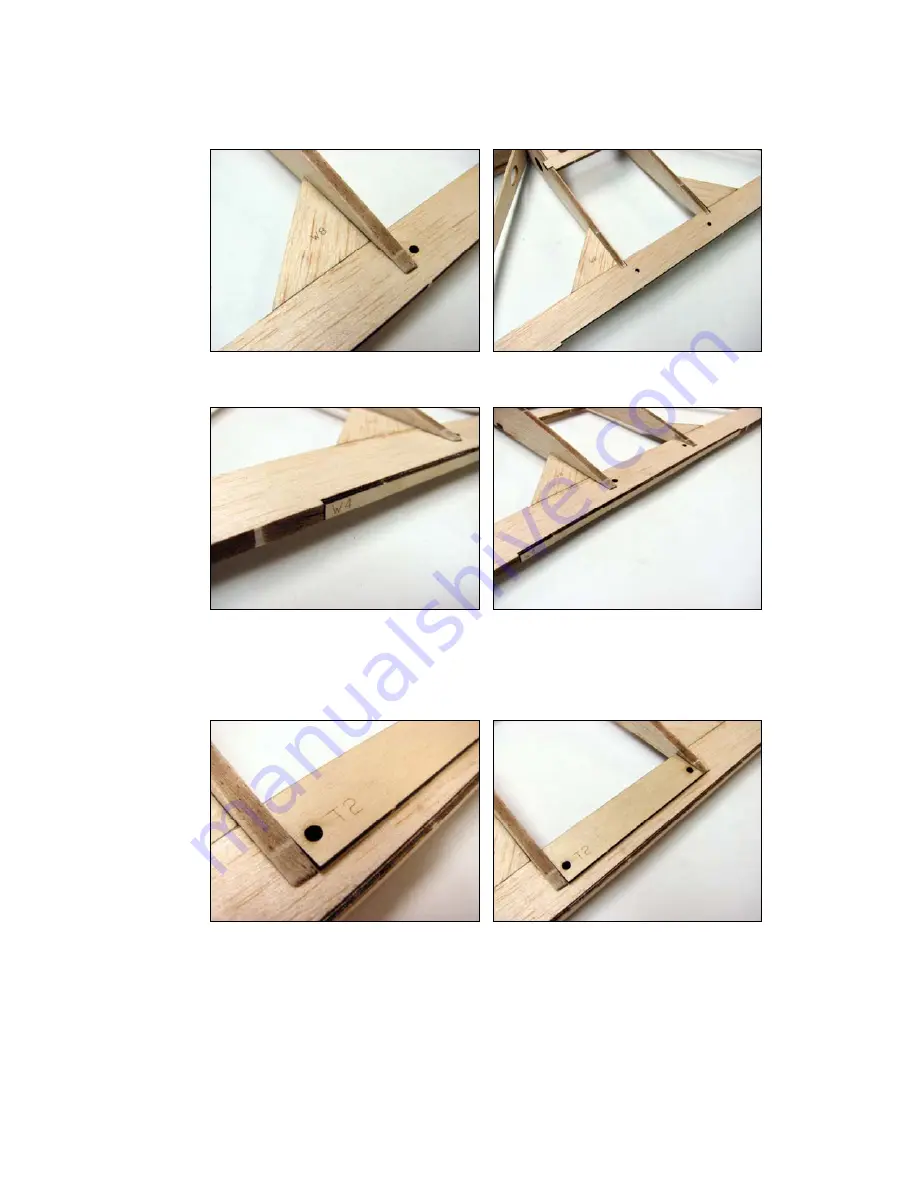
17. Install the 3/16” balsa trailing edge triangular re-enforcement spanning the outside edges of rib R1 and T1
trailing edge. See photo below and plan set for details.
18. Install the 1/16” plywood W4 trailing edge re-enforcement within the notch at the wing trailing edge center
section.
19. *** OPTIONAL STEP – install the 1/16” ply trailing edge doubler T2 as illustrated below. This part is only
required should you wish to convert the wing to a bolt on type. The SHAFT 25e was designed to be a survivor
in the hands of novice pilots who may botch a landing or two. It’s been our experience that bolt on wings do a
poor job of weathering such abuse. Thus beyond pre-cutting provisions for this option a bolt on wing is neither
recommended nor supported by Stevens AeroModel. ***
20.
DO NOT OVERLOOK THIS STEP YOU MUST FINAL GLUE ALL WING ASSEMBLY PARTS.
For the most
part we have been utilizing thin CA glue to hold parts in position while we complete the wing assembly. At this
point it’s time to finalize the wing assembly by re-visiting every surface to surface joint with thin CA glue making
certain that all parts are securely bonded. Hold you wing flat against your building surface while bonding to
ensure that it remains straight.


